Create a Group
A group is a collection of users, such as a project team, a department, or a geographical location. (You can create and edit groups in Enterprise Manager only when using the ‘Default’ authentication provider.) Groups are generally organizational in nature, while roles are functional in nature.
Create a New Group
To create a new group, follow the steps below:
-
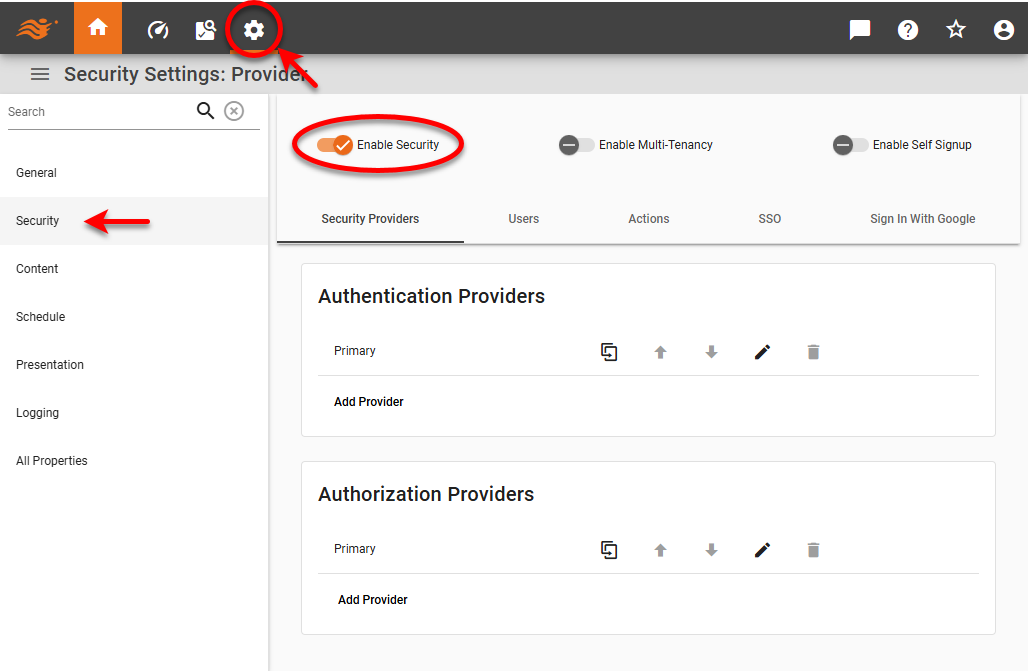
Press the ‘Settings’ button
 at the top of Enterprise Manager.
 -
Select the Security page in the left panel.
-
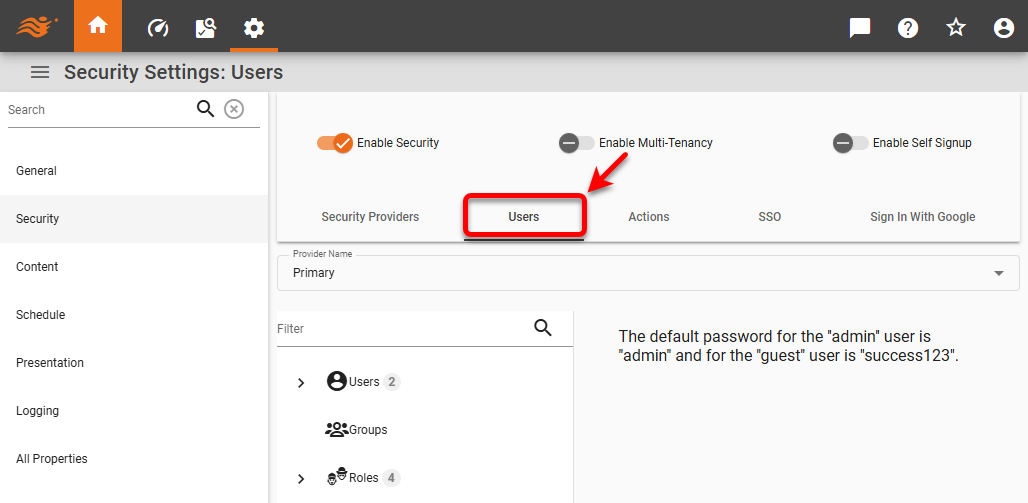
Select the Users tab.
-
From the ‘Provider Name’ menu, select the security provider under which to define groups.
-
If multi-tenancy is enabled, from the ‘Select Organization’ menu, choose the desired organization. This feature is available only in Enterprise Edition.

Settings you make in the steps below apply only to the selected organization. Users and assets of other organizations are not affected. Note that some settings may only be available to the Host Organization, and are only visible to the Site Administrator. -
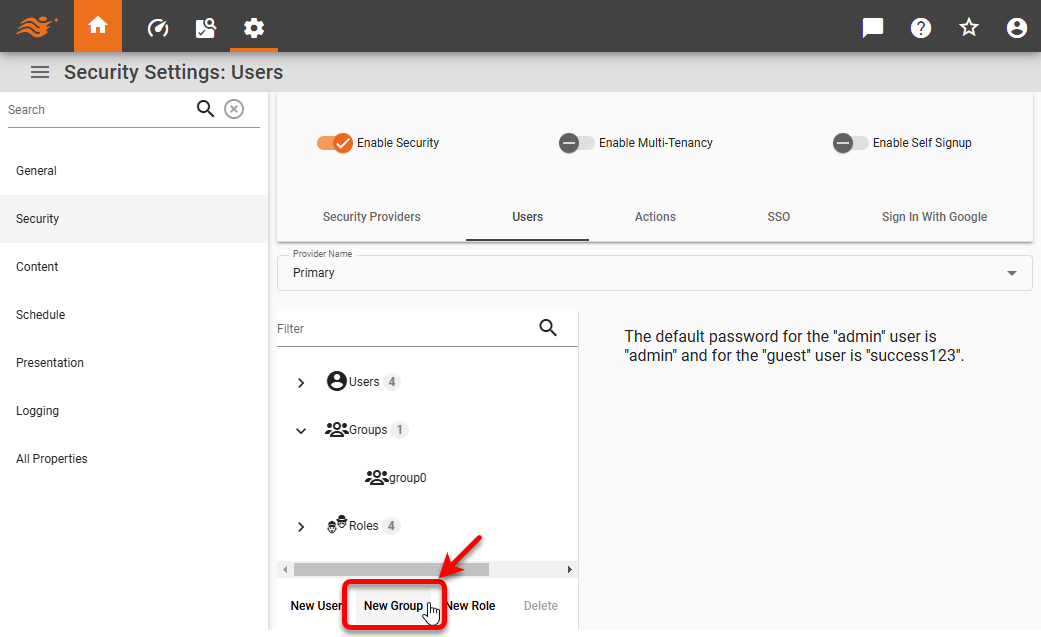
Press the ‘New Group’ link below the tree. This creates a group with the default name ‘groupN’ (group0, group1, etc.).
-
Type in the ‘Name’ field to change the name of the group.
-
To select a Portal theme for the group, choose the desired theme from the ‘Theme’ menu. (See Presentation for information about how to create a theme.) This feature is available only in Enterprise Edition.
The multi-tenant feature in Enterprise Edition must be disabled. See Enable Multi-Tenancy for more information. -
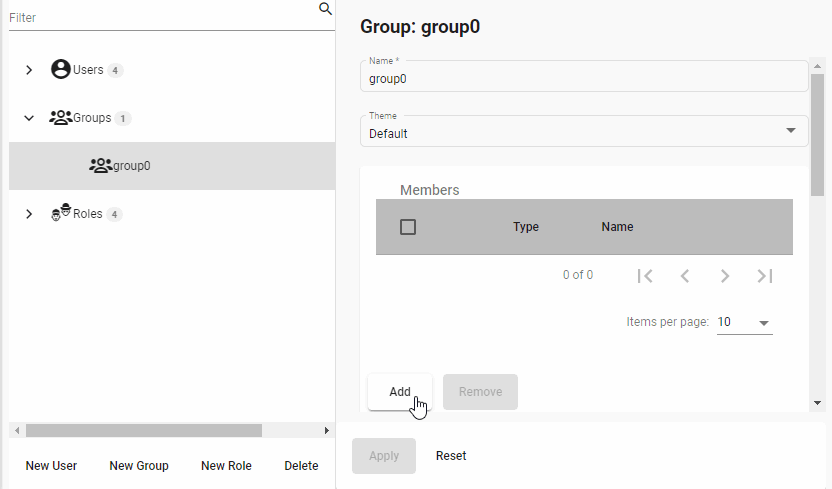
Optional: To add the users or groups to a group, press the Add button in the ‘Members’ area. Choose the desired group(s) in the ‘Add Group/User’ dialog box (Ctrl-click to select multiple groups or users), and press Add.
-
Optional: To add a role for users in the group, press the Add button in the ‘Roles’ area. Choose the desired role(s) in the ‘Add Role’ dialog box (Ctrl-click to select multiple roles), and press Add.
-
Optional: To add administrative permission for the group (ability for other users to administer this group), press the Add button in the ‘Administrator Permissions’ area. Choose the desired user(s), groups(s), or role(s) in the ‘Add Permission’ dialog box (Ctrl-click to select multiple items), and press Add. Users, groups, or roles granted such administrative privileges will be able to use Enterprise Manager to remove the group or reassign users and roles to the group.
-
Press Apply to save your changes.
-
Repeat the above steps to add additional groups.
Edit an Existing Group
To edit a user, follow the steps below:
-
Press the ‘Settings’ button
at the top of Enterprise Manager. -
Select the Security page in the left panel.
-
Select the Users tab.
-
From the ‘Provider Name’ menu, select the security provider under which to define groups.
-
If multi-tenancy is enabled, from the ‘Select Organization’ menu, choose the desired organization. This feature is available only in Enterprise Edition.
Settings you make in the steps below apply only to the selected organization. Users and assets of other organizations are not affected. Note that some settings may only be available to the Host Organization, and are only visible to the Site Administrator. -
Expand the ‘Groups’ node on the tree, and select the desired group.
-
Make the desired changes and press Apply.
Rules for Users, Groups, Roles
The following are some rules which govern users, roles and groups:
-
Users, groups, and roles are defined independently for different organizations if multi-tenancy is enabled. The exceptions are the Administrator role and Organization Administrator role, which are predefined and global. See Enable Multi-Tenancy for more information. If multi-tenancy is not enabled, all users, groups, and roles belong to the Host Organization.
-
Groups and Roles are independent, i.e., you do not have to define both groups and roles in your system. You can have one or the other, or both.
-
A user can belong to more than one group.
-
A user can have multiple roles.
-
An entire group can be assigned one or more roles.
-
A role can be applied to one or more groups.
-
A role can inherit all the permissions from another role.
-
Permissions to assets can be assigned directly to users, groups, and roles.
-
When troubleshooting user problems, it is often useful for the administrator to log into the Portal as a particular user. See Login as Different User. This allows the administrator to experience the application environment as the user experiences it, which makes it easier to replicate the user’s problem.