Email a Dashboard
| These features are available to both designers and end-users. |
To immediately email a Dashboard to other users, follow the steps below. To schedule a Dashboard to be periodically emailed, see Schedule a Dashboard.
-
Open the Dashboard. (See Use a Dashboard.)
-
Press the ‘Email’ button
 on the Dashboard toolbar.
This opens the ‘Email’ dialog box.

-
Select the Email tab, and make the following selections:
Email Tab-
In the ‘Mail To’ field, enter a semicolon-separated list of emails to which the Dashboard should be sent. To choose the emails from a list, press the ‘…’ button. This opens the ‘Select Emails’ dialog box.
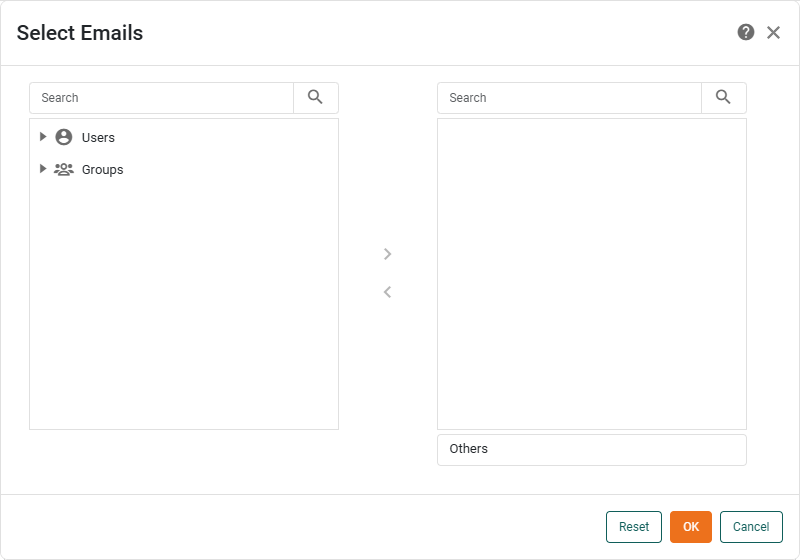
Select the users you want to email and press the ‘Add’ button
 , or simply drag users to the right panel. When you are finished, press OK.
 -
Repeat the above step to enter the desired emails in the ‘CC To’ field.
-
In the ‘From’ field, enter the email address that should be used to represent the sender.
-
In the ‘Subject’ field, enter a message for the email subject line.
-
In the ‘Message’ field, enter the body of the email message.
-
-
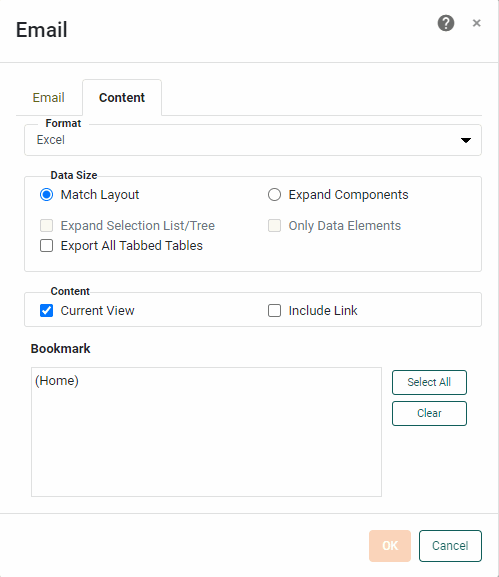
Select the Content tab, and make the following selections:
Content Tab-
Choose the export type: ‘Excel’, ‘PowerPoint’, ‘PDF’, ‘HTML’, ‘Embedded PNG’, ‘CSV’.
- CSV
-
For ‘CSV’ format, select ‘Export All Tables’ to include all Dashboard tables in the export. To include only specific tables, uncheck ‘Export All Tables’ and select the desired tables to export from the ‘Assemblies’ list. In the ‘Delimiter’ field, enter the character to be used to separate entries in the CSV file. (The default delimiter character is a comma.) For tab-delimitation, select the ‘Tab Delimited’ option. Enter a value in the ‘Quote’ field to use this character to quote exported values. Select ‘Keep Header’ to include the column headers in the export. Filename length may be limited by the machine operating system.
- Excel
-
For ‘Excel’ format, select ‘Export All Tabbed Tables’ to export tables within different tabs of a Tabbed Interface into separate Excel tabs. (See Arrange Components for more information about Tabbed Interfaces.) If you select a bookmark, the bookmark name will be used as the name of the first tab. If you select ‘Current View’, the name of the tab will be “Current View”. In Excel exports only, text that contains HTML markup will be exported as text with markup, not as rendered images. Filename length may be limited by the machine operating system.
-
In the ‘Data Size’ panel, select ‘Match Layout’ to obtain the closest possible match between the appearance of the emailed copy and the original Dashboard. Select ‘Expand Components’ to expand scrolling tables and charts in the emailed Dashboard so that all data is displayed. Select the ‘Only Data Elements’ option to limit the export to only the data-bearing components.
-
Select ‘Current View’ to include the current state of the Dashboard in the emailed file.
-
Select ‘Include Link’ to include a URL link to the Dashboard in the email. The email recipient can click the link to open the Dashboard in a new browser tab if they possess the appropriate permissions for that Dashboard.
-
Select the bookmarks that you want to include in the exported file. The selected views are converted to individual pages (PowerPoint and PDF) or sheets (Excel) in the exported copy.
-
-
Press OK to close the dialog box and email the Dashboard.