Create a User
If you are using the default security provider for authentication, you can define users in Enterprise Manager as described below. If you are using an LDAP server for authentication, you should define users in your LDAP software. See Specify Security Provider for more information about security providers.
|


Create a New User
To create a new user in Enterprise Manager , follow the steps below:
-
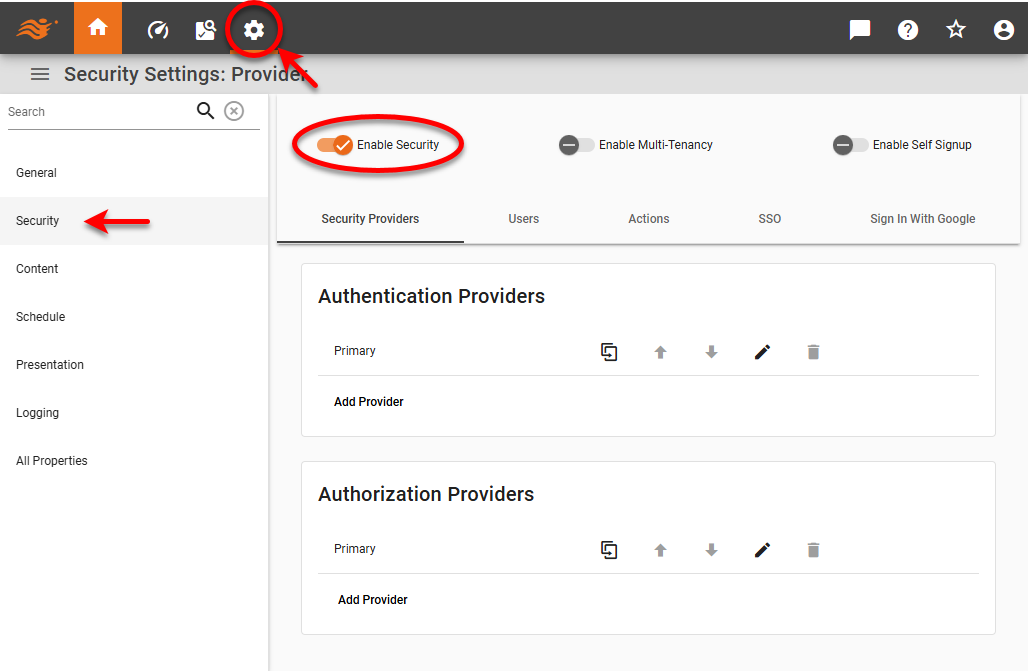
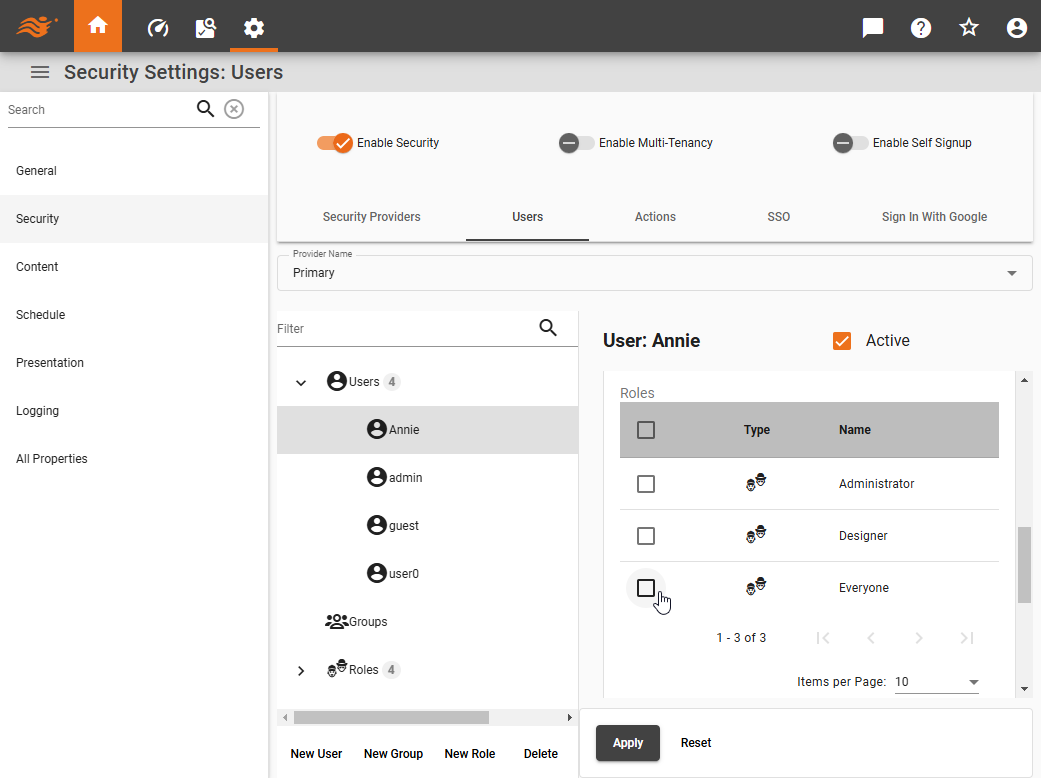
Press the ‘Settings’ button
 at the top of Enterprise Manager.
 -
Select the Security page in the left panel.
-
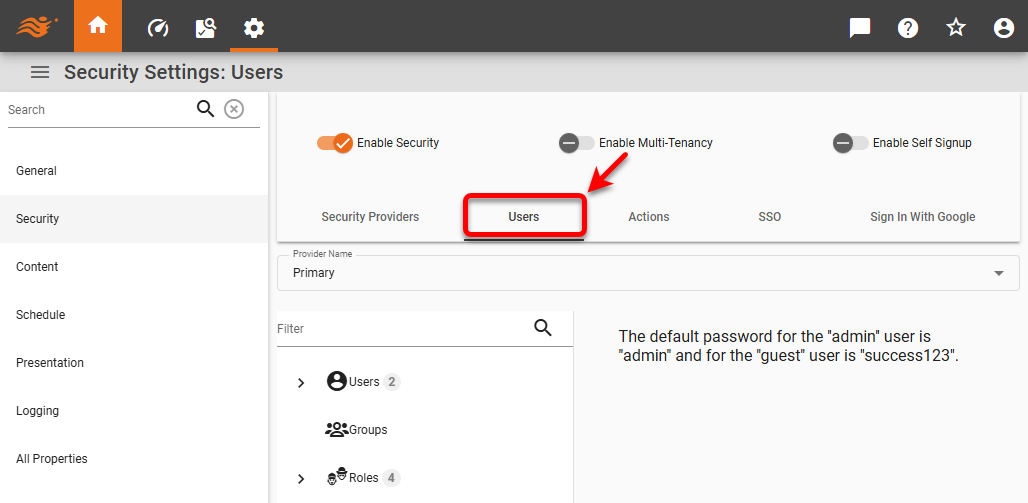
Select the Users tab.
-
From the ‘Provider Name’ menu, select the security provider under which to define users.
-
If multi-tenancy is enabled, from the ‘Select Organization’ menu, choose the desired organization. This feature is available only in Enterprise Edition.

Settings you make in the steps below apply only to the selected organization. Users and assets of other organizations are not affected. Note that some settings may only be available to the Host Organization, and are only visible to the Site Administrator. New users will be added to the organization you select.
-
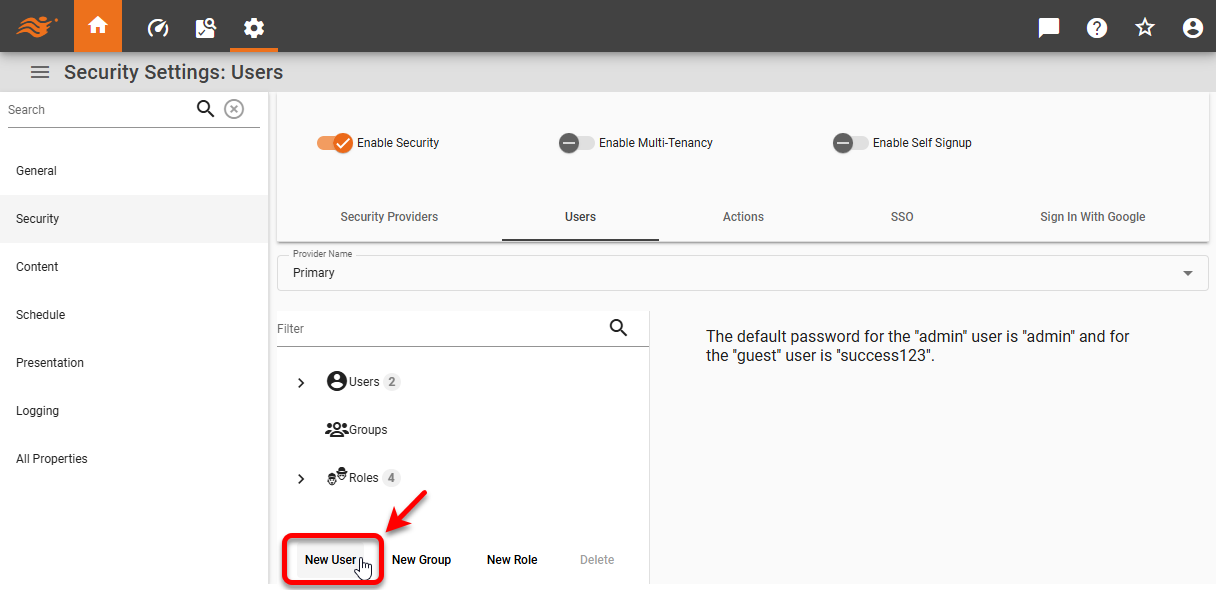
Press the ‘New User’ link below the tree. This creates a user with the default name ‘userN’ (user0, user1, etc.).
-
Type in the ‘Name’ field to change the name of the user.
-
Optional: Enter an ‘Alias’ for the user. This is the name that will be displayed in the Portal for the user.
-
Select ‘Active’ from the right-side menu to allow the user to log into the Portal.
When a user is not marked as ‘Active’, the user cannot log in, but all assets and scheduled tasks continue to function normally. -
Specify an email address for the user in the ‘Email’ field.
-
Optional: Select a locale for the user from the ‘Locale’ menu. See Register a Locale for information on how to define the locales that appear in this menu. See Localization for full information on localization.
-
To select a Portal theme for the user, choose the desired theme from the ‘Theme’ menu. (See Presentation for information about how to create a theme.) This feature is available only in Enterprise Edition.
The multi-tenant feature in Enterprise Edition must be disabled. See Enable Multi-Tenancy for more information. -
Select the ‘Change Password’ option to change the user’s password.
-
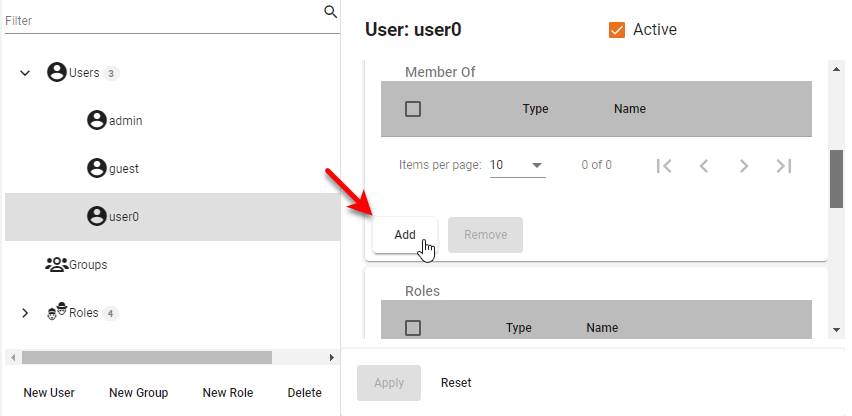
Optional: To add the user to a group, press the Add button in the ‘Member Of’ area. Choose the desired group(s) in the ‘Add Group’ dialog box (Ctrl-click to select multiple groups), and press Add.
-
Optional: To add a role for the user, press the Add button in the ‘Roles’ area. Choose the desired role(s) in the ‘Add Role’ dialog box (Ctrl-click to select multiple roles), and press Add.
-
Optional: To add administrative permission for this user (ability for other users to administer this user), press the Add button in the ‘Administrator Permissions’ area. Choose the desired user(s), groups(s), and role(s) in the ‘Add Permission’ dialog box (Ctrl-click to select multiple items), and press Add. Users, groups, or roles granted such administrative privileges will be able to use Enterprise Manager to remove the defined user or reassign groups and roles to the user.
-
Press Apply to save your changes.
-
Repeat the above steps to add additional users. If you are using a “Named Viewer Session” license, the number of users you can add is limited by the license. See note below.
Defining Users for Named LicensesIf you are using a “Named Viewer Session” or “Named Session” license key, the security provider must define the named users. (See Specify Security Provider for more information about security provider options.)
-
If you are using the default InetSoft security provider, you will not be permitted to create more users than the installed licenses allow. If existing users already exceed the licensed number, remove the excess users and restart the server.
-
If you are using an LDAP security provider, add a user filter to return only the desired named users. For example,
(|(uid=user1)(uid=user2)(uid=user3))returns only user1, user2, and user3. -
If you are using a custom security provider, modify the implementing class to ensure that the number of users is within the licensed limit.
Note that if any security provider defines more than the allowed number of users, it is not possible to predict which of those users will be granted access to the User Portal.
For a “Named Session” license key (which enables Visual Composer), you should specify which particular users have permission to access Visual Composer. To do this, assign the ‘Designer’ role to users who need Visual Composer access.
You can assign the ‘Designer’ role to more users than the maximum number allowed by the license. If the maximum number of licensed users is reached, the next named user who attempts to open Visual Composer will receive a notification that all licenses are in use.
-
Edit an Existing User
To edit a user, follow the steps below:
-
If multi-tenancy is enabled, from the ‘Select Organization’ menu, choose the desired organization. This feature is available only in Enterprise Edition.
Settings you make in the steps below apply only to the selected organization. Users and assets of other organizations are not affected. Note that some settings may only be available to the Host Organization, and are only visible to the Site Administrator. -
Expand the user’s organization on the tree, expand the ‘Users’ node, and click on the username to select it. (A user may be listed directly under the ‘Users’ node or be listed within a group under the ‘Users’ node.)
-
Make any desired changes as described above, and press Apply.
For efficiency, the number of users listed in the navigation tree under LDAP security is limited by the em.user.max property (default 1000). See All Properties for more information about setting properties. Unlisted users can be found by using the ‘Filter’ field  . .
|
Rules for Users, Groups, Roles
The following are some rules which govern users, roles and groups:
-
Users, groups, and roles are defined independently for different organizations if multi-tenancy is enabled. The exceptions are the Administrator role and Organization Administrator role, which are predefined and global. See Enable Multi-Tenancy for more information. If multi-tenancy is not enabled, all users, groups, and roles belong to the Host Organization.
-
Groups and Roles are independent, i.e., you do not have to define both groups and roles in your system. You can have one or the other, or both.
-
A user can belong to more than one group.
-
A user can have multiple roles.
-
An entire group can be assigned one or more roles.
-
A role can be applied to one or more groups.
-
A role can inherit all the permissions from another role.
-
Permissions to assets can be assigned directly to users, groups, and roles.
-
When troubleshooting user problems, it is often useful for the administrator to log into the Portal as a particular user. See Login as Different User. This allows the administrator to experience the application environment as the user experiences it, which makes it easier to replicate the user’s problem.