Extend a Physical View
| This feature is available only in Enterprise Edition. |
In a multi-tenant environment, it may be useful to provide a different physical view to each tenant. Each physical view can provide access to tenant-specific database tables, as well as to a set of common tables that are shared by all physical views. To create a tenant-specific physical view, extend the existing physical view by adding tables from a tenant-specific connection.
| See Add an Additional Connection, for information on how to add a tenant connection. |
|
If you see the ‘Create Visualization’ dialog box, press the ‘Close’ button
|


Follow the steps below to extend a physical view:
-
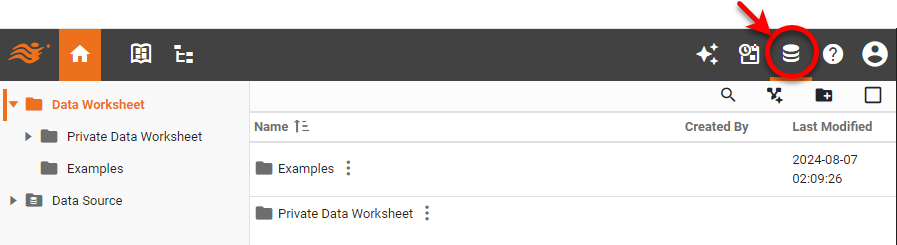
Press the top ‘Data’ button
 .
.
-
Expand the ‘Data Source’ folder in the left panel, select the ‘Data Model’ node. Press the ‘More Options’ button
 or right-click the base physical view that you wish to extend, and select ‘Add Extended View’ from the context menu. This opens the ‘Extended View’ dialog box.
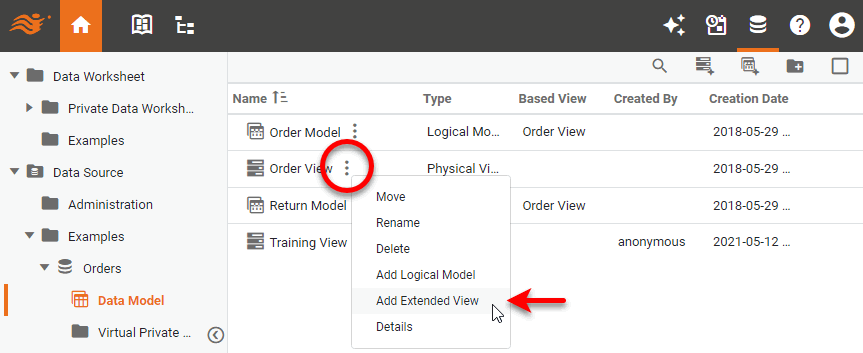
-
In the ‘Extended View’ dialog box, choose a connection option for the new extended view, and press OK. (You can select the default data source connection, or any of the tenant-specific connections. See Add an Additional Connection for information on configuring connections.)

An extended physical view is associated with one (and only one) connection. Likewise, a connection can be associated with only one extended physical view. This adds the new extended view to the current data source, and opens the view for editing. The right panel displays the tables and joins defined in the base physical view.
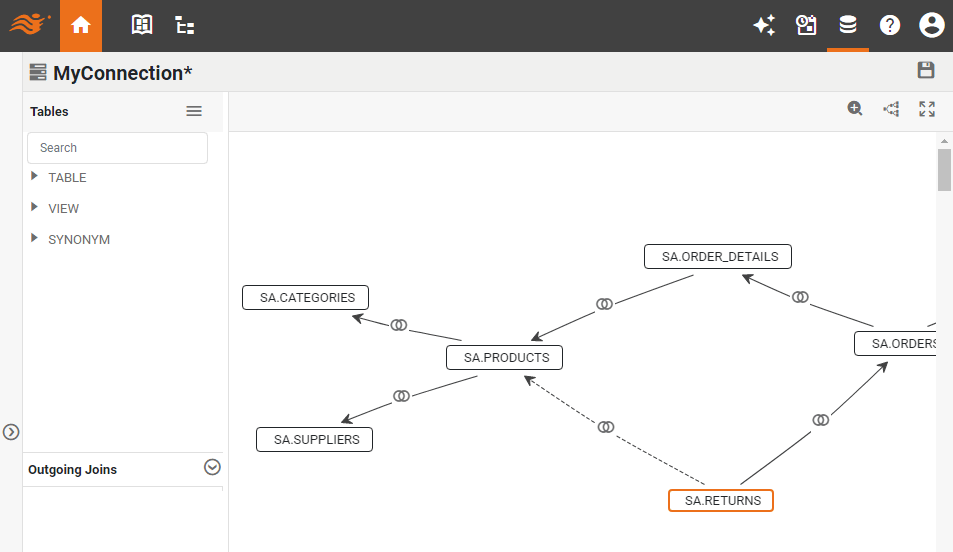
Tables and joins inherited from the base physical view cannot be modified within the extended view. -
Drag tables from the left panel into the right panel, and create any desired joins between the new tables and the inherited tables. (See Create a Physical View for more information about joining tables in a physical view.)
-
When you have finished defining the extended view, press the ‘Save’ button
 .
.
You can now use this extended physical view to create an extended logical model. See Extend a Logical Model for more information.