Create a Table Style
In addition to using predefined Table Styles (see Table Properties), you also can create your own custom table styles. A custom Table Style is a reusable component that can be applied to multiple tables in Dashboards. The following sections explain how to create and use a custom Table Style.
Create New Table Style
To create a custom table style, follow the steps below:
-
Open the Asset panel in Visual Composer. (See Create a New Dashboard or Prepare Your Data for information on how to open Visual Composer.)
-
Open the ‘Library’ folder.
-
Right-click the Table Styles folder or press the ‘Actions’ button
 and select ‘New Table Style’.
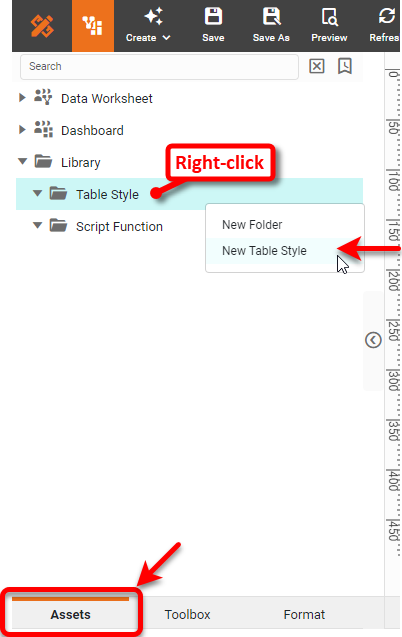
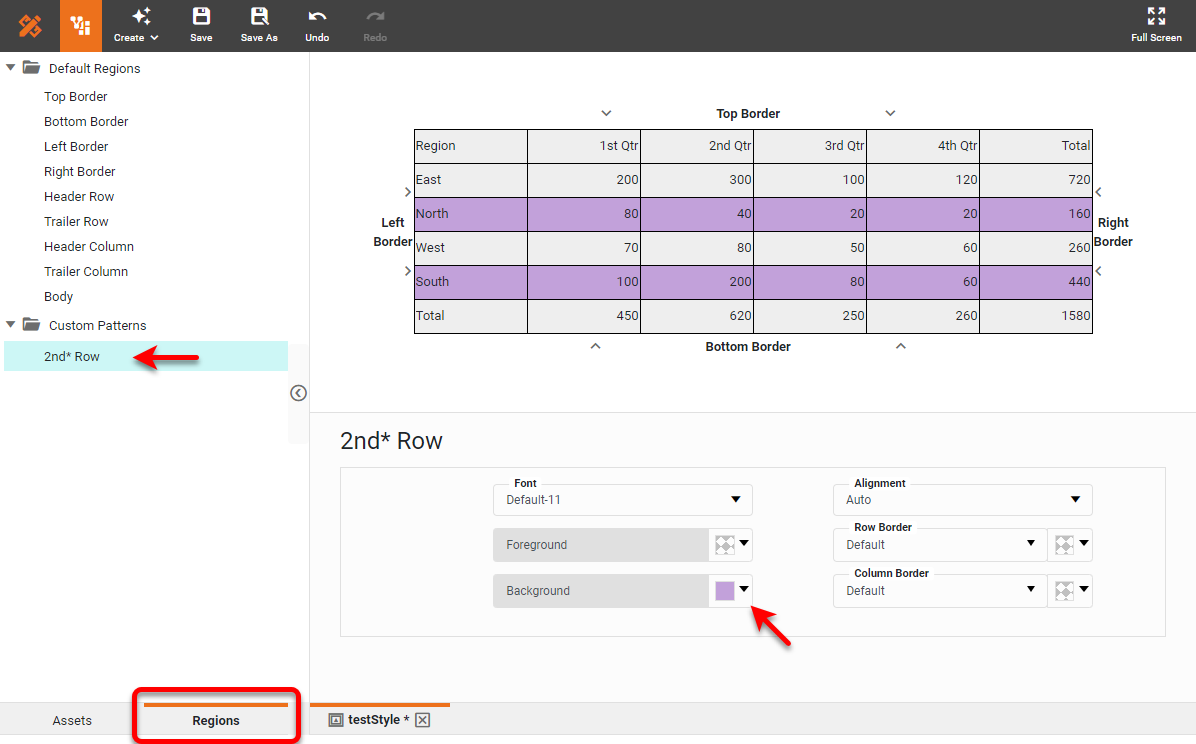
This opens the Table Style Editor, and opens a Regions tab next to the Assets tab. The table diagram in the top panel is an interactive interface that has nine regions, each of which has its own set of attributes.
-
Optional: If desired, create a custom region to style. See Create a Custom Style Pattern for more details.
-
Click on the region of the table diagram that you wish to style (or click the region name in the ‘Default Regions’ list). The bottom panel displays the visual property settings for the region you selected.

Region Selection Header Row
Click on the first row.
Header Column
Click on the first column.
Trailer Row
Click on the last row.
Trailer Column
Click on the last column.
Body
Click in the middle of the table (cells excluding header/trailer).
Top Border
Click on the Top Border arrow.
Left Border
Click on the Left Border arrow.
Right Border
Click on the Right Border arrow.
Bottom Border
Click on the Bottom Border arrow.
Note: When there is a conflict between row and column settings, row settings take precedence over column settings. For instance, if you set the background of the Header Row to green and the background of the Header Column to red, the top-left cell of the table which is common to both will have a green background (adopting the Row setting). -
Modify the properties to achieve the desired appearance for the selected region of the table.
-
Press the ‘Save’ button
 in the toolbar. This opens the ‘Save Table Style’ dialog box. Enter a name for the new Table Style, and select a folder into which the Style should be placed. Press OK.
You can use the new style in the same way that you use the predefined styles. See Table Properties to add a Style to a Dashboard Table.
Create a Table Style Folder
The existing Table Styles are stored in a predefined set of folders (e.g., ‘Bands’, ‘Columns’, ‘Light’, etc.). You can store your custom Styles in any of these predefined folders, or you can define your own folders.
To define a new folder for your custom Table Styles, follow the steps below:
-
Open the Asset panel in Visual Composer. (See Create a New Dashboard or Prepare Your Data for information on how to open Visual Composer.)
-
Open the ‘Library’ folder.
-
Right-click the Table Styles folder or press the ‘Actions’ button
and select ‘New Folder’.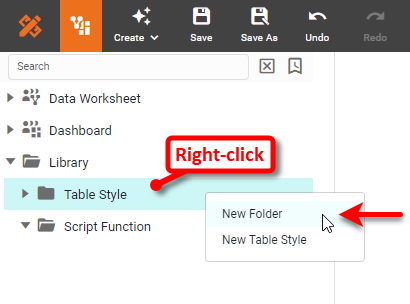
-
Enter the desired name into the ‘Create New Folder’ dialog box, and press OK to create the new folder.
Delete a Table Style
To delete a table style, follow the steps below:
-
Open the Asset panel in Visual Composer. (See Create a New Dashboard or Prepare Your Data for information on how to open Visual Composer.)
-
Open the ‘Library’ folder.
-
Locate the Style that you want to delete in the ‘Table Styles’ folder.
-
Right-click the Style or press the ‘Actions’ button
and select ‘Remove’.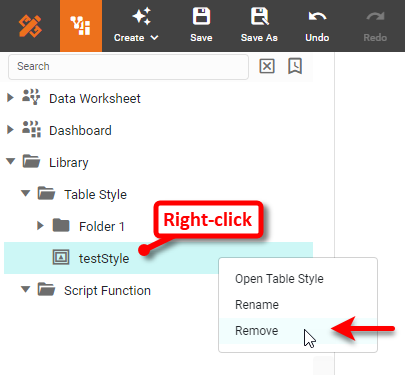
Create a Custom Style Pattern
Create New Table Style explained how you can specify your own Table Style by applying visual formats to different regions of the table. You can create more complex visual styles by specifying a row/column pattern for the table styles. The pattern is a mathematical rule that determines the rows or columns to which the formatting is applied. For example, you can add a background color to every other row, or you can add a heavy border to every 3rd column.
To create a pattern for use in a table style, follow the steps below:
-
Create a new Table Style as described in Create New Table Style.
-
In the Regions panel, right-click the ‘Custom Patterns’ folder or press the ‘Actions’ button
, and select the ‘New Pattern’ option.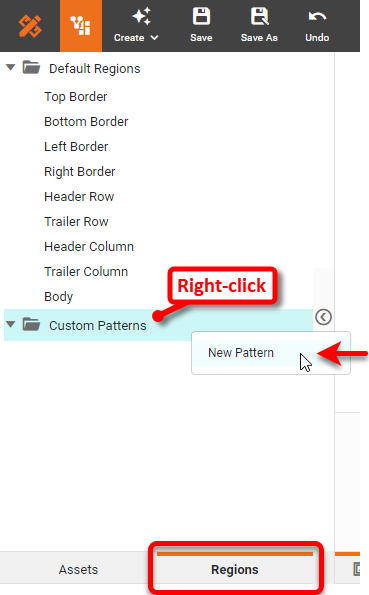
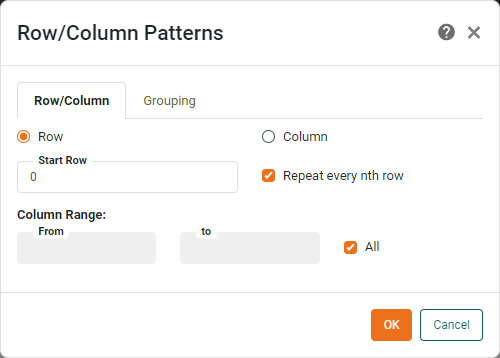
This opens the ‘Row/Column Pattern’ dialog box.
-
On the Row/Column tab, select ‘Row’ to designate a row-based pattern rule, or select ‘Column’ to designate a column-based pattern rule.
-
In the ‘Row’ or ‘Column’ text field, enter an integer value to the indicate the interval at which the style should be applied. For example, a value of “4” indicates that the style will be applied to the 4th row or column.
-
Select the ‘Repeat’ option to repeat this pattern for subsequent rows/columns. For example, this would repeat the formatting in the previous step to every 4th row or column in the specified range.
-
In the ‘Cell Range’ field, indicate whether the specified pattern should be in effect for ‘All’ rows or columns, or only for a specified range of cells.
-
Optional: Click the Grouping tab to specify formatting pattern for group headers and footers.
-
Press OK to save the Style pattern. The new pattern is now listed under the ‘Custom Patterns’ folder in the Regions panel.
Edit a Custom Style Pattern
To edit a pattern for a custom table style, follow these steps:
-
Create a new Table Style as described in Create New Table Style.
-
In the Regions panel, open the ‘Custom Patterns’ folder.
-
Right-click the pattern name under the ‘Custom Patterns’ folder or press the ‘Actions’ button
. Select ‘Edit’ from the menu.
This opens the ‘Row/Column Pattern’ dialog box. See Create a Custom Style Pattern for further details.