Modify a Column
The following sections describe ways that you can modify the columns of a data block.
Find a Column
To search for a column, press the ‘Search Columns’ button  in the bottom panel toolbar, and type the column name or any part of the column name. This will scroll the table to a matching column. If there are multiple matches, press the arrows to cycle through the matches. Press the ‘Clear’ button
  to clear the search term.

Change a Column Name
To change a column name, select the data block and double-click the column header in the bottom panel. To display long column names, press the ‘Wrap Column Headers’ button  . Press again to hide long names.
| Names must be unique without respect to case (e.g., "num1" is the same name as "Num1"). |
| If there is a Dashboard that uses a Data Worksheet column, renaming the column will cause the Dashboard to lose its reference. |
Change a Column Type (Embedded Table)
By default, all manually created columns in an Embedded Table are of type ‘String’. To change the type of an Embedded Table column, follow these steps:
-
Click the Embedded Table data block to select it. In the bottom panel, right-click the column header and select ‘Column Type’ from the context menu or press the ‘Type’ button (
 ,
,  ,
,  ,
,  ) in the column header. Note: You can also access menu options from the ‘More’ button (
 ) in the mini-toolbar.
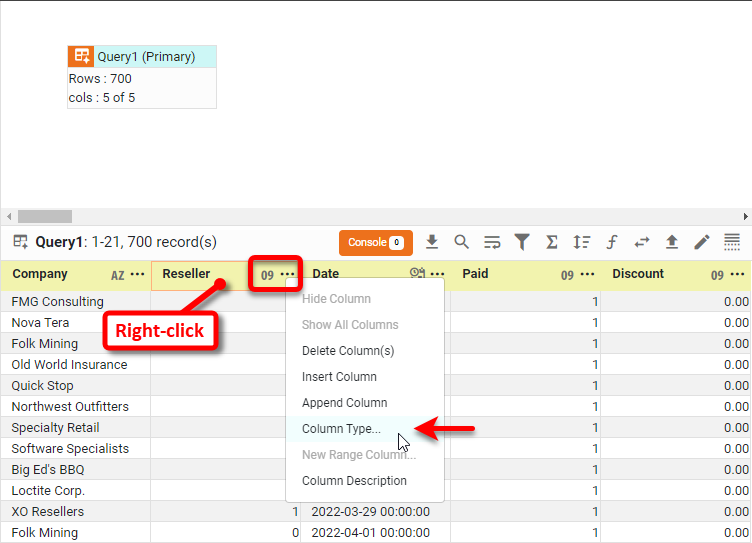
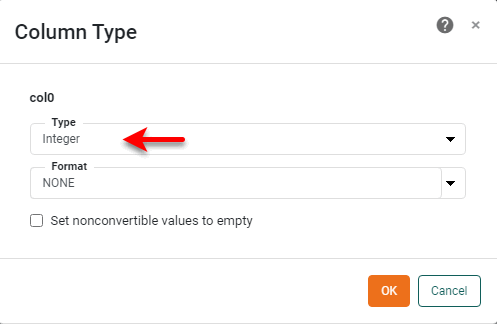
This opens the ‘Column Type’ panel.
-
Select the desired data type from the ‘Type’ menu. If you select a numeric or date type, a secondary ‘Parse Format’ menu appears below.
-
Optional: In the ‘Parse Format’ menu, select the format in which you have entered your data. This allows the Embedded Table to convert the data to a standard representation. For example, if you have entered dates in the form “1/13/1995,” select or type
MM/d/yyyyas the parse format.The ‘Parse Format’ menu is available only for manually-created Embedded Table columns. It is not available for data converted from a regular data block. -
Optional: Enable ‘Set nonconvertible values to empty’ to assign a null value to numbers and dates that cannot be converted. Otherwise, you will be prompted to choose an action when nonconvertible values are detected.
-
Press OK to close the ‘Column Type’ panel.
After you have specified a data type for a column of an Embedded Table, any additional data you enter into the column must match this specified type.
In the following example, you will change the data type of an Embedded Table column from ‘String’ to ‘Integer’:
-
Create a new Data Worksheet. For information on how to create a new Data Worksheet, see Create a Data Worksheet.
-
Create a new Embedded Table with four rows and four columns. (See Enter Data for instructions on how to create an Embedded Table.)
-
Click the Embedded Table data block to select it.
-
Right-click a header cell in the bottom panel and select ‘Column Type’ from the context menu. Note: You can also access menu options from the ‘More’ button (
) in the mini-toolbar. This opens the ‘Column Type’ panel.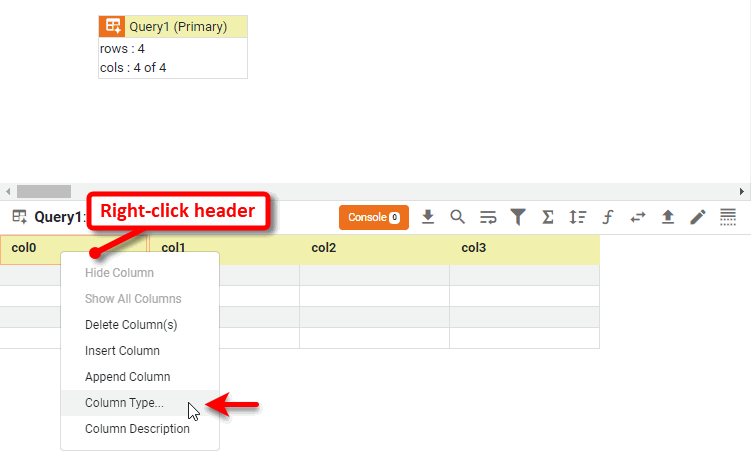
-
Select ‘Integer’ from the ‘Type’ menu and press OK.
Change Column Description
To add or edit a column description, follow the steps below:
-
Click the data block to select it. Right-click the desired column header in the bottom panel (or press the ‘Actions’ button
), and select ‘Column Description’ in the context menu.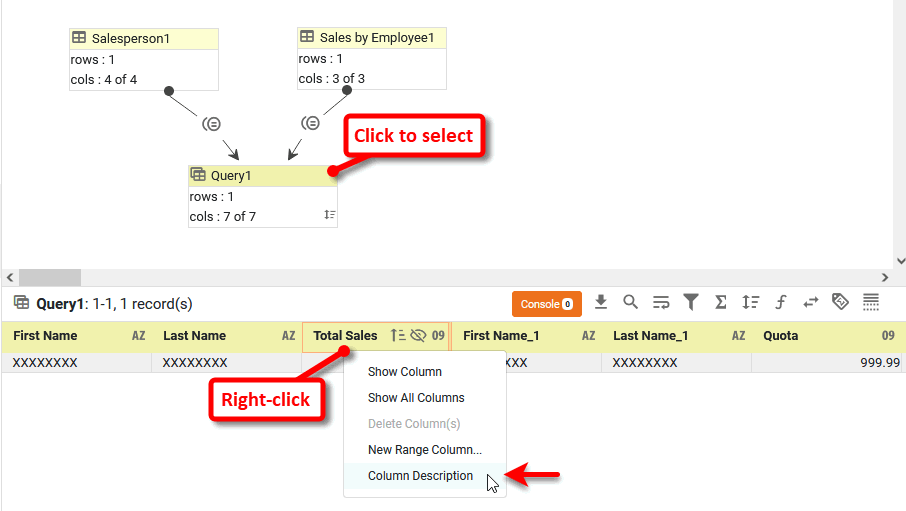
-
Add or edit the desired description in the ‘Column Description’ dialog box and press ‘OK’.

Reposition a Column
To reposition a column, simply drag the column within the bottom panel and drop it at the desired position.
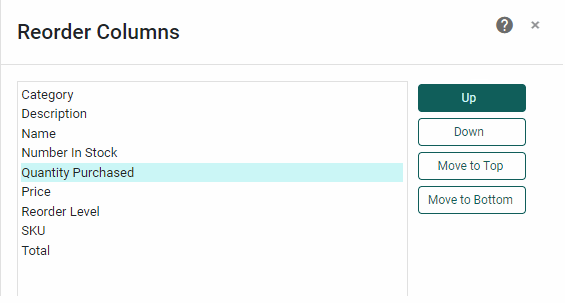
To reposition multiple columns, press the ‘Reorder Table Columns’ button  in the bottom panel toolbar. This opens the ‘Reorder Columns’ dialog box. Select one or more fields and press the Up, Down, Move to Top and Move to Bottom buttons to adjust the order as desired. Press OK at the bottom of the panel.
Hide a Column
To hide a column, press the ‘Visibility’ button  in the column header, or press the ‘Actions’ button and select ‘Hide Column’ from the menu. To show the column again, press the ‘Visibility’ button again or press the ‘Actions’ button and select ‘Show Column’ or ‘Show All Columns’ from the menu.
You may need to first press the ‘Change View’ button  and select ‘Meta Data View’ in order to see the column listed. and select ‘Meta Data View’ in order to see the column listed.
|
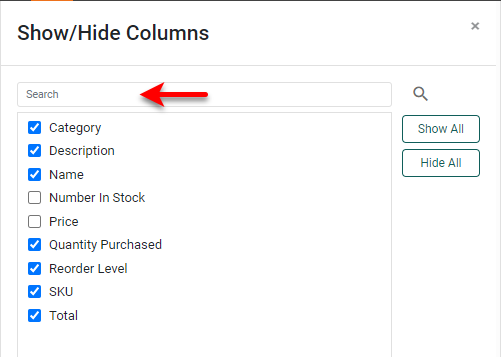
To hide multiple columns, press the ‘Show/Hide Columns’ button in the bottom panel toolbar. This opens the ‘Show/Hide Columns’ dialog box, where you can choose columns that you want to hide. Type in the ‘Search’ box and press the ‘Search’ button to list columns that fully or partially match the search string. Press OK at the bottom of the panel after making your selection.