Create a Task, Cycle, or Alert
The following sections explain how to create tasks, cycles, and alerts.
Create a Scheduled Task
A scheduled task is an action or set of actions that occur automatically on a schedule, such as emailing a Dashboard to certain users every morning. To create a scheduled task, follow the steps below:
-
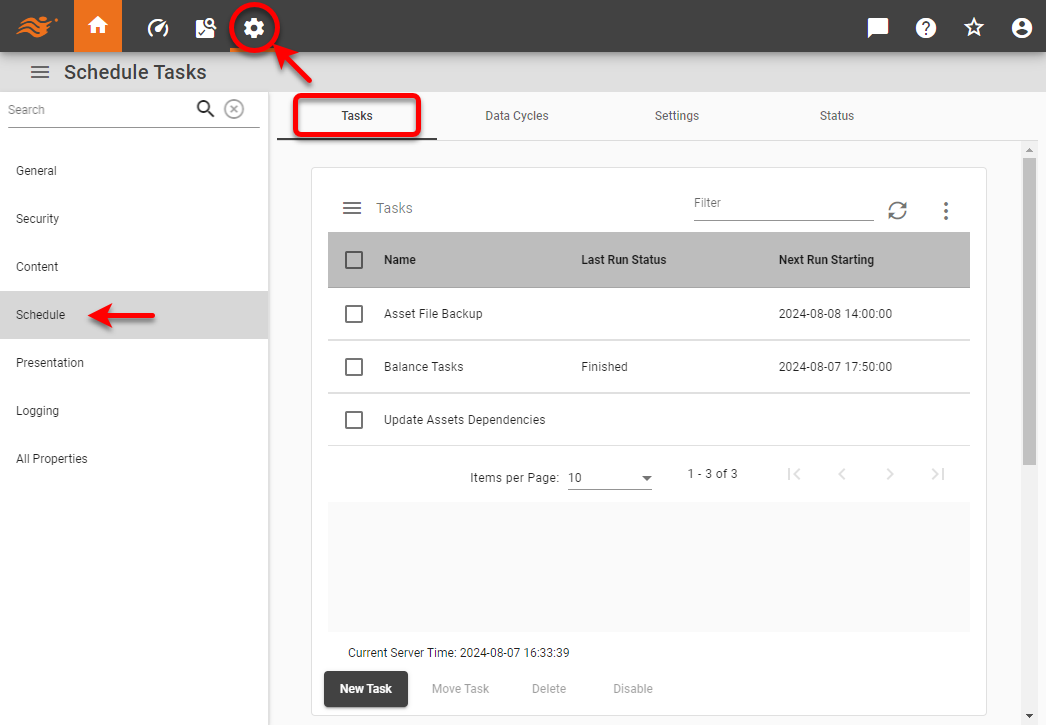
Press the ‘Settings’ button
 at the top of Enterprise Manager.
 -
Select the Schedule page in the left panel, and select the Tasks tab at the top.
-
If multi-tenancy is enabled, from the ‘Select Organization’ menu, choose the desired organization. This feature is available only in Enterprise Edition.

Settings you make in the steps below apply only to the selected organization. Users and assets of other organizations are not affected. Note that some settings may only be available to the Host Organization, and are only visible to the Site Administrator. -
Press the New Task button under the table. This creates a new task, with the default name ‘Task n’ (e.g., Task1, Task2, Task3, etc.).
-
Select the Conditions tab and specify a condition to determine when the task will execute. See Scheduler Conditions for details.
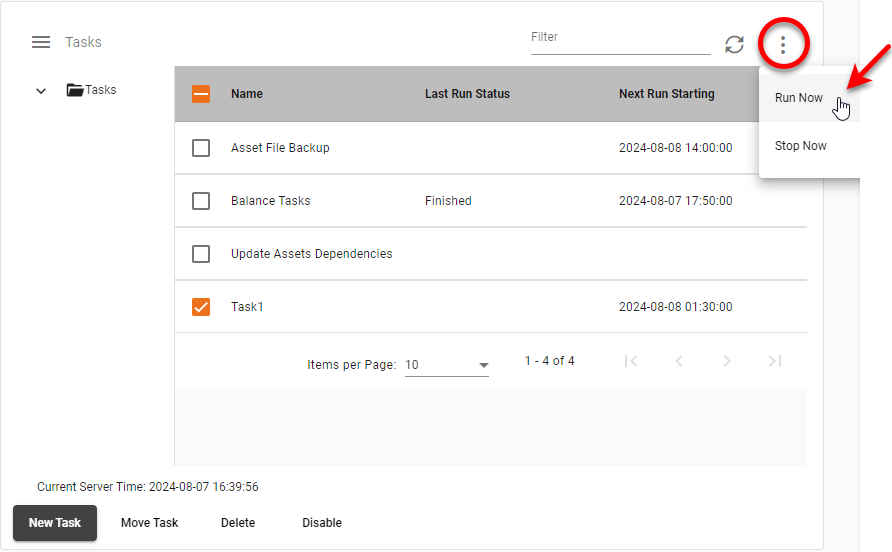
To run a task on demand, see Monitor Scheduled Tasks below. -
Select the Actions tab and specify the type of action to take when the scheduled task executes. See Scheduler Actions for details.
-
Optional: Select the Options tab to set advanced properties.
-
Press the Save button at the bottom to save the task.
Create a Scheduled Cycle
Watch Video: Create a High-Performance Cache (Create New Cycle)
This video might show an earlier version of the feature or operation that differs in minor ways from the current version.
A scheduled cycle is a time condition that can be used to automate materialized view generation (see Materialized View). It is the “Conditions” part of a scheduled task alone, without the “Actions” part.
To create a new cycle, follow the steps below.
-
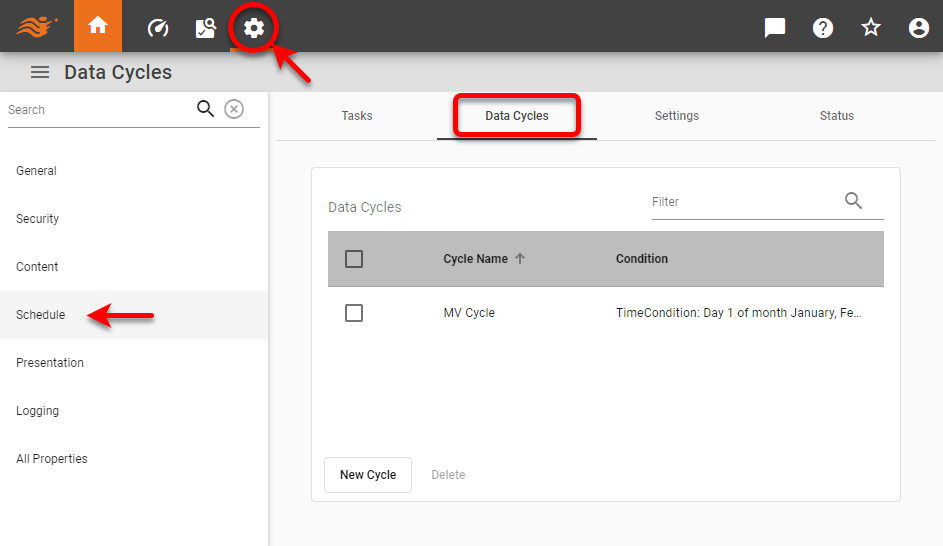
Press the ‘Settings’ button
at the top of Enterprise Manager. -
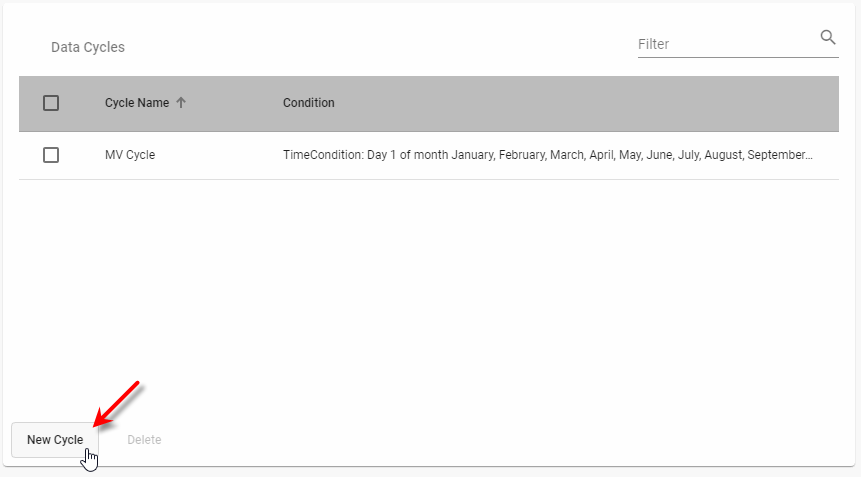
Select the Schedule page in the left panel, and select the Data Cycles tab at the top.
-
If multi-tenancy is enabled, from the ‘Select Organization’ menu, choose the desired organization. This feature is available only in Enterprise Edition.
Settings you make in the steps below apply only to the selected organization. Users and assets of other organizations are not affected. Note that some settings may only be available to the Host Organization, and are only visible to the Site Administrator. -
Press the New Cycle button to create a new cycle.
-
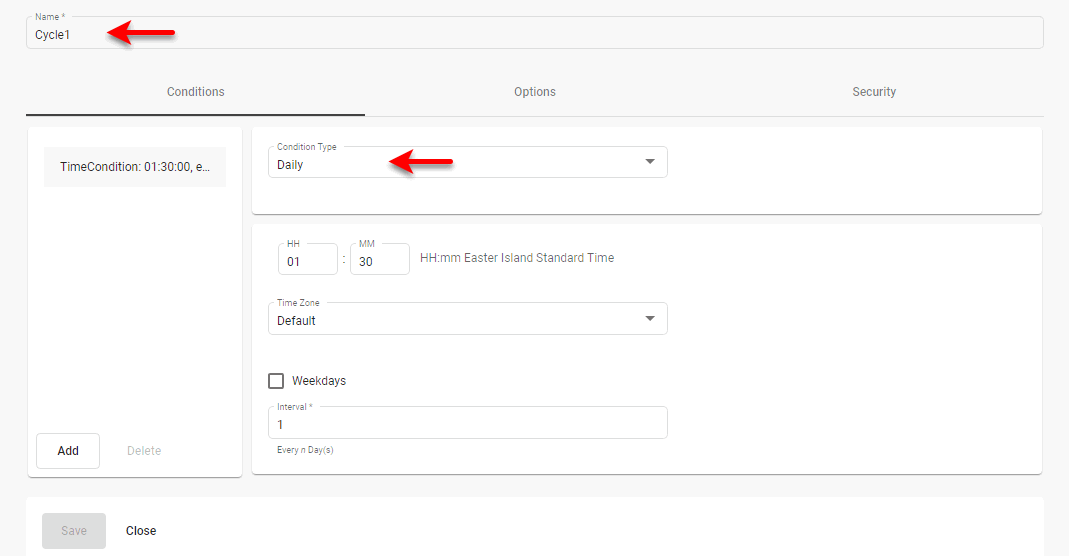
In the ‘Name’ field enter a name for the cycle, and set the cycle time condition. See Scheduler Conditions for details on the different time conditions available.
-
Select the Options tab, and set the desired options:
-
‘Notification of Cycle Start’ emails the specified addresses when the cycle begins.
-
‘Notification of Cycle Completion’ emails the specified addresses when the cycle concludes.
-
‘Notification of Cycle Failure’ emails the specified addresses if the cycle terminates abnormally.
-
‘Notification of Cycle Threshold Exceeded’ emails the specified addresses if the cycle runs for longer than the specified number of seconds.
-
-
Select the Security tab, and assign the desired permissions for the cycle. See Set Security Actions for instructions on how to assign permissions.
-
Press the Save button at the bottom of the panel.
-
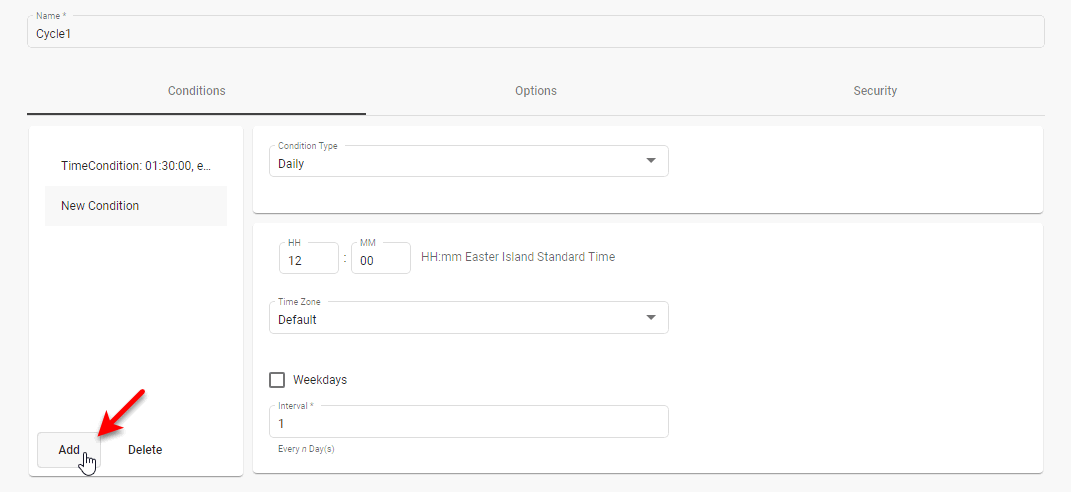
Optional: To create additional conditions on the cycle, press the Add button.
-
Create the new condition as described above.
-
To edit one of multiple conditions, select the desired condition in the list.
-
To delete one of multiple conditions, select the desired condition, and press Delete.
To delete a cycle, select the cycle you want to delete in the table, and press the Delete button below the table.
Create an Alert
|
An alert is a notification that a specified event has occurred, for example, that total sales have fallen below some critical level. You can set an alert based on highlight conditions in a Dashboard, or based on Dashboard Output component ranges.
To configure an alert for a Dashboard, follow the steps below:
-
Create a new scheduled task. See Create a Scheduled Task above for instructions.
-
On the Conditions tab, set the frequency with which the alert conditions should be tested. (See Scheduler Conditions for more details on the available day and time conditions.) For example, if you want to test a highlight condition every day, specify a ‘Daily’ condition.
-
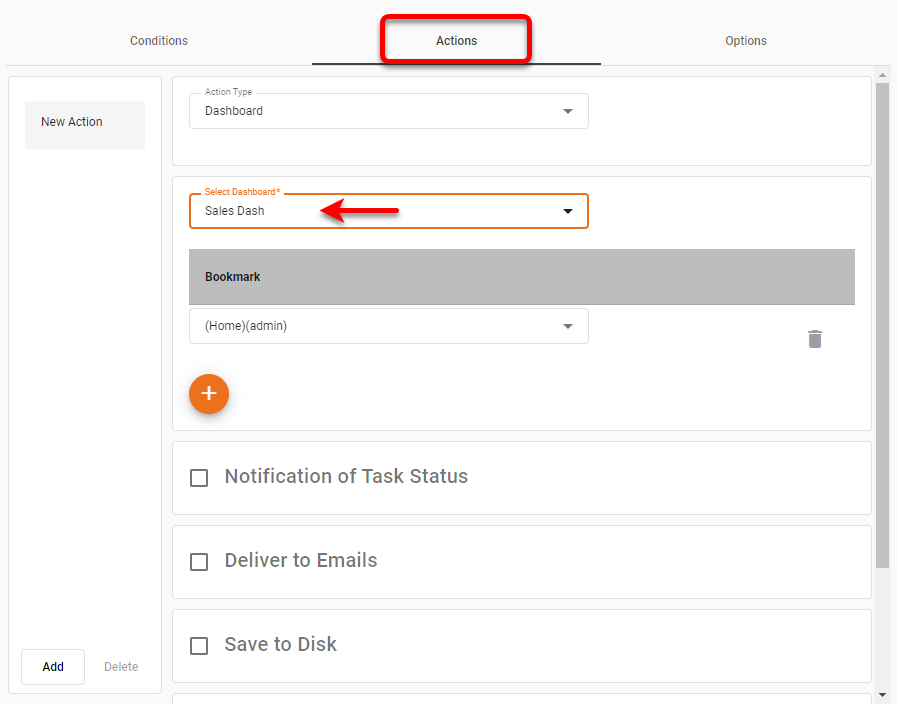
On the Actions tab, specify the Dashboard that contains the alert condition you want to test.
-
Select the actions that you want to perform if the alert is triggered. Generally, you will at least select the ‘Deliver To Emails’ option. (See Scheduler Actions for more about the available actions.) Enter a ‘Subject’ and ‘Message’ appropriate for the nature of the alert.
-
In the ‘Alert’ panel at the bottom of the Actions tab, check the ‘Execute action only under selected highlight conditions’ option. The table lists highlight conditions for all chart, table, image, and text components, as well as range conditions for Dashboard Output components.
This panel is only available if the Dashboard contains highlights or ranges. -
In the table, select the highlight or range conditions that you want to trigger the alert. When any of the selected conditions test true, the actions you specified above (e.g., emailing) will be performed.
-
Press Save to save the scheduled task.
See Schedule a Dashboard in Use a Dashboard for information on how an end-user can set an alert. See Create an Automated Alert below for information about setting an alert based on conditions that are not defined in a highlight.
Create an Automated Alert
| Create an Alert, above, to easily create an alert based on existing highlight conditions in a Dashboard. |
You can implement an automated alert based on arbitrary conditions by creating a scheduled task that executes when specified conditions are met by the Dashboard data. This allows you to automatically inform a user when results within the data demand their attention (e.g., inventory falls below a certain level, order volume spikes, etc.).
To create an automated alert, follow the steps below:
-
Create the scheduled task as described in Create a Scheduled Task above. Make the following settings:
-
In the ‘Dashboard’ menu of the Actions tab, choose the Dashboard which contains the data you wish to evaluate.
-
Configure the task actions (notification, email, etc.) to accomplish the desired “alert” behavior. For example, if you wish to generate an email to users when a Dashboard data indicator meets certain criteria, configure the ‘Deliver to Emails’ message to convey the desired alert.
-
Configure the settings on the Conditions tab to execute the task at the interval at which you wish to evaluate the Dashboard data.
-
-
Within the specified Dashboard, implement the logic which determines whether an alert should be dispatched. In general, you should place the script containing this logic on the individual component containing the data to be evaluated.
See Add Script to a Dashboard for more information on where to add script. Within this script, place a call to
scheduleAction()to specify whether the scheduled task should execute or not (based on the logic you implemented above). If a script setsthisViewsheet.scheduleAction(false), the scheduled task will not execute. -
Deploy the Dashboard to the repository as you usually would.
When this scheduled task executes (as determined by the settings on the Conditions tab), the Scheduler will check to see whether scheduleAction() is set to true or false for the Dashboard. If the value is false, the Scheduler aborts the task actions, and no alerts are issued. If the value is true, the Scheduler proceeds to execute the task actions, and any specified alerts are delivered to users.
Organize Scheduled Tasks
To manage scheduled tasks, first open the page. (See Create a Scheduled Task above.) Then perform the desired operations below.
Create a Folder
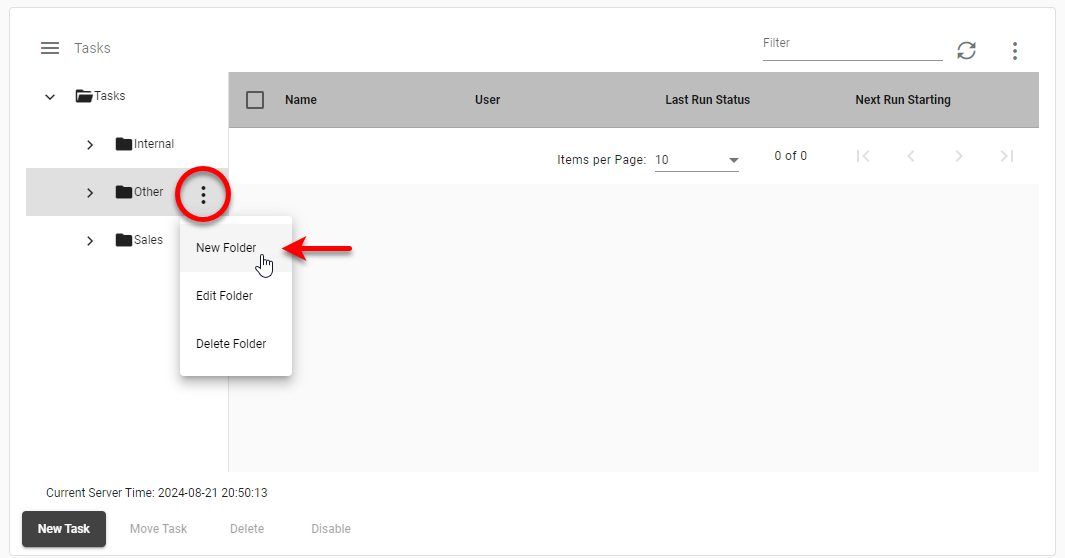
To create a new folder for scheduled tasks, press the ‘More Options’ button  next to a desired folder and select ‘New Folder’.
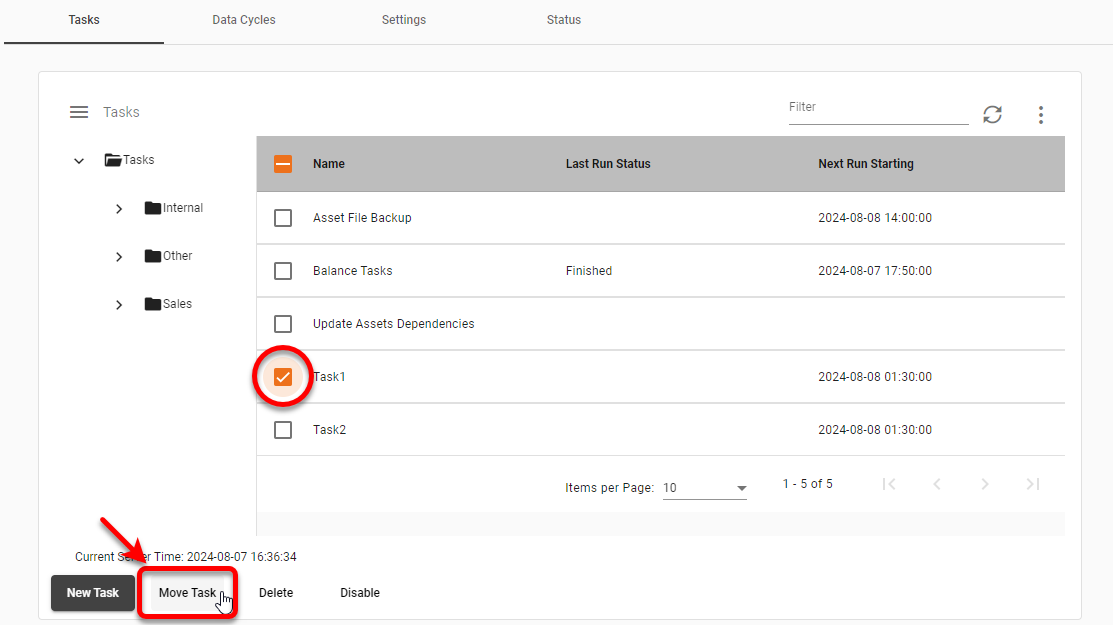
Move a Task
To move a task into another folder, follow the steps below:
-
Select the task in the table, and press the Move Task button below the table.
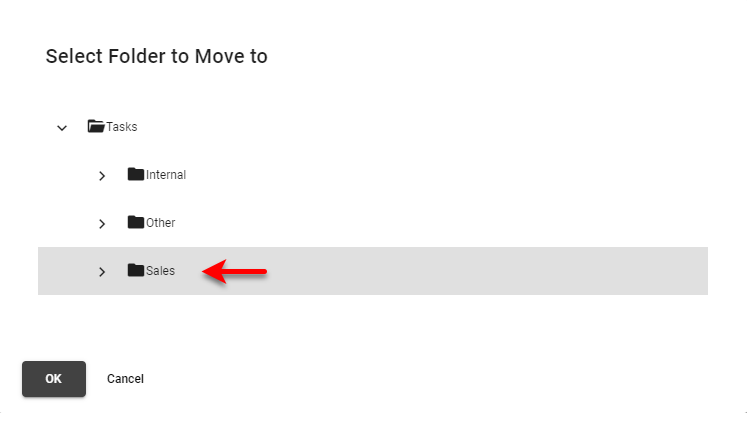
-
Choose the desired folder into which to place the task, and press ‘OK’.
Rename a Folder
To rename a folder, press the ‘More Options’ button next to the desired folder and select ‘Edit Folder’.
Monitor Scheduled Tasks
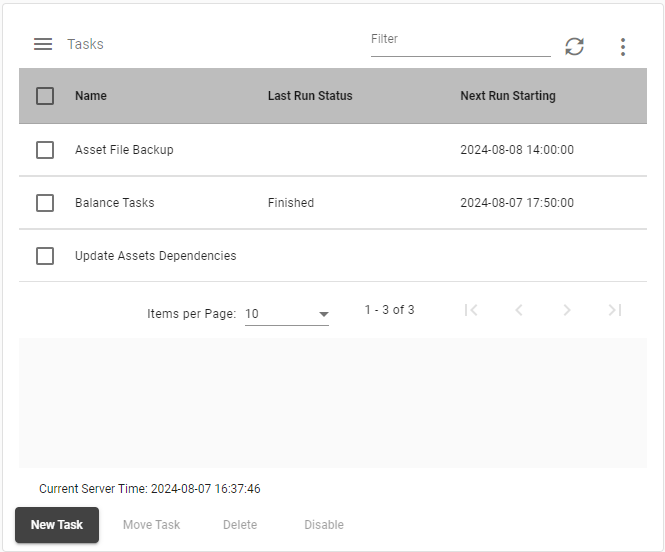
To monitor scheduled tasks, first open the page. (See Create a Scheduled Task above.) The table under the Tasks tab displays basic information (such as start time, end time, status of the last run, etc.) for all scheduled tasks.
To temporarily disable or enable a task, use the checkbox under the ‘Enabled’ column.
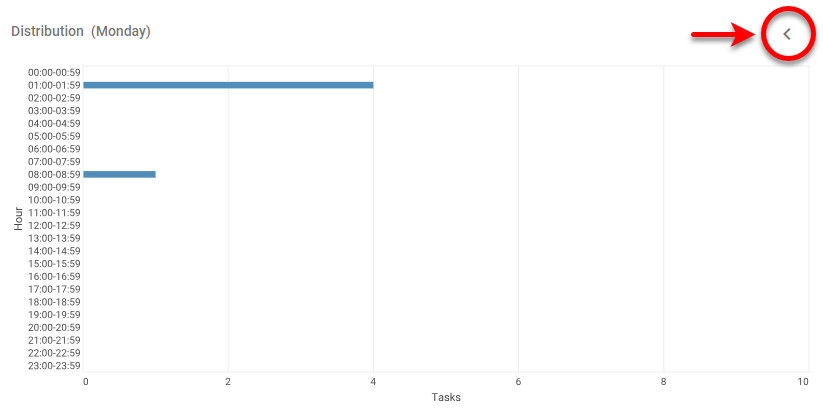
The ‘Distribution’ chart provides a breakdown of daily tasks, including both enabled and disabled tasks.
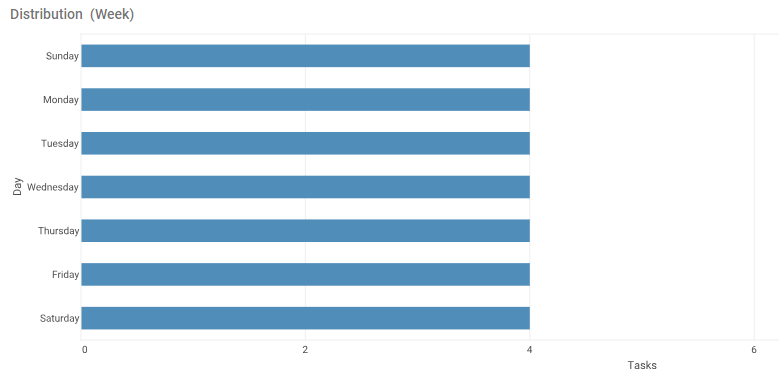
You can click a bar on the chart to zoom in. Press the ‘Back’  button at the top-right to return to the original view.