Create a Logical Model
| Logical models can only be created for relation database data sources. (See JDBC or Connect to a Specific Data Source for information on how to configure a relational database data source.) |
|
If you see the ‘Create Visualization’ dialog box, press the ‘Close’ button
|


To create a logical model, you must first define a physical view. See Create a Physical View. Then follow the steps below:
-
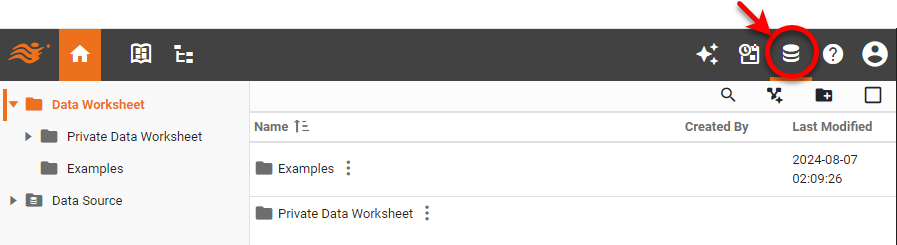
Press the top ‘Data’ button
 .
.
-
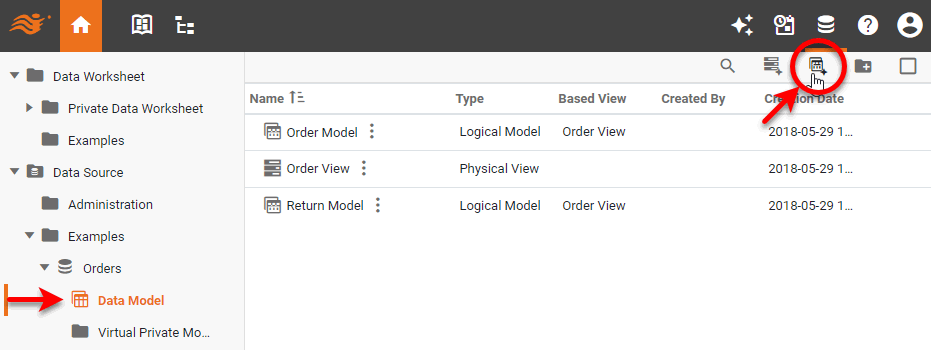
In the ‘Navigation Tree’ in the left panel, expand the ‘Data Sources’ folder and the data source to which you want to add a data model. Select the ‘Data Model’ node, and press the ‘New Logical Model’ button
 .
.
-
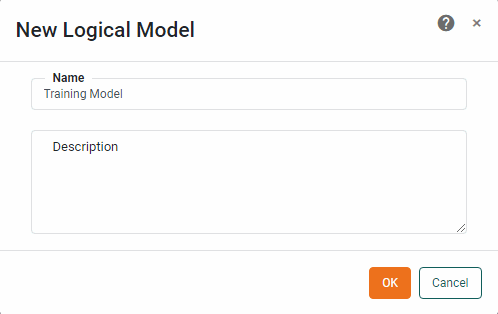
Provide a name for the logical model and press OK.
-
Press the ‘Add Element’ button
 , and select ‘Add Entity’.
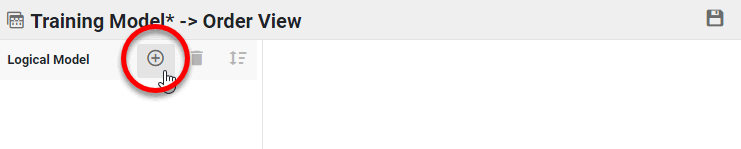
-
Provide a name for the new entity and press Next.
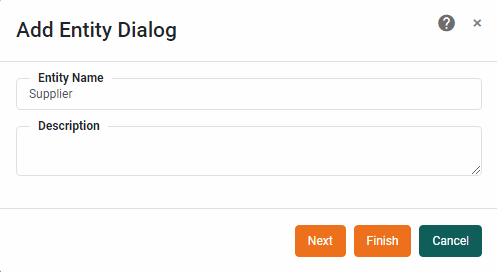
An entity name can contain any characters. However, the following characters and character combinations have been observed to cause problems on certain databases in particular usages. If you use these characters in an entity name, thorough testing with your database is recommended.
! ? [ ] < > ^ ` \ ' = " {D {d {T {t ( : $() -
In the ‘Add Attributes’ dialog box, select the fields (columns) that should be used as attributes for the entity. Press OK.
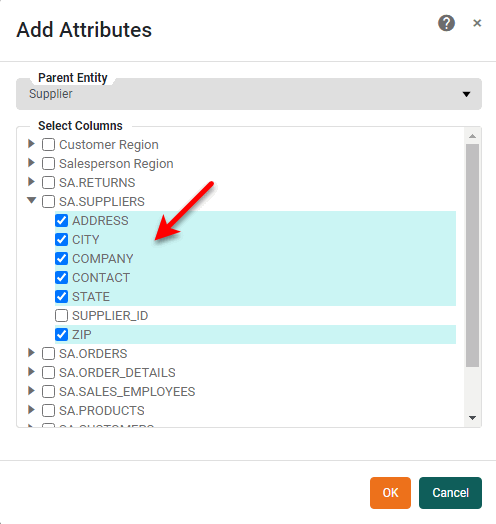
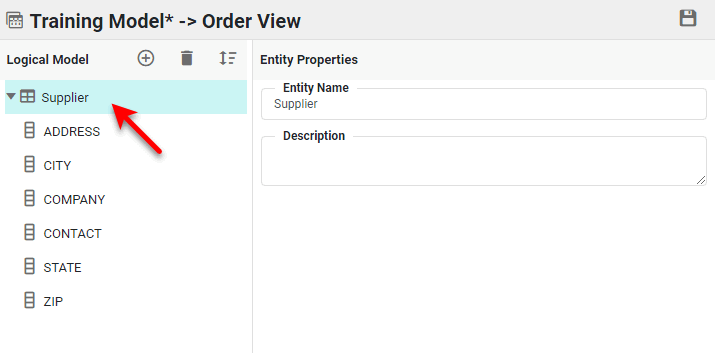
This adds the logical model entity and its attributes to the left panel.
An attribute name can contain any characters except a period (“.”). However, the following characters and character combinations have been observed to cause problems on certain databases in particular usages. If you use these characters in an attribute name, thorough testing with your database is recommended.
! [ ] ? { & } : ^ ` \ ' " = / < > $() -
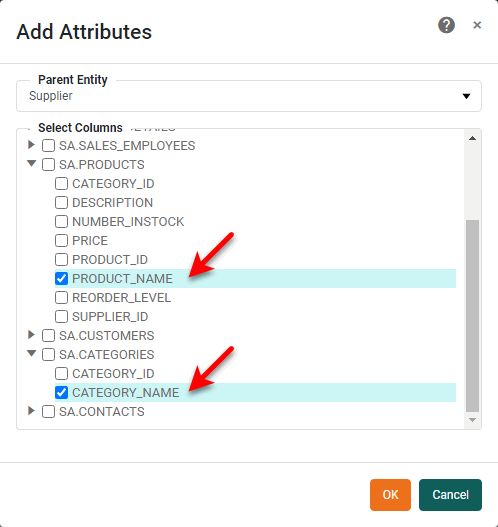
Optional: To add additional attributes to an entity, follow the steps below:
-
Press the ‘Add Element’ button
, and select ‘Add Attribute’.
-
In the ‘Add Attributes’ dialog box, select the entity to which you want to add attributes, and then choose the attributes to add. Press OK.
-
-
Optional: To add an expression or formula attribute to an entity, follow the steps below:
-
Press the ‘Add Element’ button
, and select ‘Add Expression’.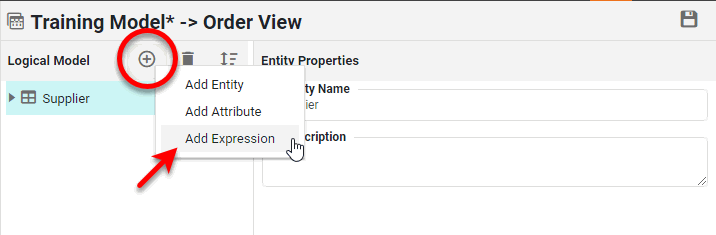
-
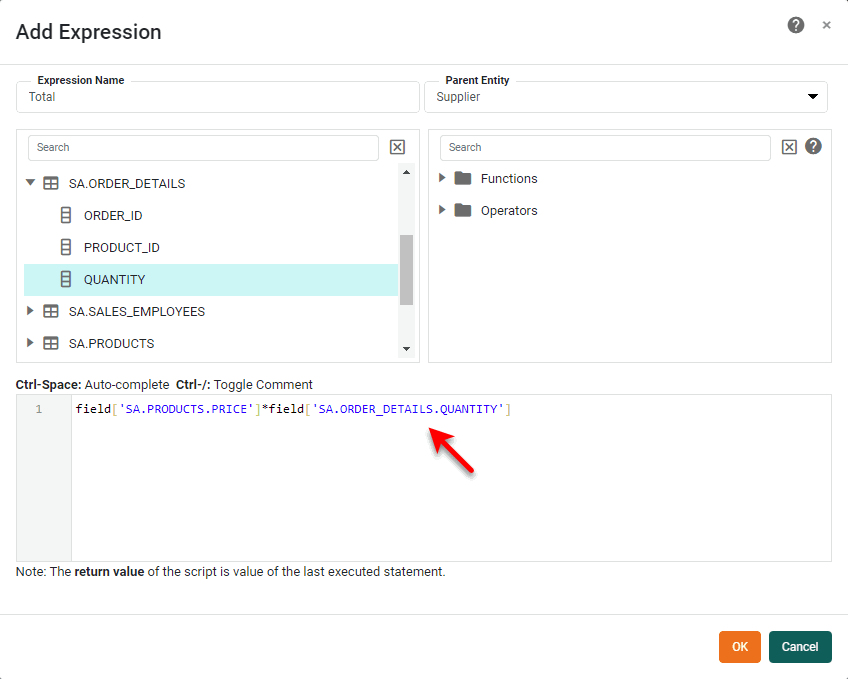
In the ‘Add Expression’ dialog box, select the entity to which you want to add an expression, and provide a name for the new expression field. Enter the expression using SQL syntax. (You can select data fields and operators from the provided lists.) Then press OK.
-
-
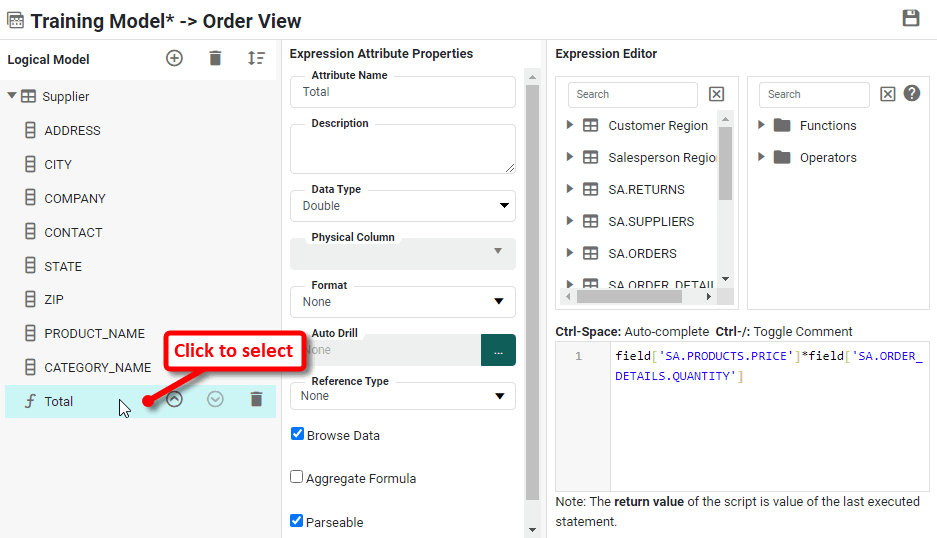
To edit the properties of an attribute, expand the entity in the left panel that contains the attribute, and click to select the attribute. Make the desired settings in the right panel. (See Modify Attribute Properties in Edit a Logical Model for more information.) Then press the ‘Save’ button
 .
.
-
Repeat the above steps to add additional entities and attributes.
-
Press the ‘Save’ button
to save the logical model.