Annotate a Dashboard
| These features are available to both designers and end-users. |
You can add annotations to a Dashboard, to an individual Dashboard component, and even to an individual data point. The following sections explain how to do this.
Annotate the Dashboard
To add annotations to the body of the Dashboard, follow the steps below:
-
Select the bookmark in which you want to save the annotation. (See Bookmark a Dashboard for information on selecting a bookmark.)
-
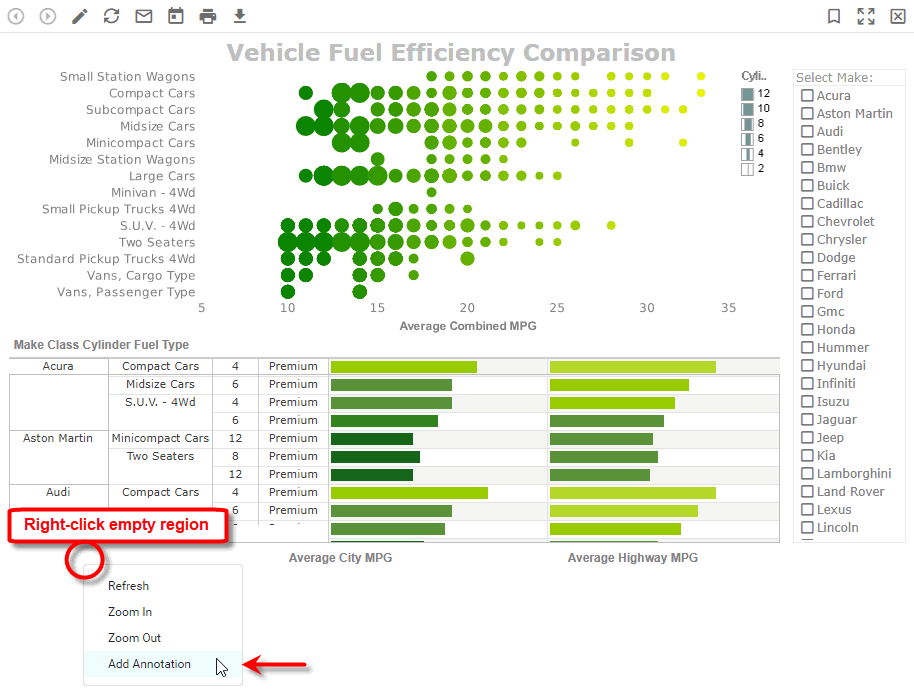
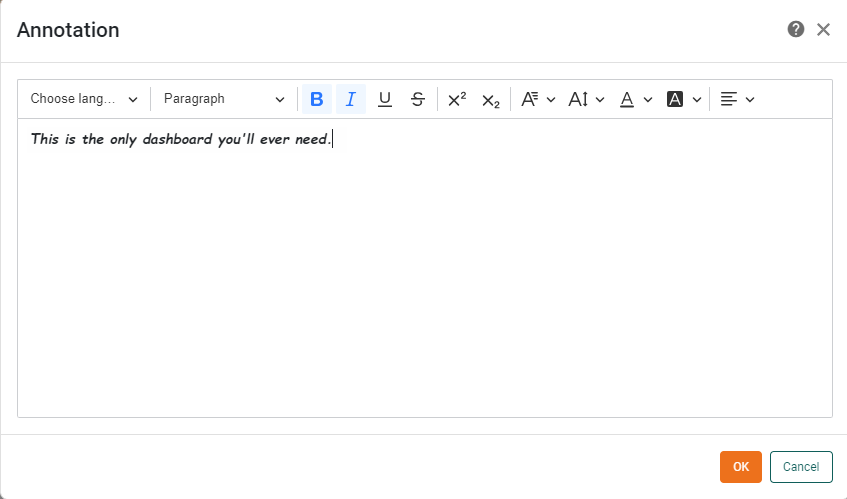
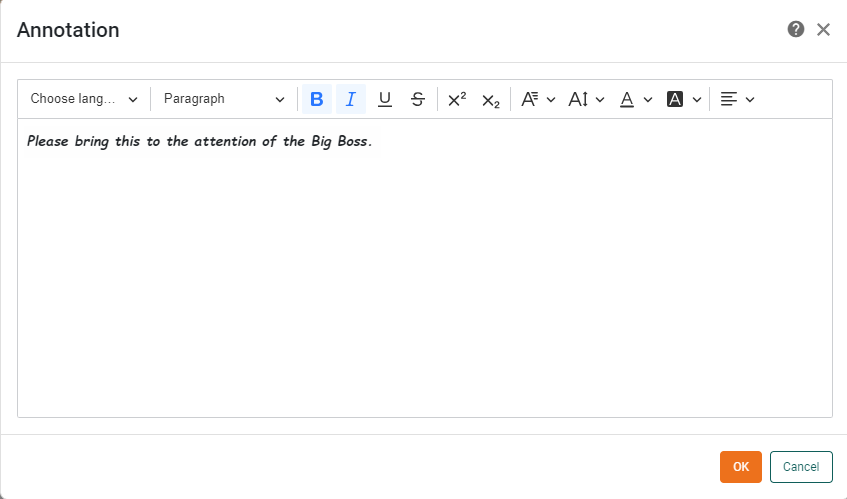
Right-click in an empty region of the Dashboard, and select ‘Add Annotation’ from the context menu. This opens the annotation in the Annotation Editor.
-
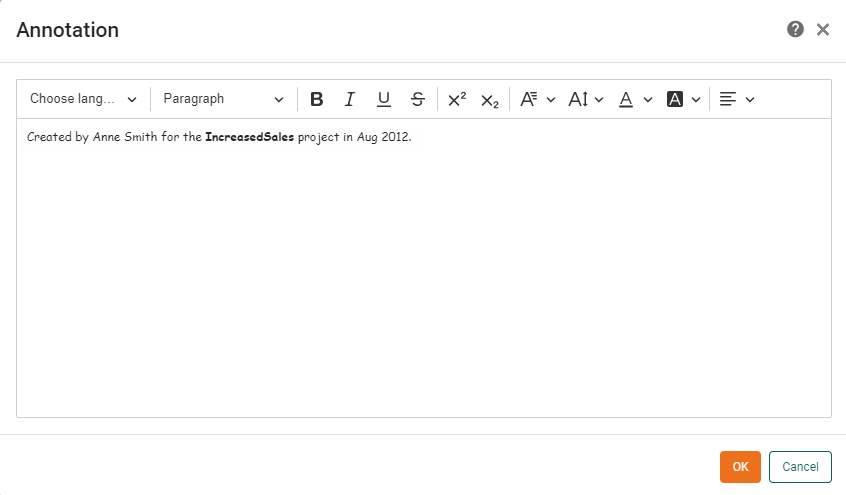
Enter the desired annotation text into the Editor, and use the formatting tools in the toolbar to adjust the font, size, weight, color, etc.
-
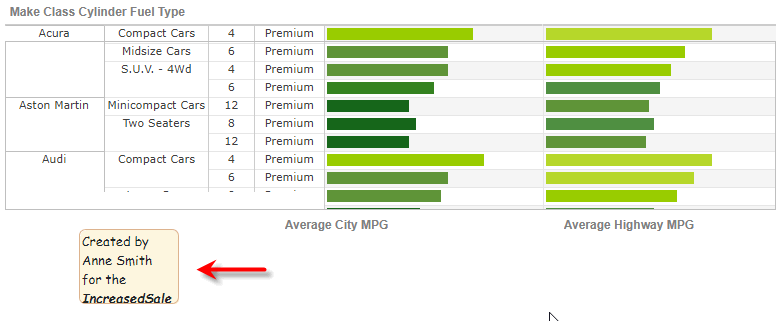
Press OK to close the Annotation Editor. This adds the annotation to the Dashboard.
-
Position and resize the annotation as desired. See Reposition an Annotation below.
-
Format the annotation box. See Format an Annotation Box below.
-
Save the annotation by saving the current bookmark. (See Bookmark a Dashboard for more information.)
Annotations are always saved together with a bookmark.
Annotate a Dashboard Component
To add an annotation to one of the Data View components (Table, Chart, Crosstab), Output components (Gauge, Image, Text, etc.), or Shape components (Rectangle, etc.), follow the steps below:
-
Select the bookmark in which you want to save the annotation. (See Bookmark a Dashboard for information on selecting a bookmark.)
-
Right-click on the Data View, Output, or Shape component, and select ‘Annotate Component’ from the context menu.
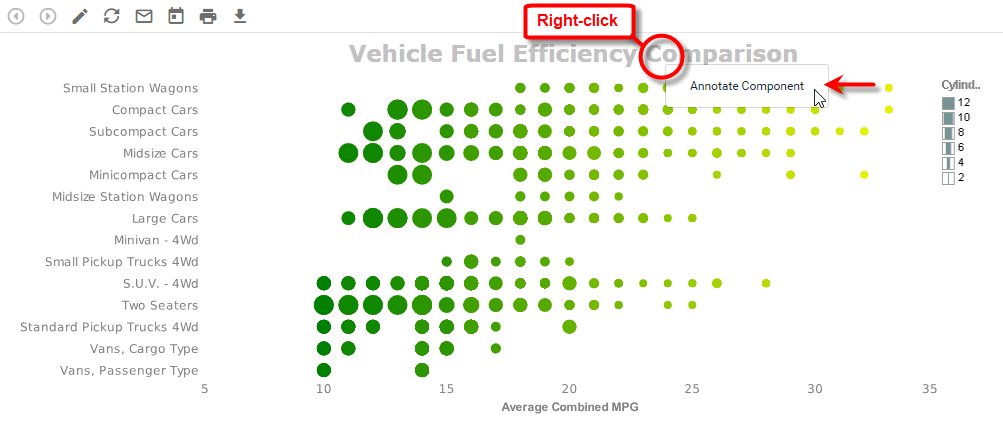
This opens the Annotation Editor. (For an Output component, the Editor displays a default annotation giving the component’s current aggregate.)
-
Enter the desired annotation text into the Editor, and use the formatting tools in the toolbar to adjust the font, size, weight, color, etc.
-
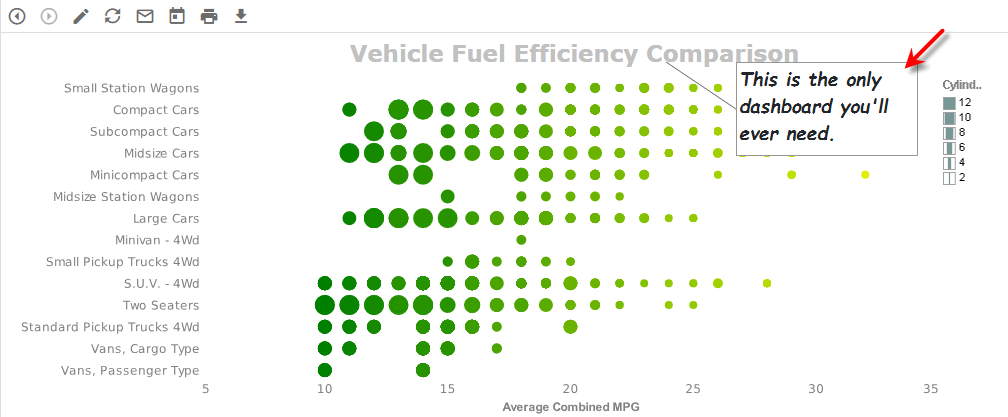
Press OK to close the Annotation Editor. This adds the annotation to the Dashboard and attaches a callout line to the designated component.
-
Position and resize the annotation as desired. See Reposition an Annotation.
-
Format the annotation box. See Format an Annotation Box.
-
Save the annotation by saving the current bookmark. (See Bookmark a Dashboard for more information.)
Annotations are always saved together with a bookmark.
Annotate a Data Point
To add an annotation to a data point on a Chart, follow the steps below:
-
Select the bookmark in which you want to save the annotation. (See Bookmark a Dashboard for information on selecting a bookmark.)
-
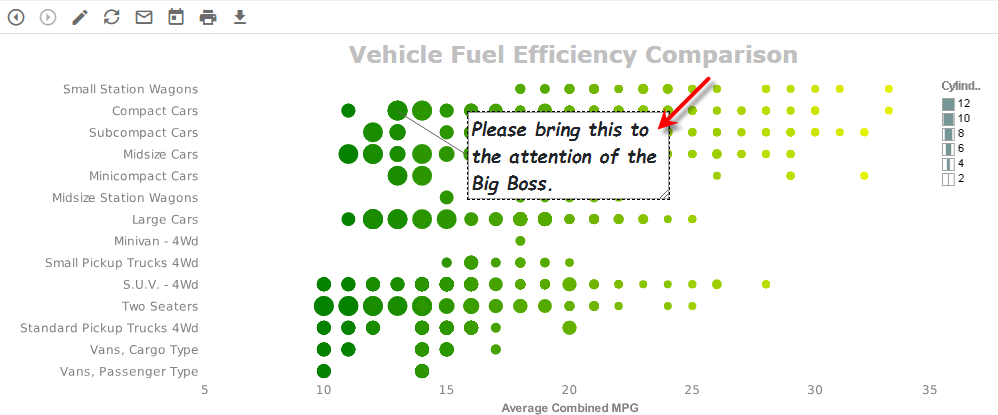
Right-click on the chart data point you wish to annotate, and select ‘Annotate Point’ from the context menu.
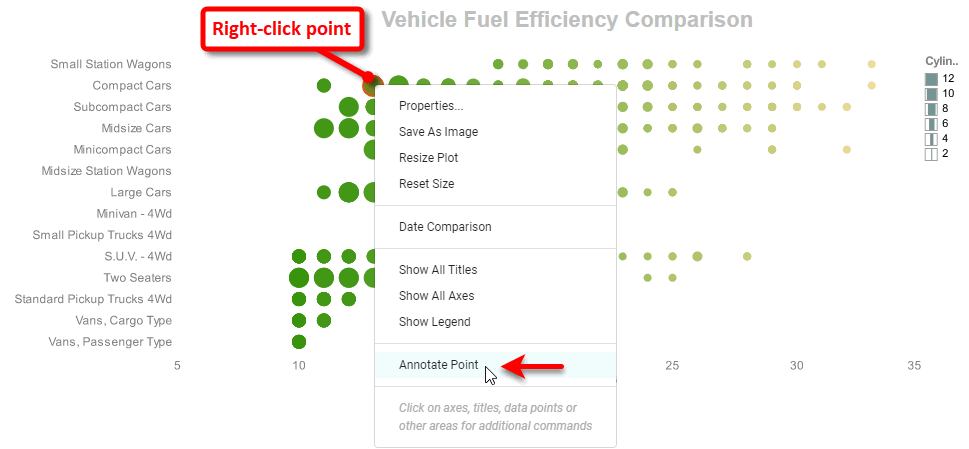
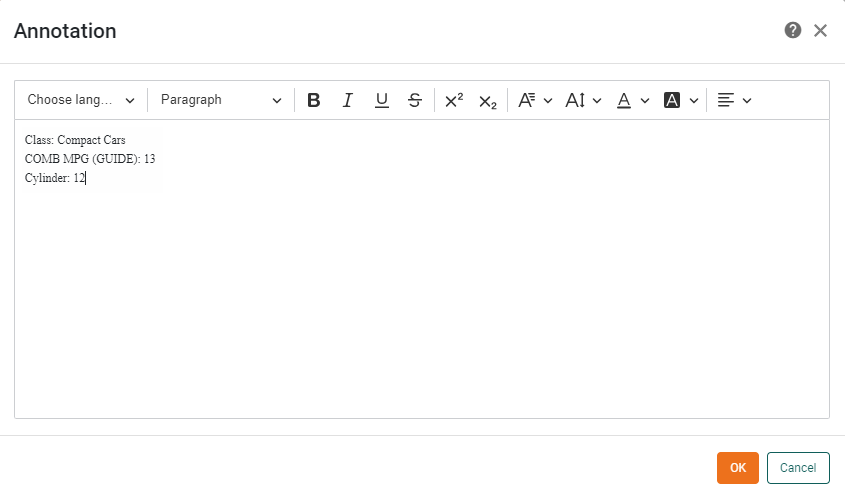
This opens the Annotation Editor, which displays the contents of the current data point tooltip.
-
Enter the desired annotation text into the Editor, and use the formatting tools in the toolbar to adjust the font, size, weight, color, etc.
-
Press OK to close the Annotation Editor. This adds the annotation to the Dashboard and attaches a callout line to the designated data point.
-
Position and resize the annotation as desired. See Reposition an Annotation.
-
Format the annotation box. See Format an Annotation Box.
-
Save the annotation by saving the current bookmark. (See Bookmark a Dashboard for more information.)
Annotations are always saved together with a bookmark.
Annotate a Table Cell
To add an annotation to a data cell in a Table, follow the steps below:
-
Select the bookmark in which you want to save the annotation. (See Bookmark a Dashboard for information on selecting a bookmark.)
-
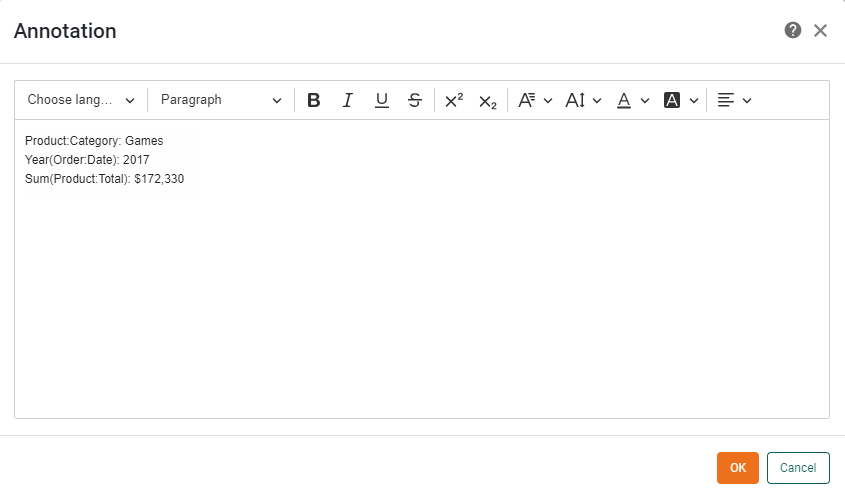
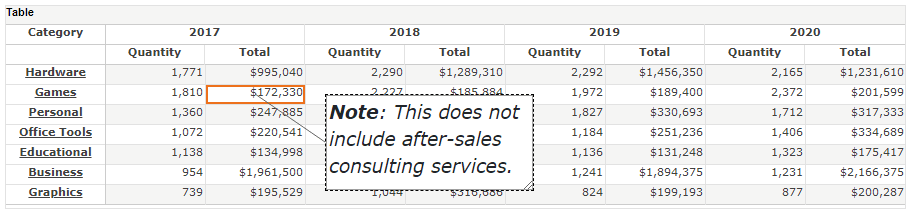
Right-click on the table cell you wish to annotate, and select ‘Annotate Cell’ from the context menu.
This opens the Annotation Editor, which by default displays the contents of the current cell’s tooltip.
-
Enter the desired annotation text into the Editor, and use the formatting tools in the toolbar to adjust the font, size, weight, color, etc.

-
Press OK to close the Annotation Editor. This adds the annotation to the Dashboard and attaches a callout line to the designated Table cell.
-
Position and resize the annotation as desired. See Reposition an Annotation.
-
Format the annotation box. See Format an Annotation Box.
-
Save the annotation by saving the current bookmark. (See Bookmark a Dashboard for more information.)
Annotations are always saved together with a bookmark.
Edit an Annotation
To edit an existing annotation, first make sure the annotation is visible. (Press the ‘Show Annotations’ button  in the toolbar.) Then follow the steps below:
-
Right-click on the annotation and select ‘Edit’ from the context menu.
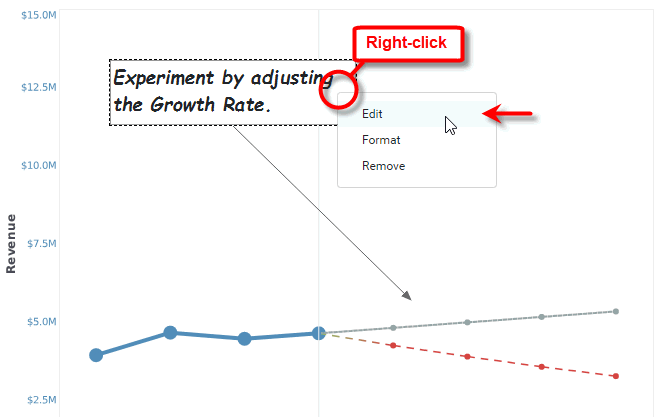
This opens the annotation for editing in the Annotation Editor.
-
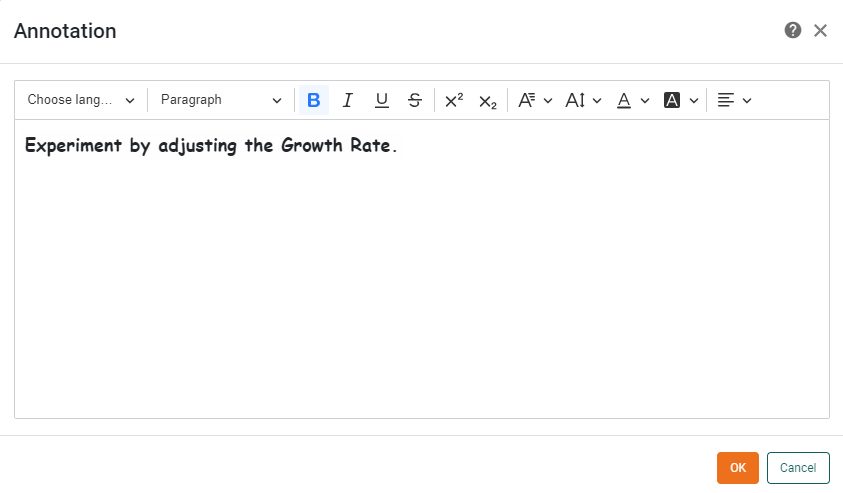
Modify the annotation text as desired by typing in the text box.
-
Modify the visual formatting of a block of text as desired by using the formatting tools in the toolbar to adjust the font, size, weight, color, etc.
-
Press OK to close the Editor.
Format an Annotation Box
To change the visual appearance of an annotation box or callout line, first make sure the annotation is visible. (Press the ‘Show Annotations’ button in the toolbar.) Then follow the steps below:
-
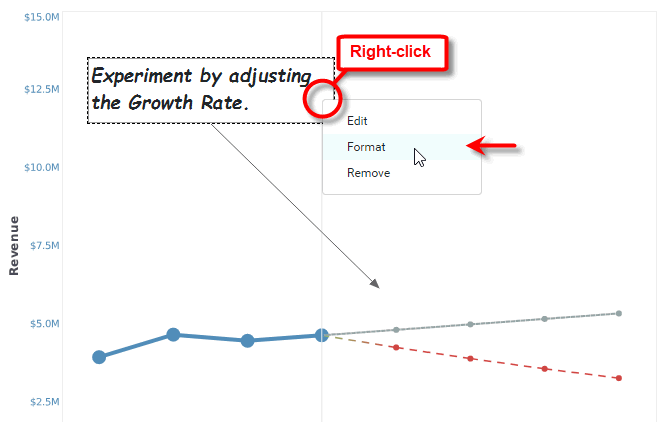
Right-click on the annotation and select ‘Format’ from the context menu. This opens the ‘Format’ dialog box.
-
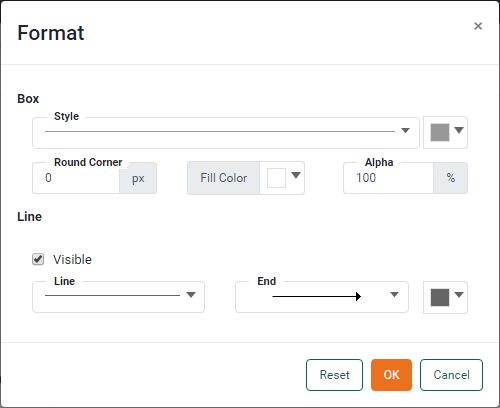
Adjust the following settings in the ‘Box’ panel:
-
From ‘Style’ menu, select a line style for the box border. Select a border color from the adjacent color-picker.
-
From the ‘Round Corner’ menu, select a radius (in pixels) for the box corners. Larger values produce more gently rounded corners, and smaller values produce more sharply rounded corners.
-
From the ‘Fill Color’ menu, select a background color for the annotation box.
-
From the ‘Alpha’ menu, set the background transparency. A value of 0% indicates complete transparency (i.e., fill color not visible), and a value of 100% indicates complete opacity.
-
-
Adjust the following settings in the ‘Line’ panel:
-
Enable the ‘Visible’ option to display the callout line.
-
From ‘Line’ menu, select a line style for the callout line.
-
From the ‘End’ menu, select the arrow type for the callout line.
-
From the ‘Color’ menu, select a color for the callout line.
-
-
Press OK to close the dialog box.
Reposition an Annotation
To resize an annotation, click-and-drag on one of the annotation “resize” handles.
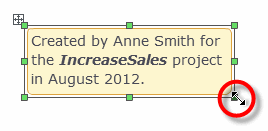
To move the annotation, click-and-drag on the “move” handle, or click and drag on the annotation body.
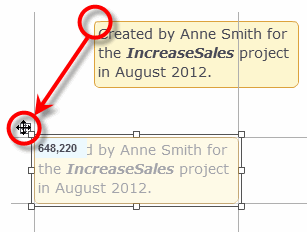
To move the callout arrow for a component annotation, click-and-drag on the arrow handle. The call-out arrow must be placed within the body of the component.
| The callout arrow for a data point annotation cannot be repositioned. |
Hide and Show Annotations
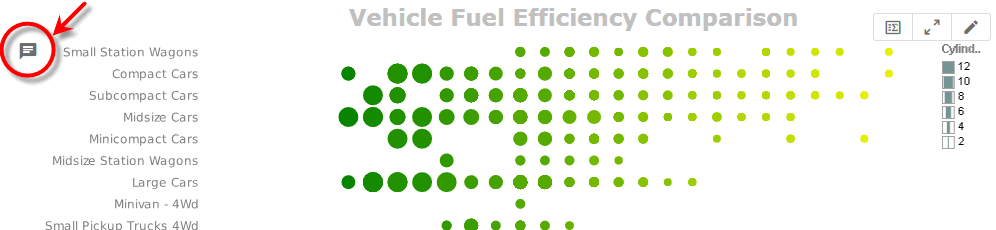
When a Dashboard or component annotation is hidden, it appears on the Dashboard or component as a small “note” icon.
Every annotation is associated with a particular bookmark. To display all annotations for a particular bookmark, follow the steps below:
-
Select the bookmark for which you want to see annotations. (See Bookmark a Dashboard for information on selecting a bookmark.)
-
Press the ‘Show Annotations’ button
in the toolbar.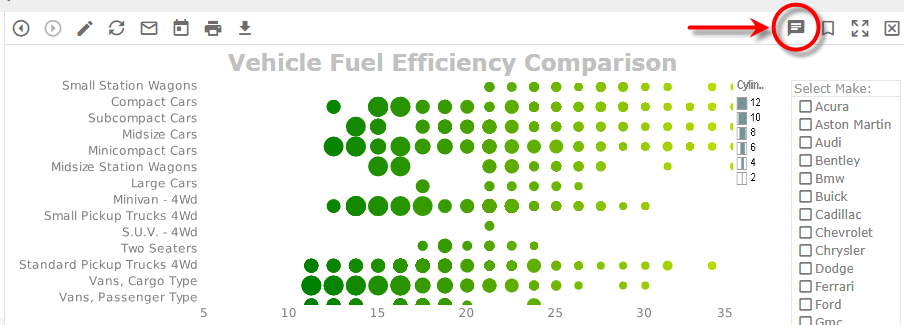
If you export a Dashboard while annotations are visible, the annotations will be included in the export.
To hide all annotations, press the ‘Hide Annotations’ button  in the toolbar.
Save an Annotation
To save the annotation, simply save the current bookmark. (See Bookmark a Dashboard for more information.)
| Annotations are always saved together with a bookmark. |