Create a Data Worksheet
Visual Composer allows you to create a Data Worksheet by performing data pipeline operations such as grouping, post-aggregate filtering, joins, and so on. Follow the steps below to create a Data Worksheet.
|
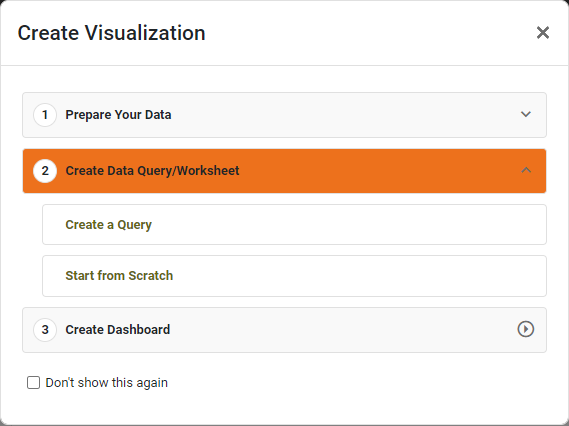
You may see the ‘Create Visualization’ dialog box.
Press the ‘Close’ button
|

Create Data Worksheet from Portal
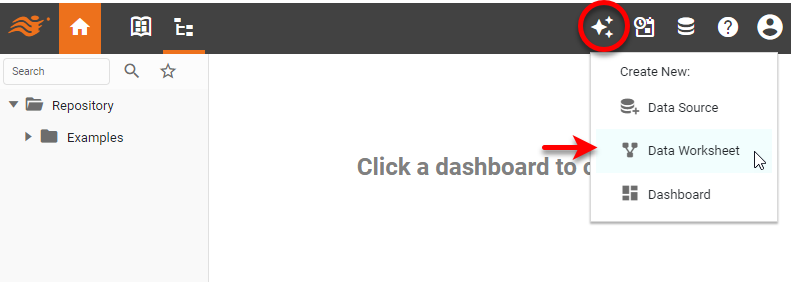
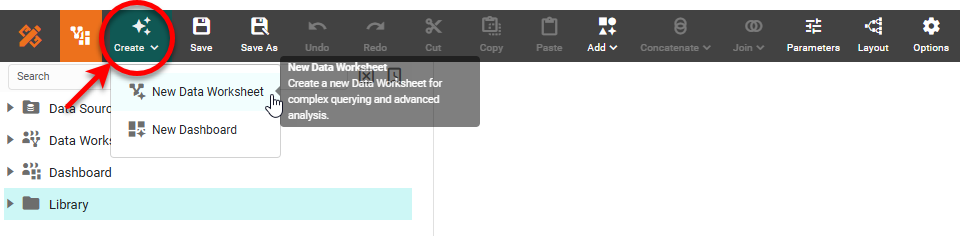
Press the ‘Create’ button  at the top of the User Portal, and select ‘Data Worksheet’
  .
.
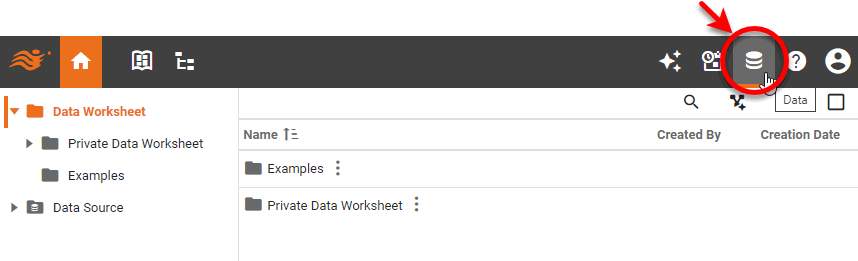
Alternatively, press the top ‘Data’ button  in the Portal.
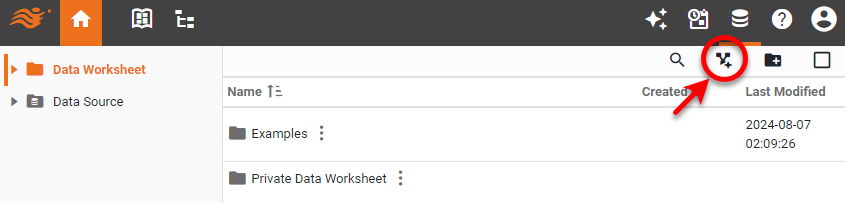
Then select ‘Data Worksheet’ in the left panel and press the ‘New Data Worksheet’ button  in the toolbar.
This displays the ‘New Data Worksheet’ dialog box. See New Data Worksheet Dialog Box below.
Create a Data Worksheet from Visual Composer
If you are already in Visual Composer, you can create a new Dashboard by pressing the ‘Create’ button and selecting ‘New Data Worksheet’ button . Then follow the directions for the ‘Mashup’ option in New Data Worksheet Dialog Box.
Create a New Folder
To create a new asset folder in Visual Composer, see Create a New Folder.
New Data Worksheet Dialog Box
The ‘New Data Worksheet’ Dialog Box presents the following three options.
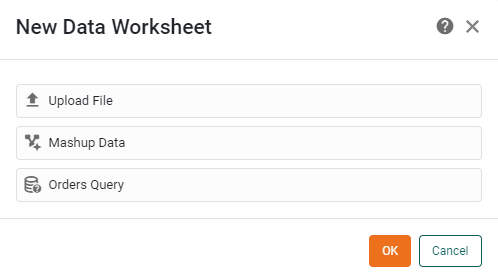
Choose the desired option for creating your data set: ‘Upload File’, ‘Mashup Data’, or an available data source query (e.g., ‘Orders Query’). The Cancel button opens a blank Data Worksheet, which is the same as selecting ‘Mashup Data’. The three options are described below.
| To create a new data block by manually entering data, see Enter Data. |
- Upload File
-
To create your Data Worksheet by uploading a file, select the ‘Upload File’
 option. This creates a blank Data Worksheet named ‘Untitled’ and opens the ‘Import Data File’ dialog box.
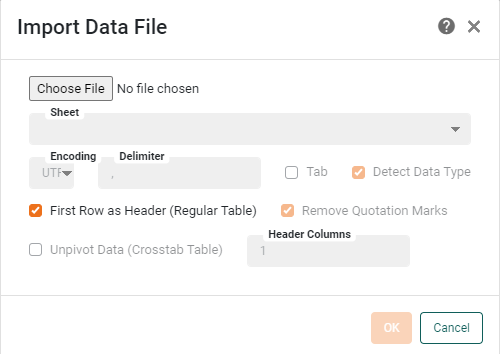
See Upload Data for information about how to use the upload options.
- Mashup Data
-
To create your Data Worksheet by mashing up data, select the ‘Mashup Data’
option. This creates a blank Data Worksheet named ‘Untitled-X’. Proceed to Create Data Blocks below. - Data Source
-
To create your Data Worksheet by defining a query, select a data source query option (e.g., ‘Orders Query’). This creates a blank Data Worksheet named ‘Untitled’ and opens the ‘Database Query’ dialog box.
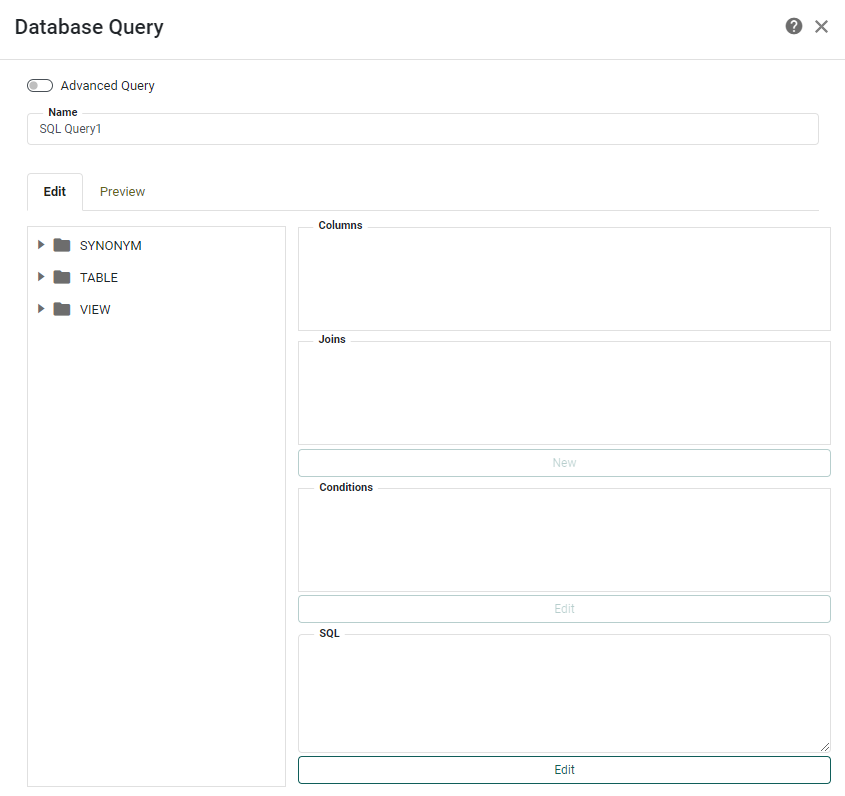
See Query Data for information about how to use the ‘Database Query’ dialog box.
Create Data Blocks
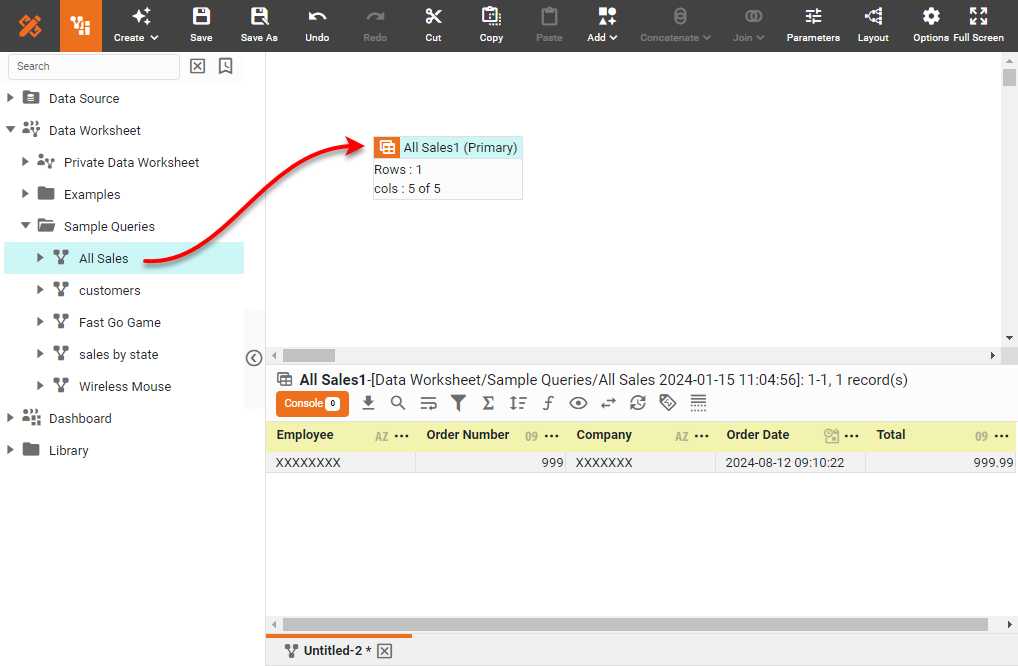
Proceed to add (additional) data blocks to the Data Worksheet. Drag the desired data (fields, attributes, or tables) from the left panel. To create a data block based on a query, see Query Data.
| You can drag fields from the same data model or same table into a single data block. For example, you can drag any attributes from the sample ‘Order Model’ into a single data block. However, to add fields from different sources (different models, different queries, etc.) into a single data block, you must perform a join. See Join Data for more details. |
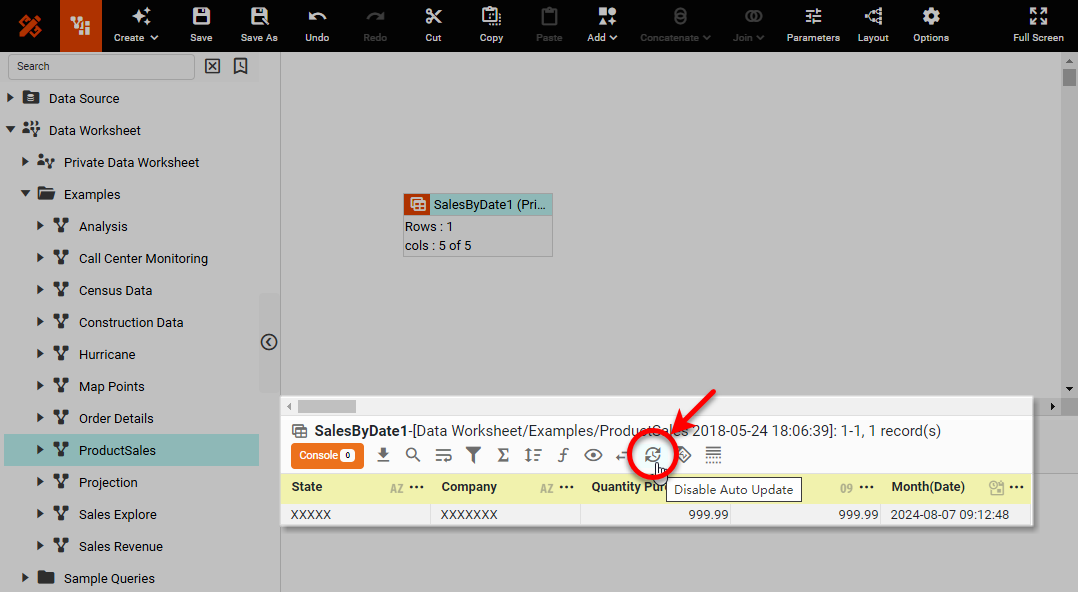
You can also drag a data block (or individual columns of a data block) from another Data Worksheet. In this case, the inserted data block remains linked to the original Data Worksheet in which it is defined, and updates automatically in response to changes in the source Data Worksheet. To disable this auto-update behavior, press the ‘Disable Auto Update’ button  in the toolbar of the bottom panel.
You can then force an update on-demand by right-clicking the data block (or by pressing the ‘Actions’ button  ) and selecting the ‘Update Mirror’ option. To restore the original auto-update behavior, press the ‘Enable Auto Update’ button
  .
.
Optional: To modify the properties of a column in a data block, such as its name, visibility, position, sort order, see Modify a Column. To view the query represented by the data block, see Preview Query. To preview the data returned by the data block, see Preview Data.
You can now do data pipeline operations on this data, as described in the following sections (Filter Data, Join Data, etc.), or you can proceed to create Dashboards based on this Data Worksheet. See Visualize Your Data for information about constructing a Dashboard.
Save the Data Worksheet
To save the Data Worksheet, press the ‘Save’ button  in the toolbar. Provide a ‘Name’, choose a Scope, and press OK.
-
To make the Data Worksheet accessible to other users, save it outside the ‘Private Data Worksheet’ scope.
-
To save into a private location, select the ‘Private Data Worksheet’ scope. The Data Worksheet will only be accessible to its creator.
A public Dashboard cannot use a private Data Worksheet as a data source. Such improper scoping may generate an “assembly could not be referenced” error. (A private Dashboard is permitted to use a public Data Worksheet.)
| Dashboards and Data Worksheets are auto-saved. If you attempt to open a saved Dashboard or Data Worksheet and a newer auto-save exists, you will be prompted to use the auto-saved version. (It is not possible to browse the auto-saves.) Note that there are some events, such as network interruptions, that may prevent a valid auto-save from being created. |