Improve Performance
The best method for boosting Dashboard performance is to create a materialized view. A materialized view is a caching strategy that pre-aggregates and stores the data required by a Dashboard so that the Dashboard can respond more quickly at runtime. When a materialized view exists for a Dashboard, the server attempts to query the cached materialized view rather than querying the database. This can significantly increase Dashboard responsiveness in many cases.
| If a VPM is in use, materialized views can only be created in Enterprise Manager. See Materialized View in Manage the Server for more details. |
Create Materialized View
Watch Video: Create a High-Performance Cache
This video might show an earlier version of the feature or operation that differs in minor ways from the current version.
To create the materialized view for a Dashboard, follow the steps below:
-
Open the User Portal.
-
Press the ‘Repository’ button
 at the top of the User Portal.
 -
In the tree on the left side of the Portal, expand the folder containing the Dashboard that you want to materialize.
-
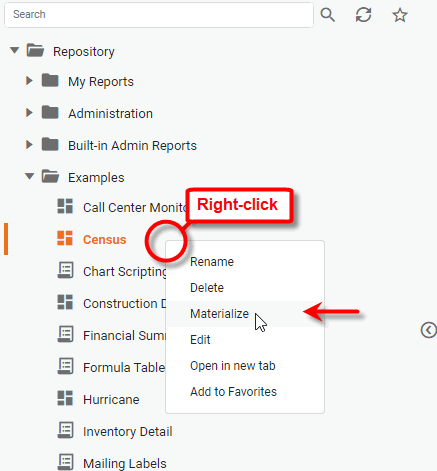
Right-click the Dashboard that you want to materialize, and select ‘Materialize’ from the menu.
-
Press the Analyze button in the ‘Materialization’ dialog box.
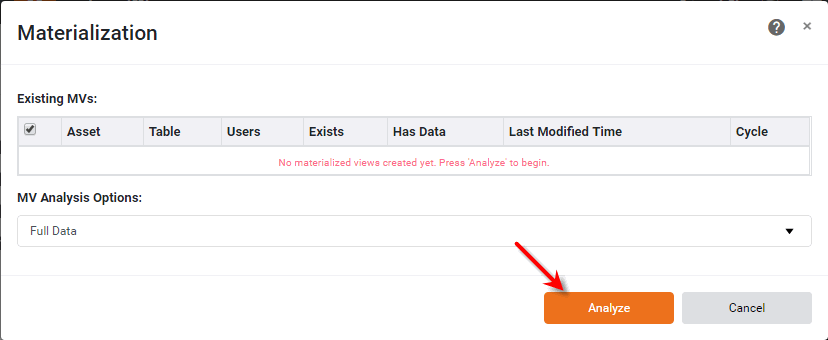
This lists the assets that can be materialized.
-
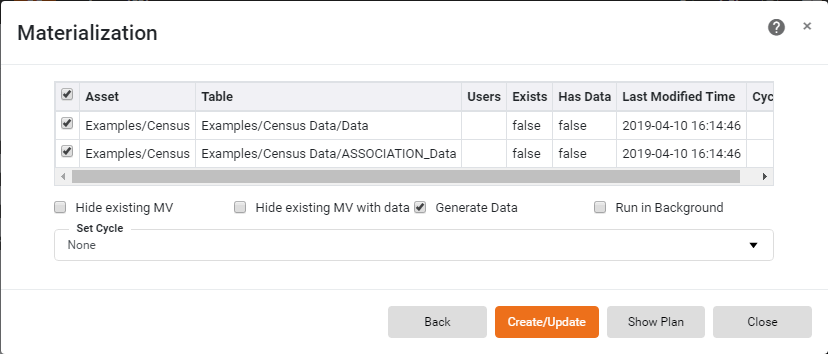
Check the box next to the assets for which you want to create a materialized view.
-
In the ‘Set Cycle’ menu, choose the cycle on which the materialized views should be regenerated.
-
Press the Create/Update button. If you select the ‘Generate Data’ option, this will immediately start the generation process and notify you upon completion. The materialized Dashboard is then displayed in the repository with a special materialization icon
 .
.If you select the ‘Run in Background’ option, the materialized view will be scheduled to begin generation. You can check the status of the task under the Schedule page. (See Schedule a Dashboard. for more information about managing scheduled tasks).
Delete Materialized View
To delete the materialized view for a Dashboard that is displayed with the materialization icon , follow the steps below:
-
Open the User Portal.
-
Press the ‘Repository’ button
at the top of the User Portal. -
In the tree on the left side of the Portal, expand the folder containing the Dashboard for which you want to remove the materialized view.
The Dashboard should be displayed with the materialization icon
-
Right-click the Dashboard, and select ‘Materialize’ from the menu.
-
Select the assets for which you want to remove the materialized view.
-
Press the Delete button.
-
Press Close to close the dialog box.
When the materialized view is removed, the Dashboard will run queries against the live database rather than against cached data.