Repository
The Repository is the collection of Dashboards deployed on the server. Dashboards can be organized into folders, and folders can be hierarchically nested. If security is enabled, users and roles can be given read and write permission for folders or individual Dashboards.
| To refresh the repository listing, reload the page in the browser. |
To manage the repository, follow the steps below:
-
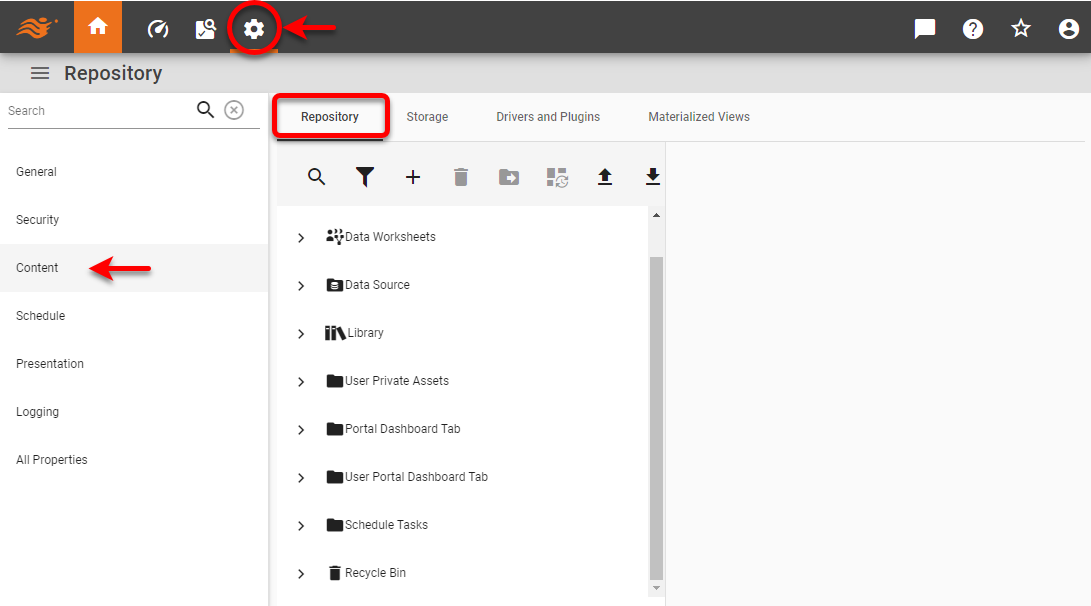
Press the ‘Settings’ button
 at the top of Enterprise Manager.
 -
Select the Content page in the left panel, and select the Repository tab.
-
Perform the desired operations described in the following sections.
Sort the Repository
Assets in the ‘Repository’ tree (both in Enterprise Manager and User Portal) are listed in alphabetical order according to the Dashboard name specified in the ‘Name’ field. To reverse the listing, use the ‘Sort Repository Tree’ option on the Look and Feel page. (See Presentation.) To display assets in an arbitrary order, use the ‘Name’ to control the ordering, and use the ‘Alias’ to specify the displayed names.
| Name | Alias |
|---|---|
dashboard1 |
First Dashboard |
dashboard2 |
Middle Dashboard |
dashboard3 |
Last Dashboard |
This forces the Dashboards to appear in the desired logical order (First Dashboard, Middle Dashboard, Last Dashboard), which is different from the alphabetical order.
Create a Repository Folder
To create a new folder, follow the steps below:
-
Select a parent folder for the new folder in the Repository tree. The parent folder can be the root ‘Repository’ node or any other folder. (You can change the parent folder later, if needed.)
-
Press the ‘New’ button
 above the Repository tree and select ‘New Folder’.
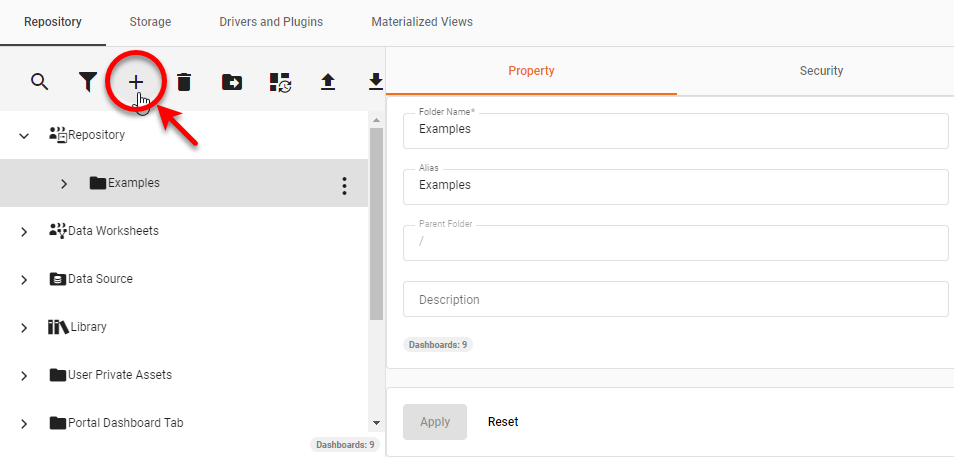
This opens the folder definition page, which has two tabs: Property and Security.
-
Under the Property tab, specify the new ‘Folder Name’ and optional ‘Description’.

-
Optional: Set the folder ‘Alias’. The alias is displayed to the user in the Portal in place of the folder’s actual name. If no alias is specified, the folder’s name is used.
-
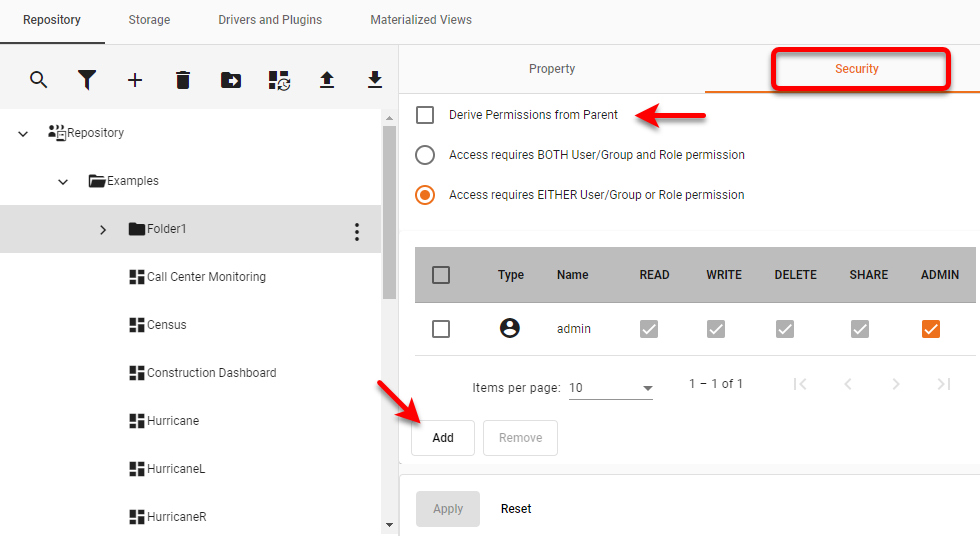
Set the folder’s permissions using the Security tab. By default, a folder is set to inherit security permissions from its parent, which is the containing folder. You can override the default behavior and give a folder its own security configuration. Follow the steps below:
-
To set independent permissions for the folder, uncheck ‘Derive Permissions from Parent’.
Expand to view a list of parent permissions
-
Press the Add button to assign permissions to users, roles, or groups. See Set Repository Permissions.
-
-
Press Apply.
To move an asset such as a Dashboard into the folder, simply drag the asset into the folder in the Repository tree.
Delete an Asset
| End users can also delete an asset if they have ‘delete’ permission on the asset. (See Set Repository Permissions.) |
To delete a Dashboard or folder from the repository tree, follow the steps below:
-
Click to select the desired asset in the tree.
-
Press the ‘Delete’ button
 above the tree.
-
If the deleted asset was in the global repository, the asset is moved to the Recycle Bin.
-
If the asset was in a user folder (under ‘User Private Assets’, which corresponds to the user’s “My Dashboards” folder), the asset is permanently deleted.
When a folder is deleted, all subfolders and their contents will be deleted as well.
-
-
To permanently remove an asset or folder from the Recycle Bin, select the asset or folder in the Recycle Bin and press the ‘Delete’ button
above the tree.
Restore a Deleted Asset
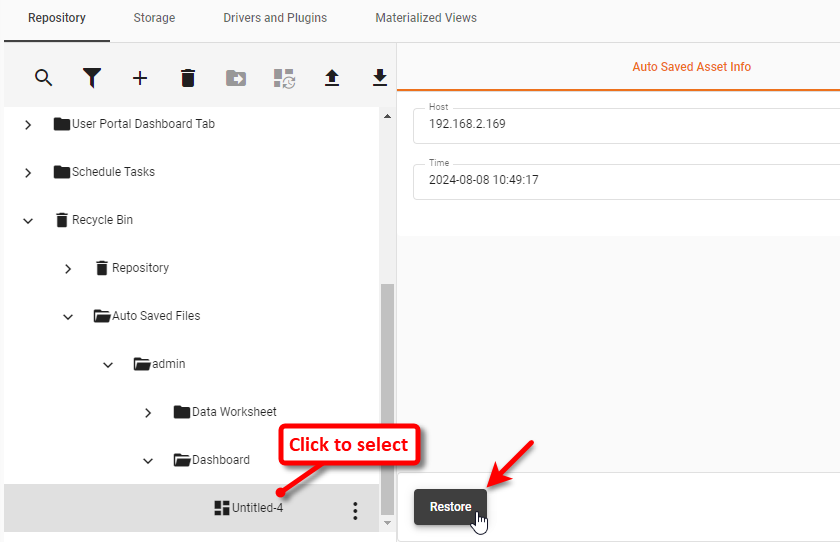
To restore a folder or asset (including auto-saved asset) from the Recycle Bin, follow the steps below.
| Deleted user-scope assets cannot be recovered. |
-
Select the ‘Recycle Bin’ node on the Repository tree, and choose ‘Repository’ or ‘Auto Saved Files’.
-
Select the asset or folder that you want to restore and press Restore.
To export an asset from the Recycle Bin, see Import and Export Assets.
Configure a Dashboard
To add a Dashboard to the Repository, use Visual Composer to save the Dashboard into a global scope (see Save a Public Dashboard) or import the Dashboard (see Import and Export Assets).To modify properties of a Dashboard, follow the steps below:
-
Click to select the desired Dashboard in the tree.
-
To set the basic properties of the Dashboard, select the Dashboard tab. Set the desired options:
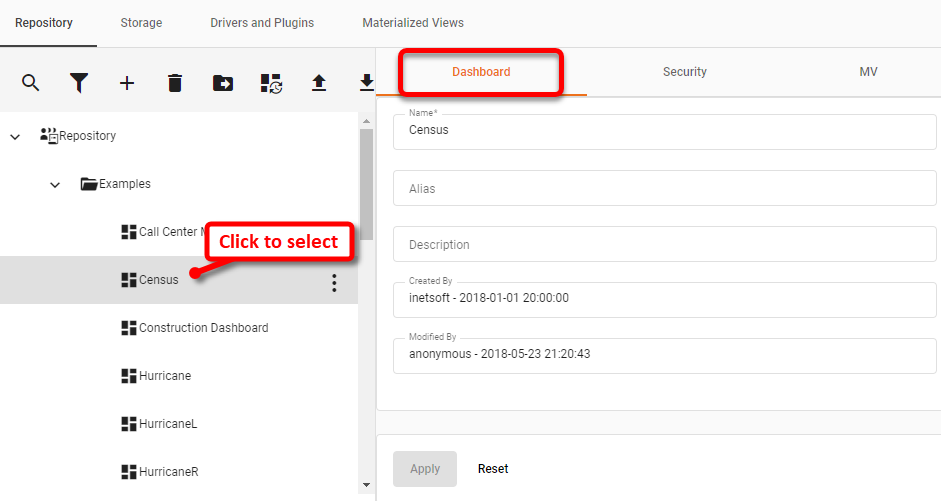
- Name
-
The name under which the Dashboard should be listed in the Repository. Certain characters (e.g., “/”) are not permitted in names.
- Alias
-
The Dashboard name displayed to the user in the Portal.
- Description
-
A brief description to be displayed as a tooltip when the user hovers the mouse over the Dashboard in the Portal or Visual Composer Repository trees.
-
To set the basic permissions for the Dashboard, select the Security tab. By default, a Dashboard is set to inherit security permissions from its parent, which is the containing folder. You can override this default behavior and give a Dashboard its own security configuration. Follow the steps below:
-
To set independent permissions for the Dashboard, uncheck ‘Derive Permissions from Parent’.
-
Press the Add button to assign permissions to users, roles, or groups. See Set Repository Permissions for more information.

-
-
To create a materialized view (high-performace cache), select the MV tab. See Materialized View for more information.
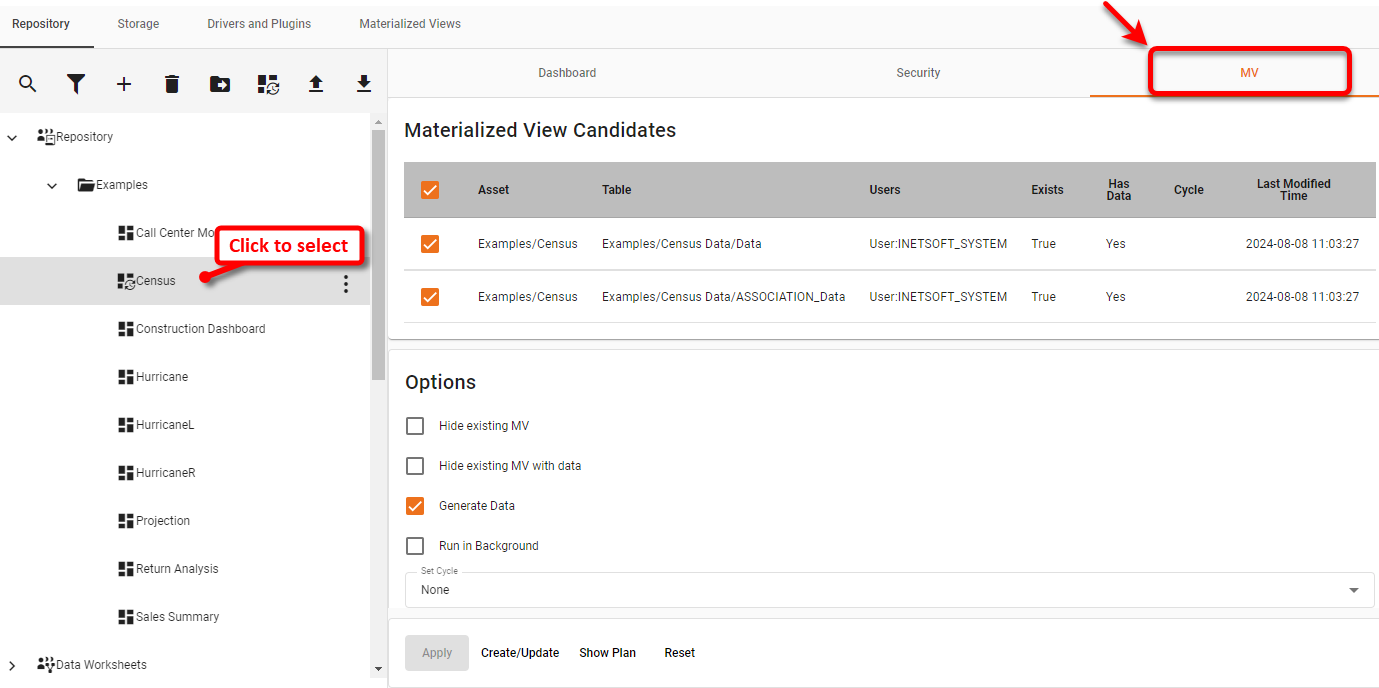
For multi-tenant implementations utilizing the additional connection feature (see Add an Additional Connection), materialized views are created based on user/group connection assignments. For this reason, if you set a Dashboard’s permissions by role, you must also add individual permissions for users or groups that have particular connections. This will enable the materialized views to be generated from the appropriate connections. -
Press Apply.
Pin a Dashboard
Users can also deploy Dashboards under the ‘Dashboard’ button  . See Pin a Dashboard for more information. . See Pin a Dashboard for more information.
|
A Portal Dashboard or “pinned Dashboard” is a Dashboard that appear under the ‘Dashboard’ button in the User Portal. To pin a Portal Dashboard, follow the steps below:
-
Press the ‘Settings’ button
at the top of Enterprise Manager. -
Select the Content page in the left panel, and select the Repository tab.
-
To add a Dashboard for all users, select the ‘Portal Dashboard Tab’ folder on the tree. To add a Dashboard for a particular user only, select the ‘User Portal Dashboard Tab’ folder, and choose the desired user.
-
Press the ‘New’ button
above the tree, and select ‘New Dashboard’.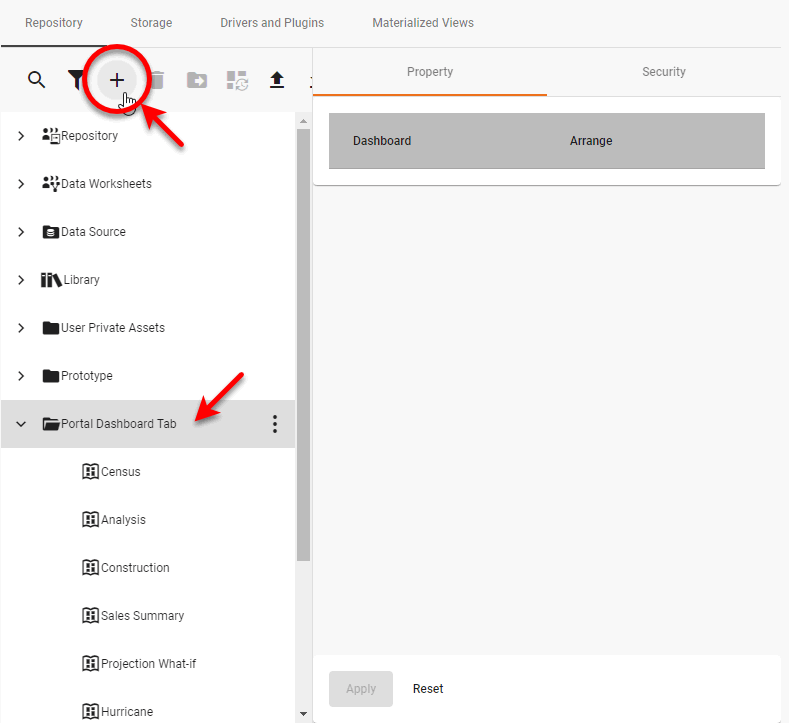
-
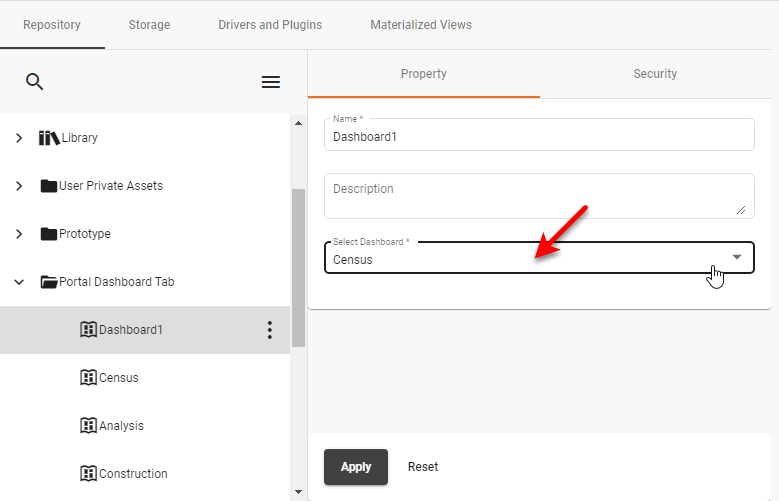
Select the Property tab in the right panel. In the ‘Name’ field, enter a name for the new Dashboard. This name will be displayed on this Dashboard’s tab in the User Portal.
-
Optional: Enter a description for the Dashboard in the ‘Description’ field. This description is visible when the Dashboard is being edited by administrator or user.
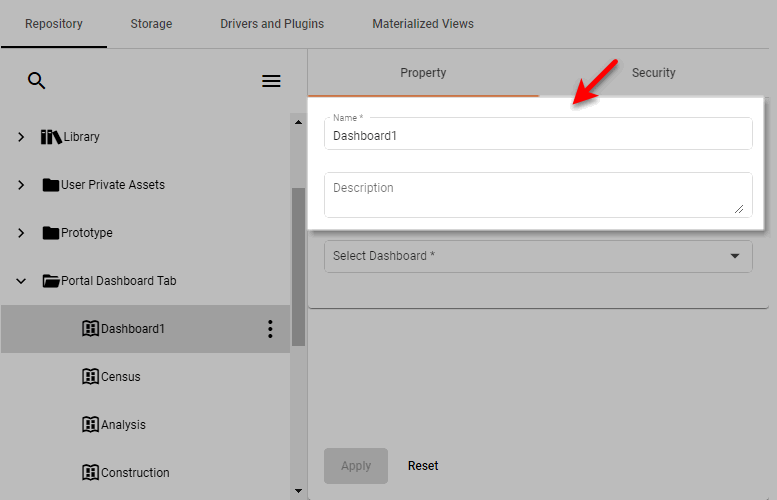
-
Choose a Dashboard from the ‘Select Dashboard’ list.
-
Select the Security tab in the right panel. See Set Repository Permissions for information on how to assign permissions.
-
Press Apply.
The new Dashboard is now listed in the ‘Portal Dashboard Tab’ folder, and will be visible to the users who have appropriate permissions. To delete a Dashboard, select the Dashboard and press the ‘Delete’ button above the repository list.
Manage Data Worksheets
To add a Data Worksheet to the Repository, use Visual Composer to save the Data Worksheet into a global scope (see Edit a Data Worksheet) or import the Data Worksheet (see Import and Export Assets).
To set Data Worksheet properties such as name, description, materialized view, and security, and follow the steps below:
-
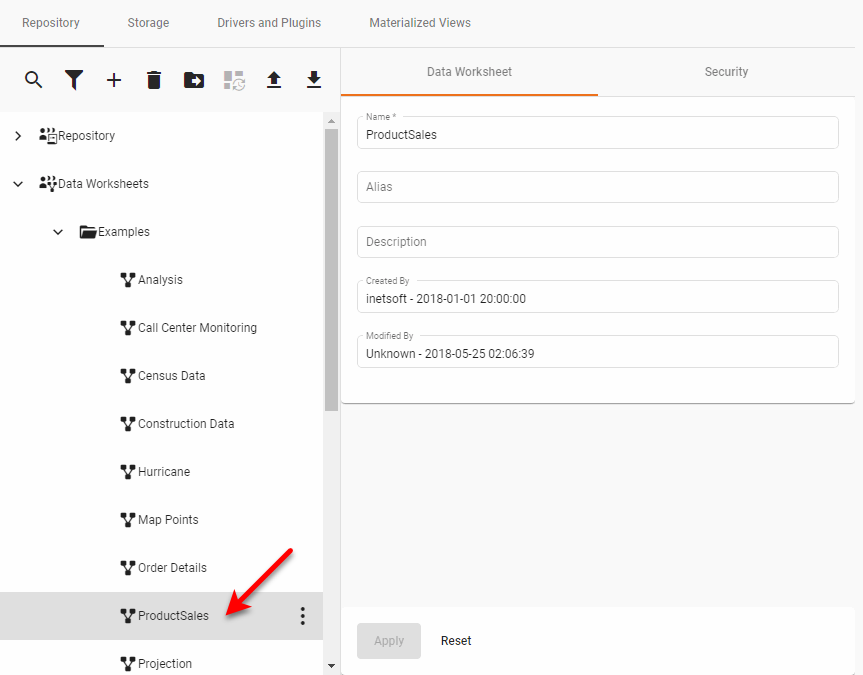
Expand the ‘Data Worksheets’ node on the content tree, and select the desired Data Worksheet.
-
Select the Data Worksheet tab on the right to set the name, alias, and description.
- Name
-
The name under which the Data Worksheet should be listed in the Portal. Certain characters (e.g., “/”) are not permitted in name.
- Alias
-
The Data Worksheet name displayed to the user in the Portal.
- Description
-
A brief description to be displayed as a tooltip when the user hovers the mouse over the Data Worksheet in the Portal or Visual Composer Repository trees.
-
Select the Security tab to manage Data Worksheet permissions. See Set Repository Permissions for more information about assigning permissions.