Create a Physical View
| Physical views can only be created for relational databases. (See JDBC or Connect to a Specific Data Source for information on how to configure a relational database data source.) |
|
If you see the ‘Create Visualization’ dialog box, press the ‘Close’ button
|


To create a physical view, follow the steps below:
-
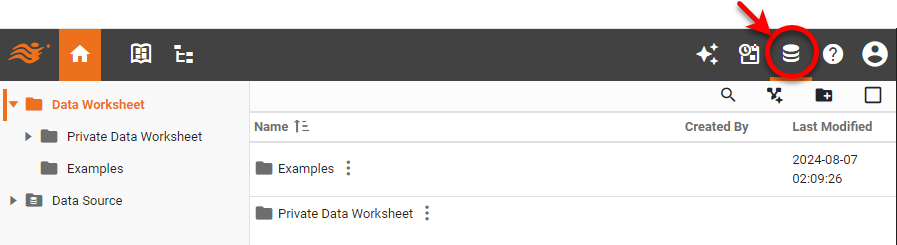
Press the top ‘Data’ button
 .
.
-
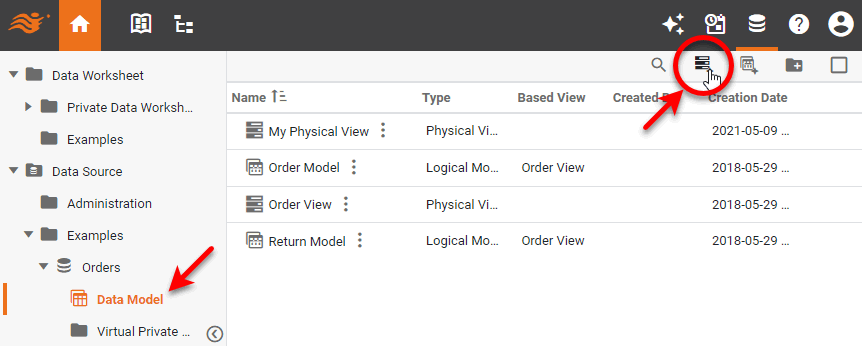
In the ‘Navigation Tree’ in the left panel, expand the ‘Data Sources’ folder. Locate the relational database data source for which you want to add a physical view. Select the ‘Data Model’ node, and press the ‘New Physical View’ button
 .
.
-
Provide a name for the physical view and press ‘OK’.

-
Add tables to the physical view. Follow the steps below:
-
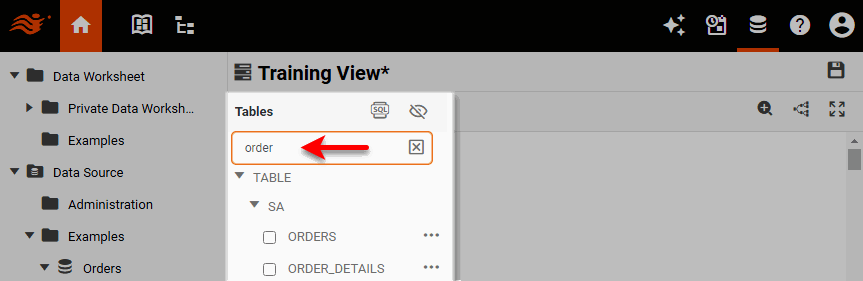
Optional: To filter the list of available tables, use the ‘Search’ box to enter the name (or partial name) of the tables to which you want to restrict the listing.
-
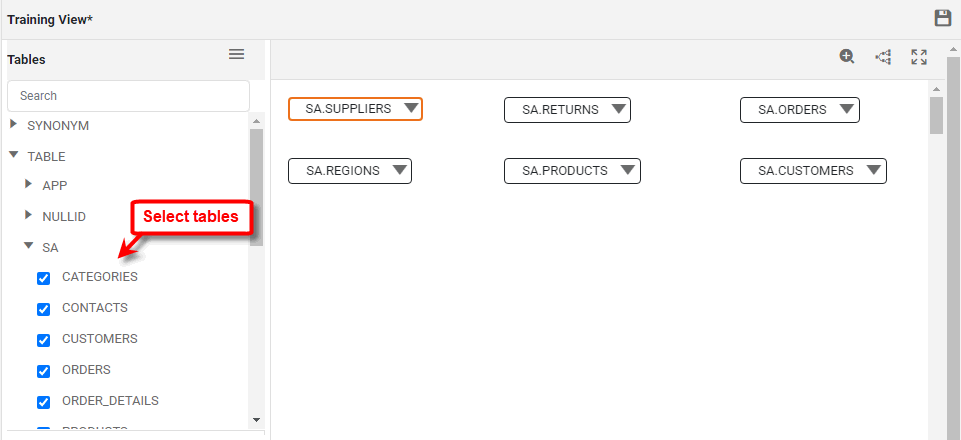
Click to select the tables to add to the physical view. (Add all the tables from which you want the data model to be able to retrieve data.)
-
Optional: To add a custom table based on a SQL query, see Add Inline SQL in Edit a Physical View.
-
Optional: To hide the tables you have not selected, press the ‘Only Show Selected Tables’ button
 at the top of the ‘Tables’ panel.
 -
To display the columns within a table, press the ‘Show Columns’ button
 .
.
-
-
Add joins to create relations between the tables. To add an individual join between tables, follow the steps below. To automatically add joins between many tables, see Automatically Create Joins in Edit a Physical View.
Physical views are susceptible to query traps that can cause unexpected results. See Identify Query Traps for more information. -
Click the first table in the left panel that you want to join. Drag the join handle
 from the first table onto the of the second table. This opens the Join Editor.
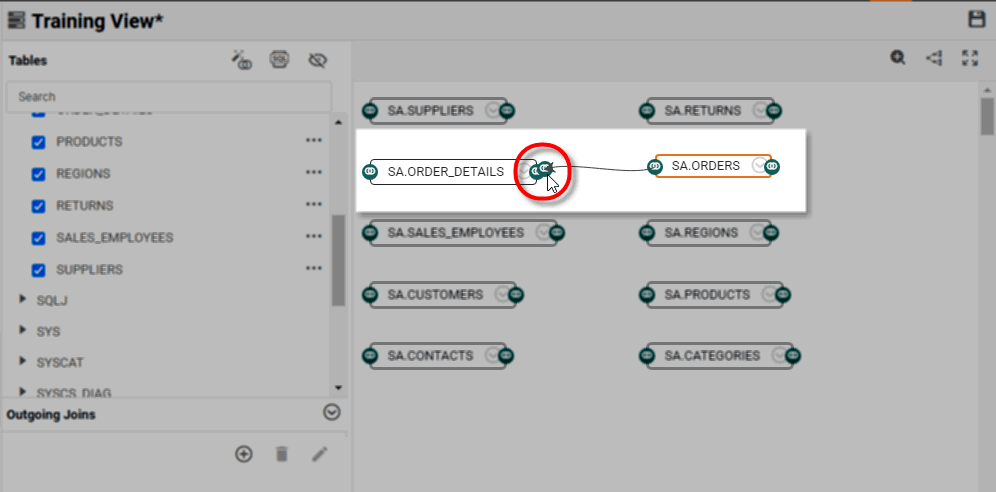
If a join between the tables already exists, click on the join link to open the ‘Edit Join’ dialog box.
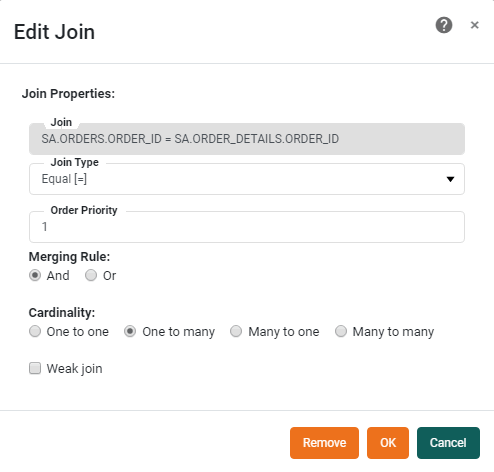
The ‘Edit Join’ dialog box allows you to modify the join operator (inner/equal, outer, or inequality), and set the cardinality, merging rule, and weak join. See Modify Join Properties for more information about these join settings.
-
Press OK to close the ‘Edit Join’ dialog box.
-
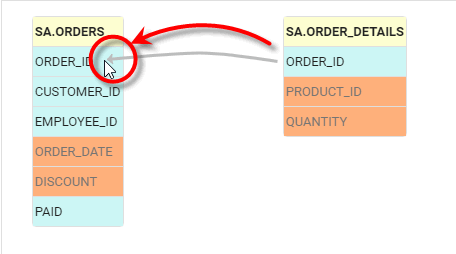
To remove an existing join, right-click on the join link, and select ‘Remove Join Condition’.

-
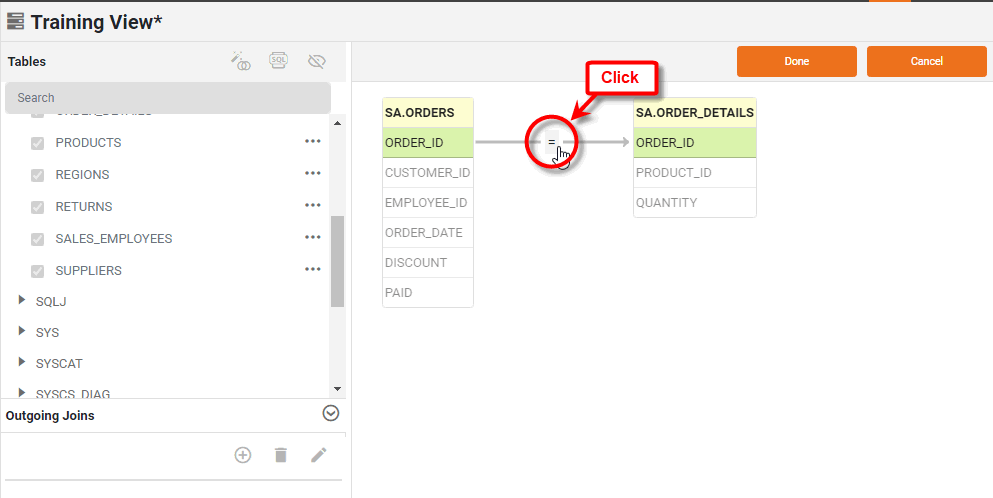
To create a new join, simply drag the desired join field from one table into the other table. Repeat to create any additional joins.
-
Press Done to exit the Join Editor.
You can also add a join by selecting a table, and pressing the ‘Add a join’ button
 .
.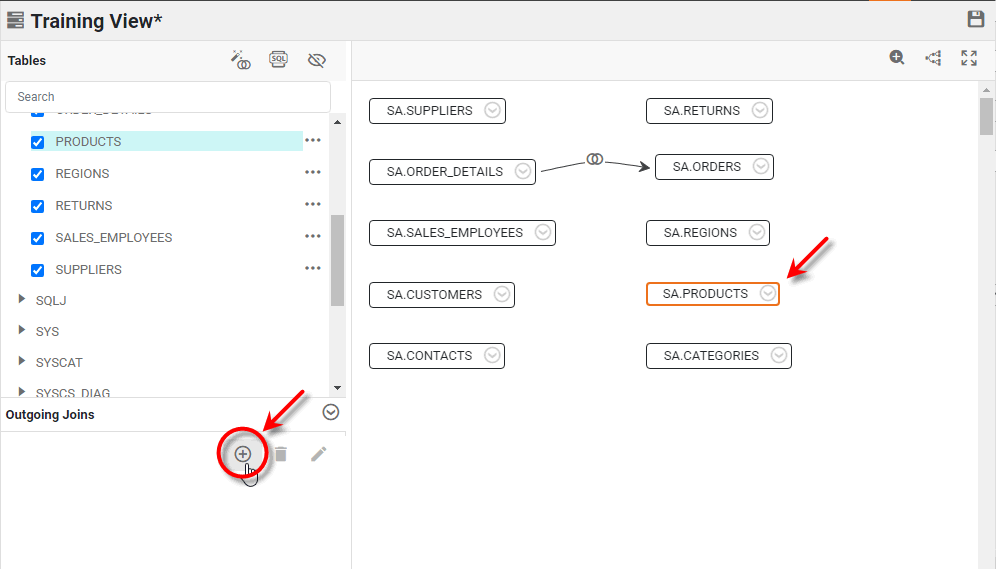
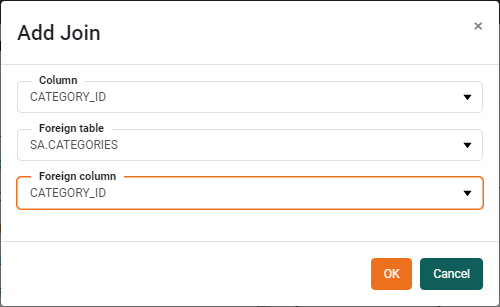
This opens the ‘Add Join’ dialog box. Choose the join column within the selected table (‘Column’) and the ‘Foreign column’ within a desired ‘Foreign table’, and press OK.
-
-
To edit a join, select the table from which the join is an outgoing join, and press the ‘Edit a join’ button
 . This will open the ‘Edit Join’ dialog box (see above), where you can modify the join.
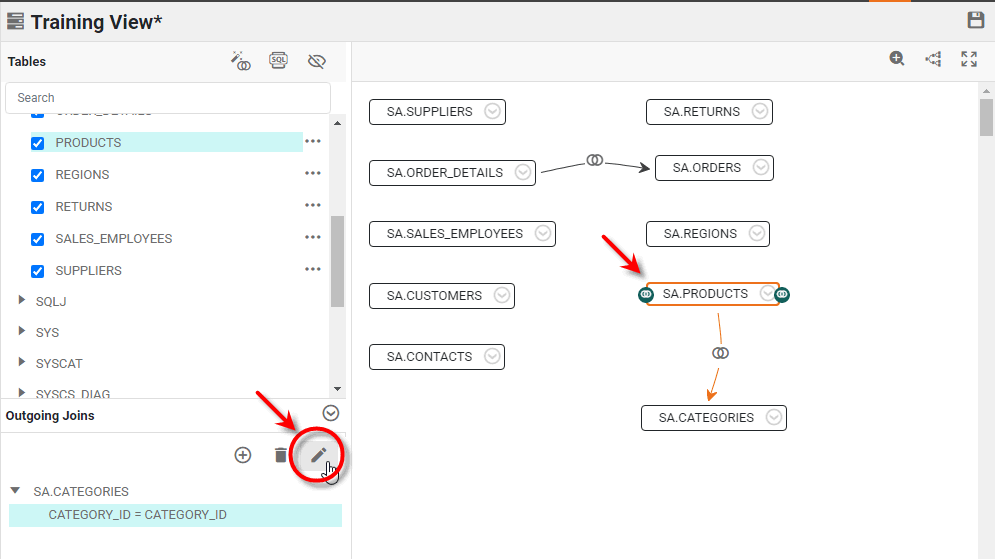
-
To delete a join, select the table from which the join is an outgoing join, and press the ‘Remove the selected join(s)’ button
 .
. -
Repeat the above steps to join all tables in the physical view. (To automatically add joins between many tables, see Automatically Create Joins in Edit a Physical View.)
-
Press the ‘Save’ button
 to save the physical view.