Set Security Actions
The procedure for setting object permissions (Actions) is the same for all components. For example, to set permissions for the ‘Bookmark’ feature, follow the steps below:
-
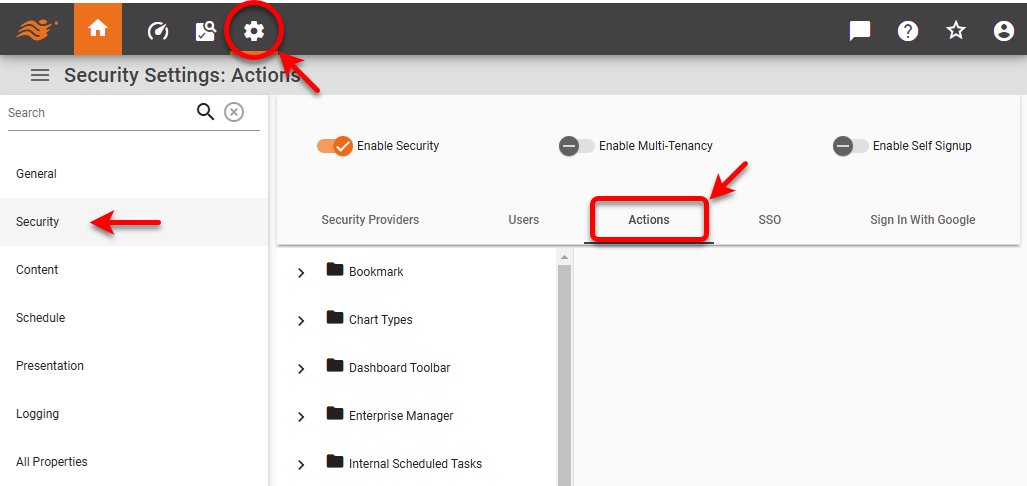
Press the ‘Settings’ button
 at the top of Enterprise Manager.
 -
Select the Security page in the left panel.
-
Select the Actions tab.
-
If multi-tenancy is enabled, from the ‘Select Organization’ menu, choose the desired organization. This feature is available only in Enterprise Edition.

Settings you make in the steps below apply only to the selected organization. Users and assets of other organizations are not affected. Note that some settings may only be available to the Host Organization, and are only visible to the Site Administrator. -
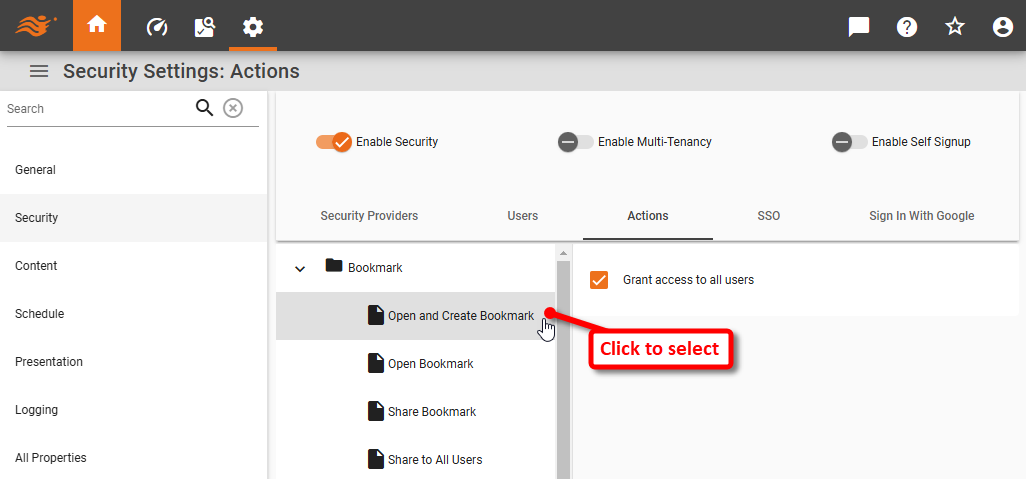
Click to select the desired action or object in the tree. For example, select the ‘Open and Create Bookmarks’ item in the tree.
Expand to see a listing of available actions
The following actions are available:
- Bookmark
-
Access to the ‘Bookmarks’ button
 features in the Dashboard toolbar. ‘Open Bookmark’ permission allows the user to view existing bookmarks, while ‘Open and Create Bookmark’ additionally allows the user to create new bookmarks. ‘Share Bookmark’ permission allows a user to share bookmarks to members of their own group(s), while ‘Share to All’ allows sharing to all users without exception. (See Bookmark a Dashboard for more information.)
 - Chart Types
-
Access to different chart types in the Chart Editor.
- Dashboard Toolbar
-
Access to various buttons on the Dashboard toolbar. (See Use a Dashboard for more information.)
- Enterprise Manager
-
Access to various pages in Enterprise Manager.
-
Only provide Enterprise Manager access to users who you trust to modify the server environment.
-
The following options are not available when multi-tenancy is enabled (see Enable Multi-Tenancy): , , , , , , , .
-
- Internal Scheduled Tasks
-
Access to various predefined scheduled tasks.
- Portal Tabs
-
Access to various Portal tabs. (See Use the Portal for more information about the Portal.)
- Schedule Options
-
Access to various Scheduler options when scheduling Dashboards in the Portal. See Schedule a Dashboard or Schedule for more details.
- Social Sharing
-
Access to the various options under the ‘Social Sharing’ button
 in the Portal. (See Share to a Social Network for more information.)
 - Visual Composer
-
Access to Visual Composer, for example via the ‘Data Worksheet’
 or ‘Dashboard’
  options under the Portal ‘Create’ button
  . Visual Composer permission is required to edit Dashboards and Data Worksheets.
 - Create New Data Source
-
Permission to select ‘Data Source’
 from the ‘Create’ button in the Portal. Requires also permission for the Portal Data tab (see ‘Portal Tabs’ above). (See Connect to Your Data for more information.)
 - Cross Join
-
Permission to create cross joins via the ‘Cross Join’
 option in a Data Worksheet and to create cross-joins in a physical view. Restricting access to cross joins may help prevent the accidental creation of large queries that impact performance.
 - Edit Dashboard Calculated Fields
-
Permission to create Calculated Fields in a Dashboard. This is enabled by default for users who have Dashboard edit permission.
- Edit Mobile Devices
-
Permission to edit mobile device screen layouts. (See Create a Device Layout for more information about device layouts.)
- Edit Worksheet Expression Columns
-
Permission to create Expression Columns in a Data Worksheet. This is enabled by default for users who have Data Worksheet edit permission.
- Free Form SQL
-
Permission to create a data set by entering a SQL string in the ‘Database Query’ dialog box of a Data Worksheet. (See Query Data for more information.)
- Materialize Assets
-
Access to the ‘Materialize’ menu option for Dashboards in the Portal Repository tree, as well as for Enterprise Manager. (See Improve Performance and Materialized View for more information.)
- My Dashboards
-
Access to the ‘My Dashboards’ folder in the Portal Repository tree for storage of private assets.
- Physical Table
-
Access to database tables via the ‘TABLE’ folder of the ‘Data Source’ tree in a Data Worksheet. This also controls access to the ‘Database Query’ option for Data Worksheet. (See Query Data for more information.)
If you want a user to see only specific tables, set your database permissions to allow that user access to only the desired tables. - Portal Repository Tree - Drag and Drop
-
Permission to drag-and-drop assets in the Portal Repository tree. (See Manage the Repository for more information.)
- Profile
-
Permission to profile the performance of a Dashboard via the Portal ‘Open with Profiling’
 action. (See Profile a Dashboard for more information.)
 - Upload Drivers
-
Permission to upload database drivers when creating a new data source using the ‘Data Source’
option under the Portal ‘Create’ button and on the Drivers and Plugins page in Enterprise Manager. (See Connect to Your Data and Manage Drivers and Plugins for more information.)
-
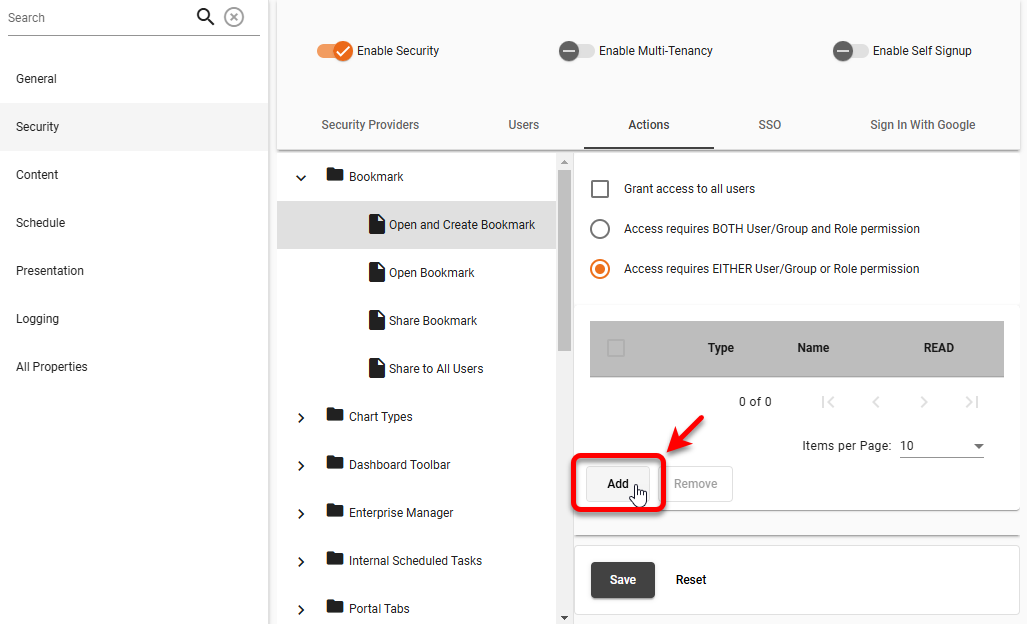
If the ‘Grant access to all users’ check-box is checked, uncheck it.
Depending on the particular component, the check-box may be labeled ‘Grant access to all users’, ‘Deny access to all users’, or ‘Use parent permissions’. In all cases, you must uncheck the box in order to specify individual permissions.
Expand to view a list of parent permissions
-
Press the Add button. This opens the ‘Add Permission’ dialog box.
-
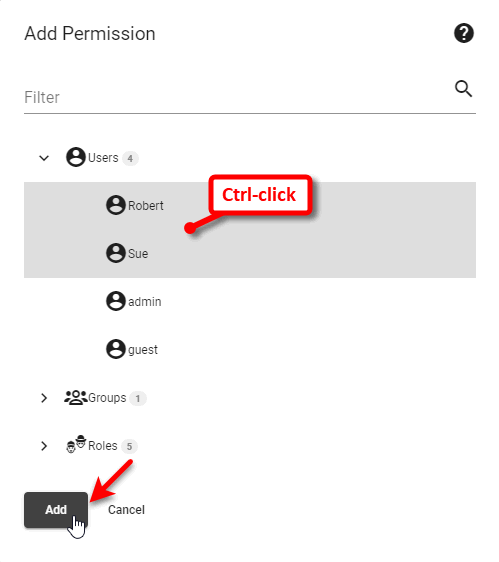
Ctrl-click to select the desired users, groups, or roles, and press Add.
-
Select ‘Access requires BOTH User and Role permission’ to specify that access to the object or component is granted only if the current user has both user and role permissions; i.e., both the user’s name (or group) and at least one of the user’s roles appear in the ‘Selected Entities’ table.
Select ‘Access requires EITHER User or Role permission’ to specify that access to the object or component is granted if the current user has either user or role permissions; i.e., either the user’s name (or group) or at least one of the user’s roles appear in the ‘Selected Entities’ table.
This is an organization-wide setting, and will be applied to all assets within the same organization. -
Select the desired permission (READ, ACCESS) by checking the boxes next to the users, roles, or groups.
-
Press Apply to save your changes.
|
Notes on Action Permissions
|