Microsoft Access
|
Connections to a Microsoft Access database are supported via UCanAccess, and have the following limitations:
|
Follow the steps below to create a connection:
Watch Video: Connecting to a Database
This video might show an earlier version of the feature or operation that differs in minor ways from the current version.
-
In the User Portal, press the top ‘Create’ button
 in the Portal, and select ‘Data Source’
  .
.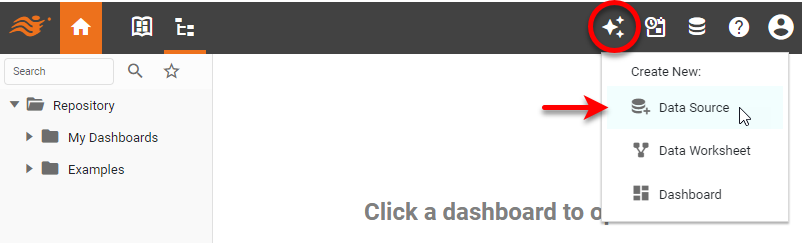
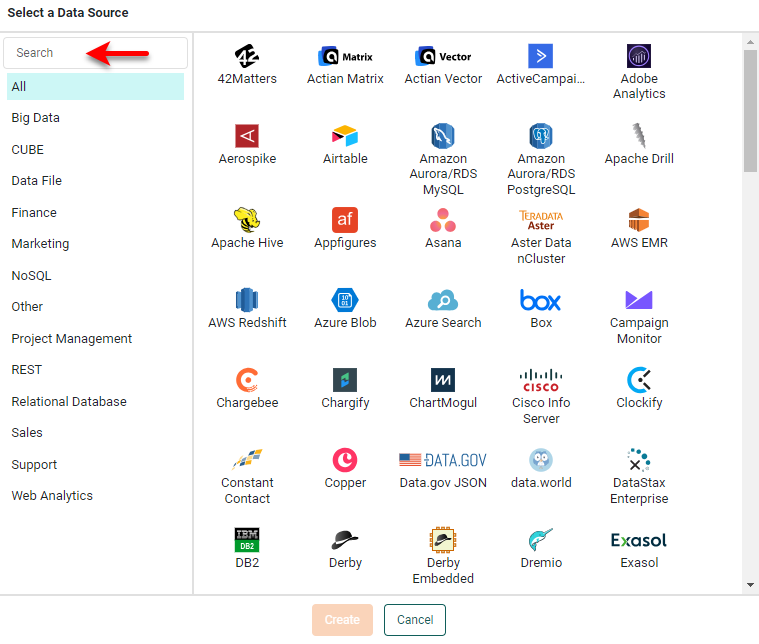
This opens the data source listing. To locate a data source, select the data source category in the left panel, or enter the data source name in the search field.
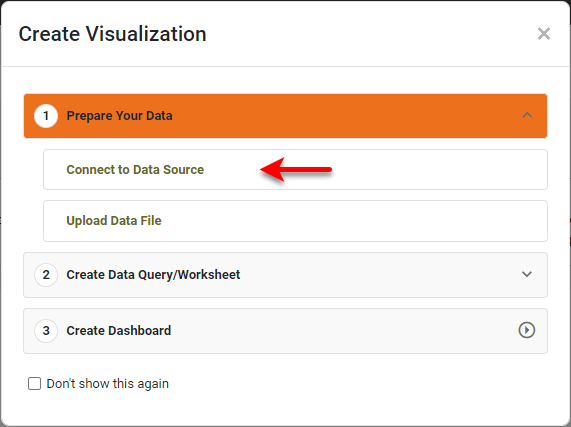
If you see the ‘Create Visualization’ dialog box instead of the User Portal, press Connect to Data Source to display the data source listing.
-
Select the ‘Microsoft Access’ data source, and press Create. This opens the data source definition screen.
-
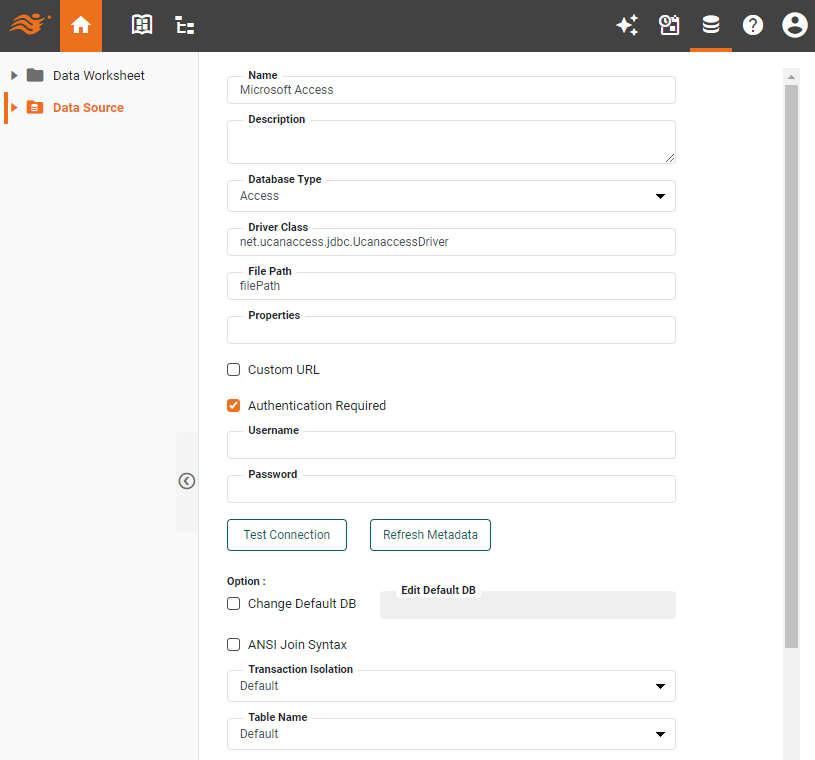
In the ‘Name’ field, enter a label for this database connection.
-
From the ‘Database Type’ menu, select ‘Access’ (if not already selected).
The UCanAccess driver is packaged with InetSoft. However, if you see a warning that the driver is not available, contact your administrator. -
If your administrator has provided a connection URL, enable ‘Custom URL’, and enter the ‘JDBC URL’ and login credentials. The URL should have the following form:
jdbc:ucanaccess:{DatabaseFilePath}If you do not have a URL, disable ‘Custom URL’, and enter the ‘File Path’ and login credentials. Optional: If ‘Custom URL’ is not enabled, enter any desired properties in the ‘Properties’ field, using the format
property1=value1&property2=value2&… -
Optional: Adjust the following optional properties:
-
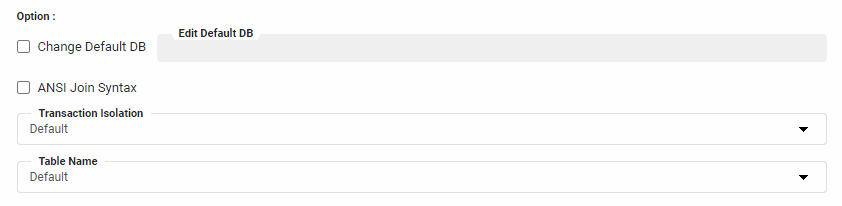
In the ‘Change Default DB’ field, enter the default schema name with which the login and password are associated.
-
Select ‘ANSI Join Syntax’ to specify that queries should use the ANSI standard.
-
The ‘Transaction Isolation’ option sets the database transaction isolation level.
-
The ‘Table Name’ option allows you to select how table names are represented in the SQL that is sent to the database.
Example 1. ‘Schema.Table’ optionIf you select the ‘Schema.Table’ option, the SQL string will refer to tables by both the schema name and the table name. For a schema called “ORDERS”, table names would therefore appear in SQL as
ORDERS.CATEGORIES,ORDERS.PRODUCTS, and so on.Example 2. ‘Table’ optionIf you select the ‘Table’ option, the SQL string will refer to tables by the table name alone, e.g.,
CATEGORIES,PRODUCTS, and so on.If the ‘Table Name’ setting does not match the structure of your queries, you may see an error such as “Table name specified more than once,” and you may not be able to access the tables.
-
-
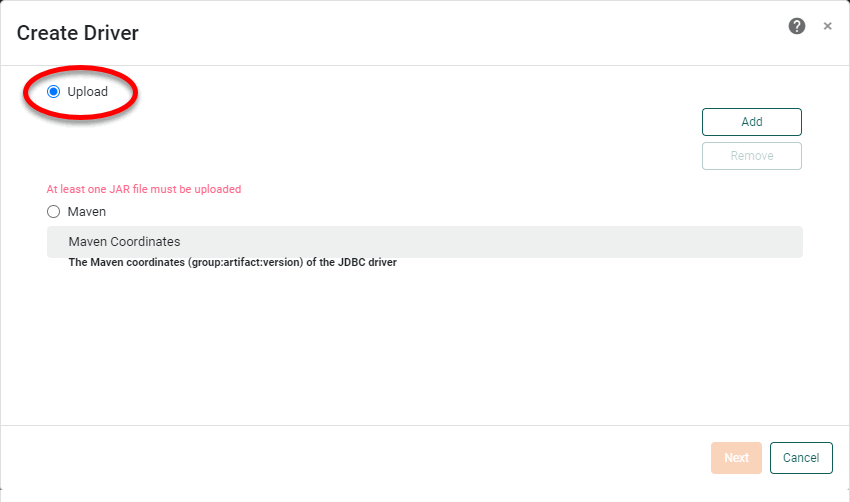
If the driver for the database has not yet been installed, press the Create Driver button to open the ‘Create Driver’ dialog box.
Read more about how to create a driver…
To upload a database driver to the server, you will package it as a plugin, either from local storage or from a Maven repository. Follow the steps below:
- Local Storage
-
To upload drivers from local storage, follow the steps below:
-
Select the ‘Upload’ option.
-
Press the Add button select the desired JAR files, as well as any other files required by the database.
-
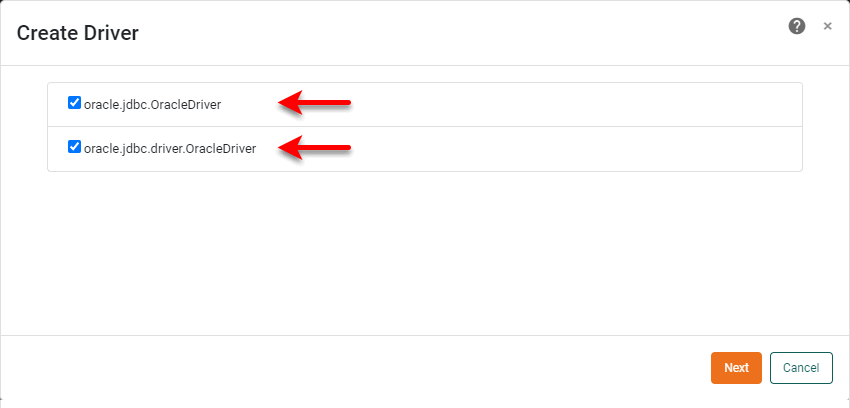
Press Next, and choose the desired driver file or files to package into a plugin.
-
Press Next, and enter the desired ‘Plugin ID’, ‘Plugin Name’, and ‘Plugin Version’. The ID must be unique, and should typically be a namespaced value, such as
com.mycompany.jdbc.dbtype. The Version should conform to semantic versioning standards.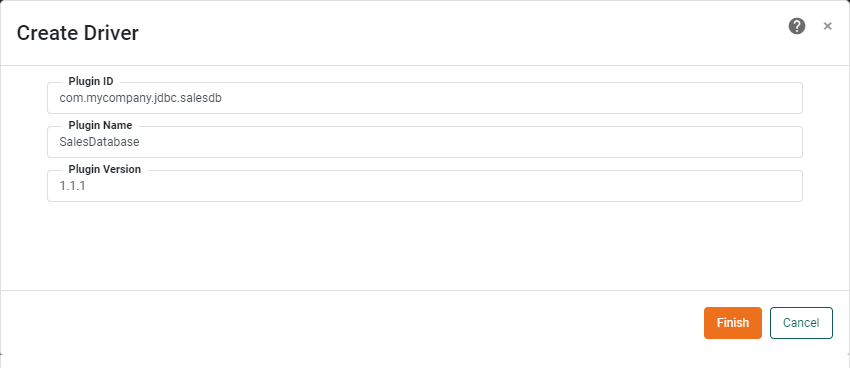
-
Press Finish to create the plugin Zip file.
-
- Maven Repository
-
To create a plugin from assets in a Maven repository, follow the steps below:
-
Select the ‘Maven’ option.
-
Enter the ‘Maven Coordinates’:
groupId:artifactId:packaging:version.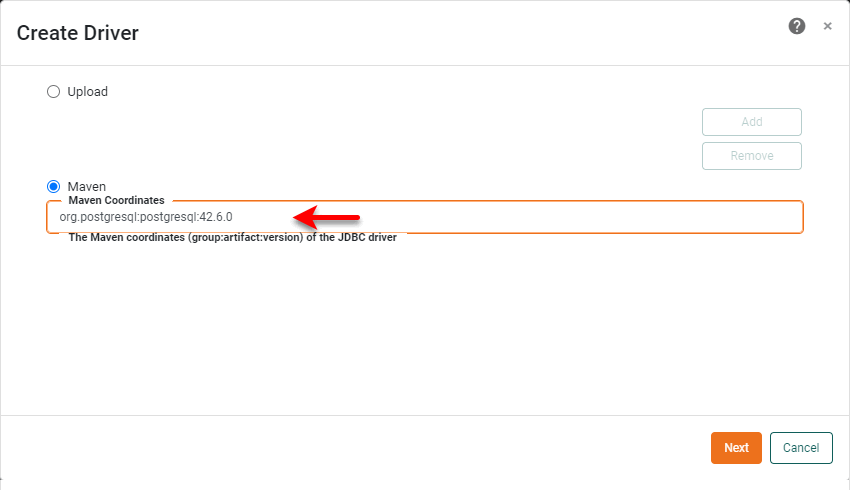
-
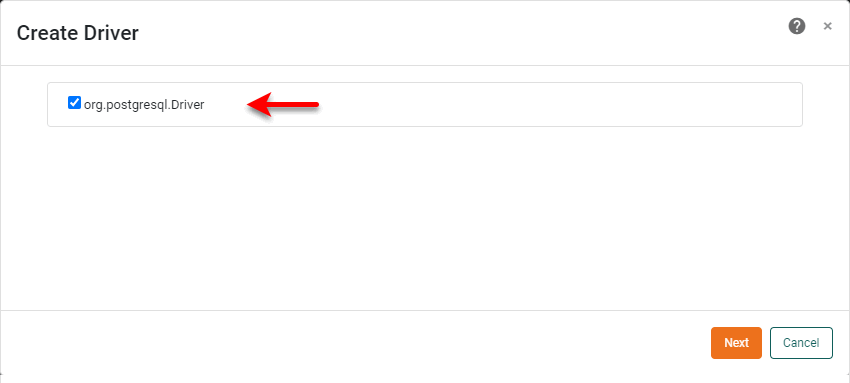
Press Next, and choose the desired driver file or files to package into a plugin.
-
Press Next, and enter the desired ‘Plugin ID’, ‘Plugin Name’, and ‘Plugin Version’. The ID must be unique, and should typically be a namespaced value, such as
com.mycompany.jdbc.dbtype. The Version should conform to semantic versioning standards. -
Press Finish to create the plugin Zip file.
-
This feature is not enabled in all installations. If you do not see the Create Driver button, consult an administrator. -
Optional: Press Test Connection to check that the database is accessible.
-
Optional: To refresh meta-data for the data source (which may be necessary if a schema change has been made to a database, for example), press the Refresh Metadata button.
-
Optional: For a multi-tenant environment, assign any desired additional connections. See Add an Additional Connection for more information.
-
Optional: For ‘Connection Pool Properties’, press the New button and add a HikariConfig name/value pair. Repeat to add additional properties.
-
Press OK.
You may see the ‘Create Visualization’ dialog box at this step.
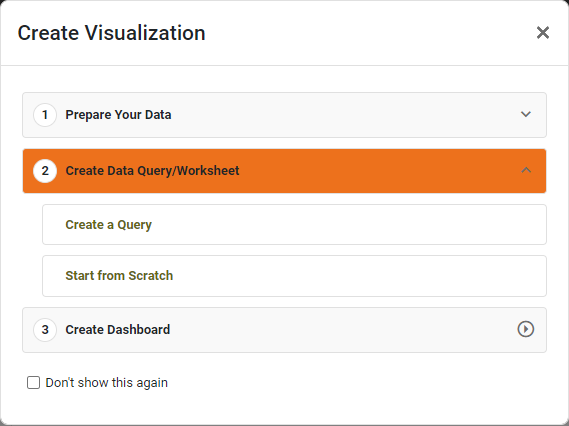
Press the ‘Close’ button
 to continue with the steps below (recommended), or choose one of the following options:
- Create a Query
-
Define a query based on the selected data source. See New Data Worksheet Dialog Box in Create a Data Worksheet for further instructions.
- Start from Scratch
-
Open a blank Data Worksheet to build data blocks from fields of the selected data source. See Create Data Blocks in Create a Data Worksheet for further instructions.
-
Verify that the data source you added is shown with a ‘check’ icon
 , indicating that the connection was successful.
If the database is shown with an ‘Error’ icon
 , this means that the connection was not successful.
Check the settings to make sure they are correct for your database. See Edit a Connection for information on how to change connection settings.
An error such as “Driver class not found” generally indicates that you do not have the correct database driver installed. See Manage Drivers and Plugins in Manage the Server or consult an administrator. Other connection errors may be caused if a proxy is blocking the connection to the data source.
After you have created a connection to the database, you can create a data set as described in Create a Data Worksheet and Query Data.