Import and Export Assets
| To automate deployment of assets, see Manage Content. To manage the storage database, see Storage. |
An asset is any Dashboard or component (Table Style, Data Worksheet, etc.). To move assets from one server environment to another server environment (e.g., from a test server to a production server), use the incremental deployment features described in the following sections.
Export Assets
To export a set of assets from the server into an archive (ZIP) file, follow the steps below:
-
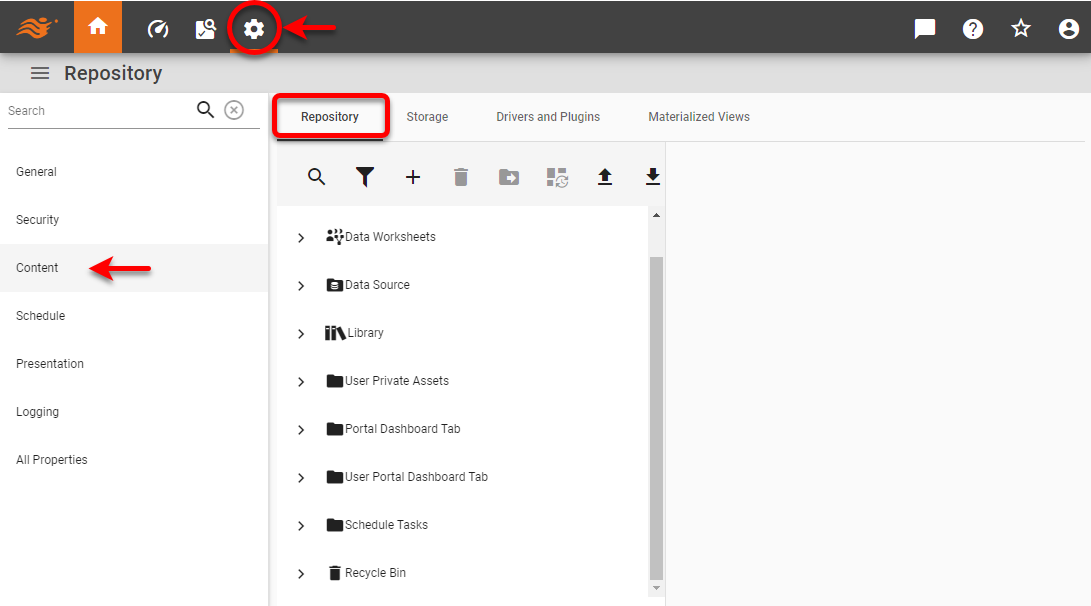
Press the ‘Settings’ button
 at the top of Enterprise Manager.
 -
Select the Content page in the left panel, and select the Repository tab.
-
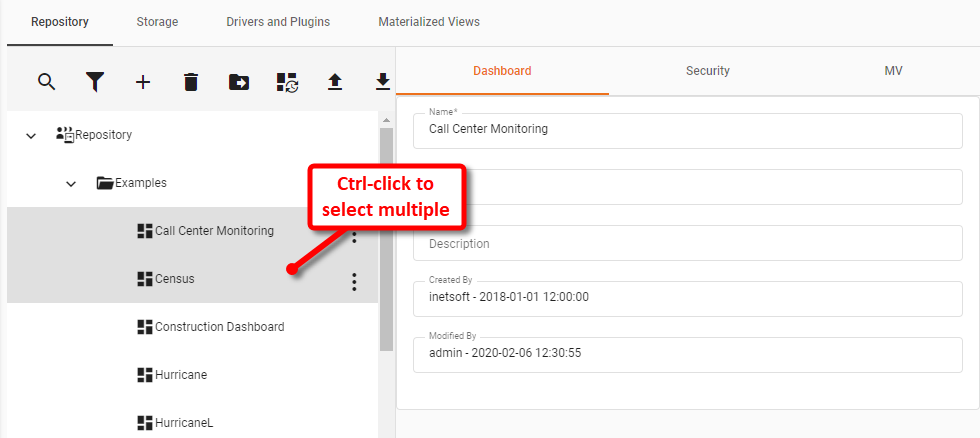
Select one or more assets in the left panel. (Hold the Ctrl and click to select multiple assets.)
-
Press the ‘Export’ button
 . (Press the ‘Menu’ button
  if the ‘Export’ button is not visible.) This opens the ‘Export Assets’ dialog box.
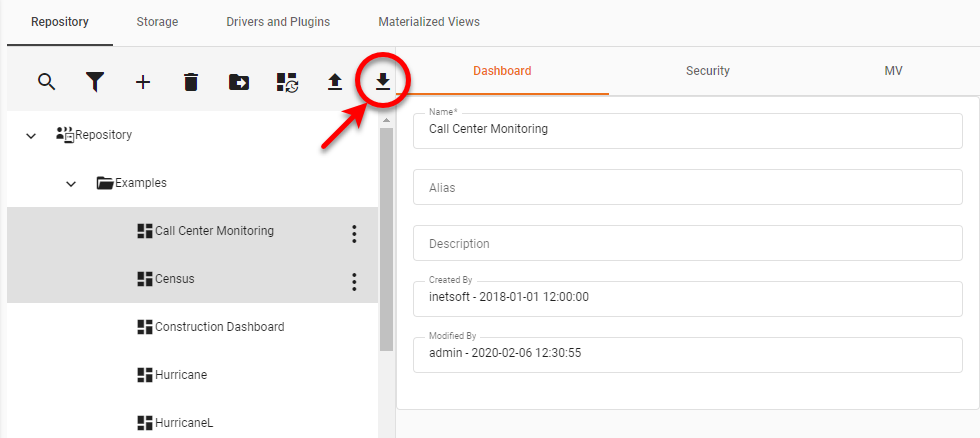
-
Enter a name for the exported ZIP file in the ‘ZIP File name’ field.
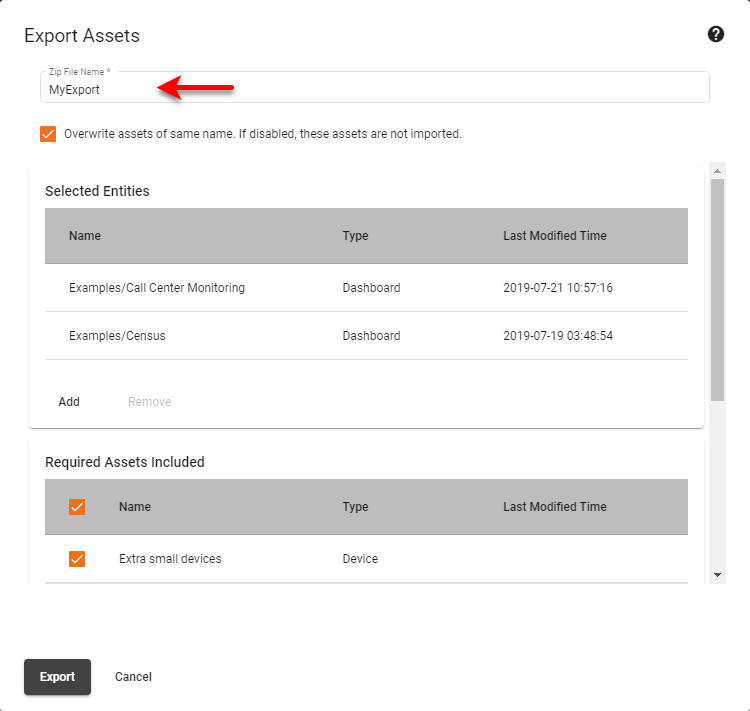
The ‘Required Assets Included’ table at the bottom of the dialog box updates shows the assets used by the entries in the ‘Selected Assets’ panel.
-
Mark the appropriate check-boxes to include the corresponding assets in the export file.
-
Check ‘Overwrite assets of same name’ if the assets in the archive should by default overwrite existing assets of the same name when imported into the new environment. This behavior can be modified if needed when the assets are imported.
-
Press Export to save the ZIP file. Depending on your browser’s configuration, you will either be prompted to save the archive file in the browser’s designated download directory, or you will be prompted to choose a location in which to save the export file.
See Import Assets for instructions on how to import the assets from the ZIP file into another server environment.
Import Assets
To import a set of assets from an archive file generated by the ‘Export Asset’ feature (see Export Assets), follow the steps below:
|
-
Press the ‘Settings’ button
at the top of Enterprise Manager. -
Select the Content page in the left panel, and select the Repository tab.
-
Press the ‘Import Asset’ button
 . (Press the ‘Menu’ button if the ‘Import Asset’ button is not visible.) This opens the ‘Import Assets’ dialog box.
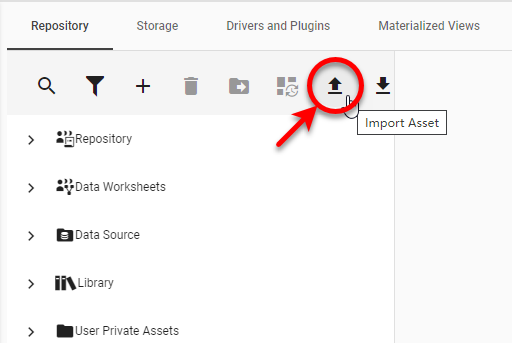
-
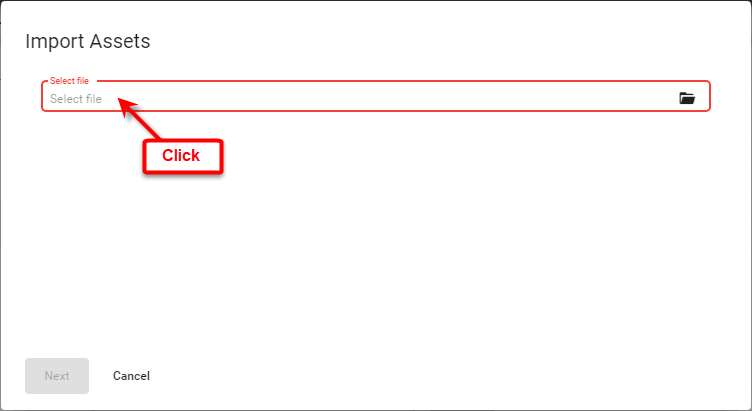
Click in the ‘Select file’ field and select the ZIP or JAR file containing assets to import. Then press Next.
This displays the asset contents of the specified ZIP or JAR file.
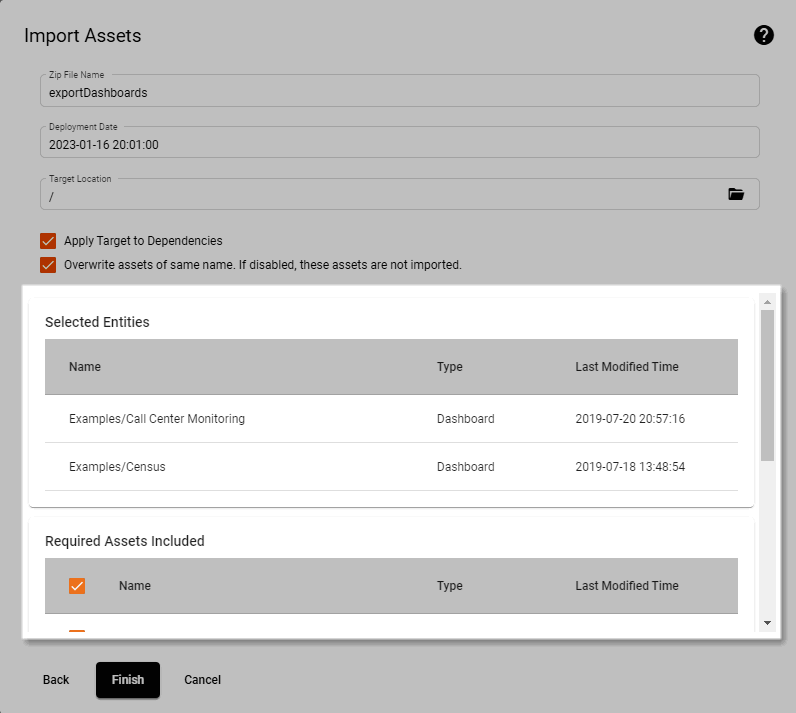
The items listed in the ‘Selected Entities’ panel will all be imported. The items listed in the ‘Required Assets Included’ table are required by items in the ‘Selected Entities’ panel, and will be imported by default. However, if one or more of these items already exist in the current server environment, you can choose not to import those items.
-
Select the assets in the ‘Required Assets Included’ table that you wish to import.
-
Select ‘Overwrite assets of same name’ if the assets in the archive should overwrite existing assets of the same name upon import. The default setting of the ‘Overwrite existing files’ checkbox is specified by the export settings under which the archive was saved. (See Export Assets.)
-
Optional: Select ‘Target Location’ if you wish to import the assets to a repository folder other than the assets’ original repository location.
-
Optional: Enable ‘Apply Target to Dependencies’ to import asset dependencies into the specified ‘Target Location’. Otherwise, they are copied into their original repository locations.
-
Press Finish to import these assets into the current environment.