Enter Data
Instead of creating a data block from database tables or data model fields (see Create a Data Worksheet), you can create a data block by manually entering values into the Data Worksheet. This kind of data block is called an Embedded Table. You can save the entered data into a Data Worksheet to persist across sessions.
Create an Embedded Table
Watch Video: Enter Embedded Data
This video might show an earlier version of the feature or operation that differs in minor ways from the current version.
|
If you see the ‘Create Visualization’ dialog box, press the ‘Close’ button
|


To create a new Embedded Table, follow the steps below:
-
If a Data Worksheet is not already open, create a new Data Worksheet. For information on how to create a new Data Worksheet, see Create a Data Worksheet.
-
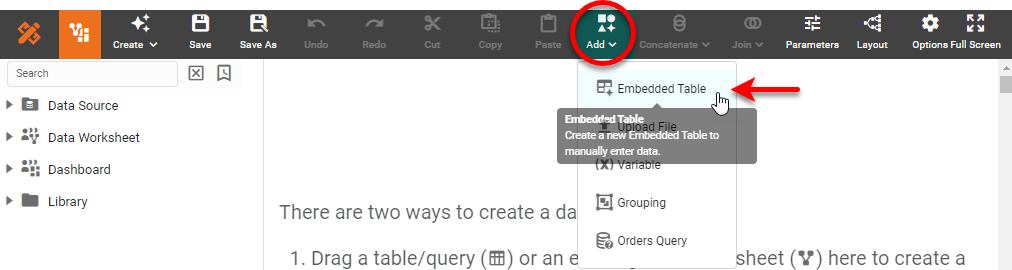
Press the ‘Add’ button
 , and select ‘Embedded Table’
  .
.
-
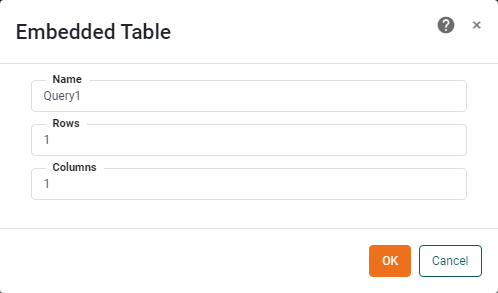
In the ‘Embedded Table’ dialog box provide a ‘Name’ for the Embedded Table and enter a number for ‘Rows’ and ‘Columns’. Then press OK.
-
To edit a column header, double-click on the header in the bottom panel and enter the desired text.
-
Set the column data type for each column. See Change Column Type for more about changing the column type.
-
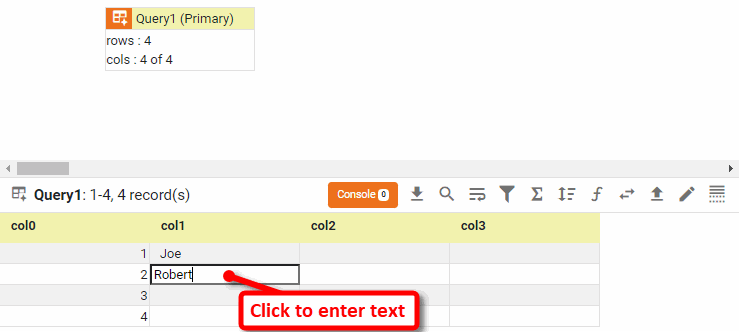
To edit a data cell, click in the cell in the bottom panel and enter text directly. You can enter both numeric and non-numeric values.
-
Press the ‘Save’ button
 in the toolbar to save the Data Worksheet with the embedded data.
Assume that you want to create a table of values to be used in a formula for some other table in the Data Worksheet. In the following example you will create an Embedded Table with three rows and three columns of data.
-
Create a new Data Worksheet. For information on how to create a new Data Worksheet, see Create a Data Worksheet.
-
Press the ‘Add’ button
, and select ‘Embedded Table’ . Use the ‘Embedded Table’ dialog box to create an Embedded Table with three rows and three columns.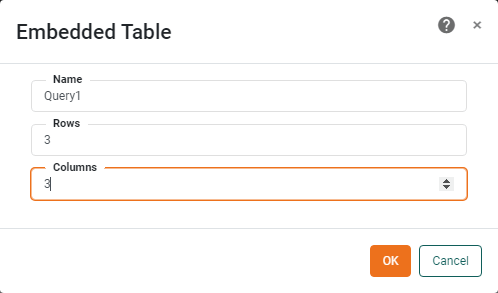
-
Press OK to close the dialog box and create the Embedded Table.
-
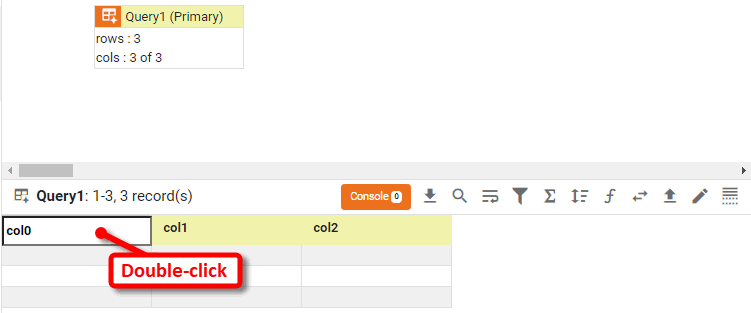
In the bottom panel, double-click on the ‘col0’ header cell. The cell switches to editing mode, and you can now type in the cell to change the text.
-
Change the column names for ‘col0’, ‘col1’ and ‘col2’ to ‘A’, ‘B’ and ‘C’, respectively.
-
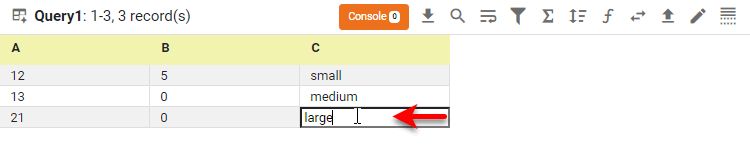
Enter any values in the nine data cells. Note that both numeric and non-numeric values can be entered in the table.
Add Rows to an Embedded Table
To add a new row to an Embedded Table, follow these steps:
-
Click the Embedded Table data block in the top panel to select it.
-
Press the ‘Change View’ button
 in the bottom panel and select ‘Edit’ .
 -
Right-click a table row in the bottom panel, and choose ‘Insert Row’ or ‘Append Row’ from the context menu. This inserts a blank row above the row you clicked or appends a blank row below the row you clicked, respectively.
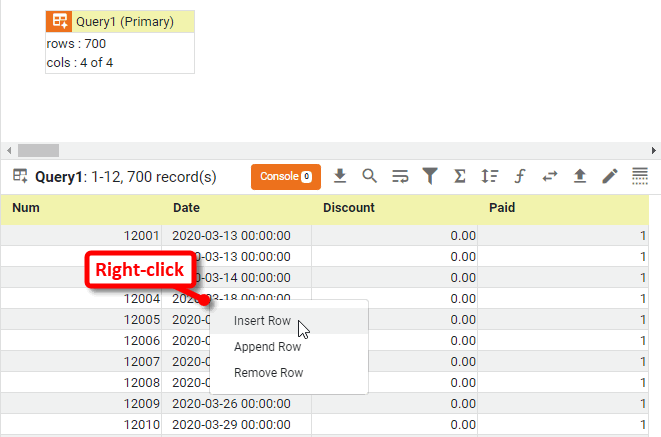
All cells in the new row can be edited.
Remove Rows from an Embedded Table
To remove an existing row from an Embedded Table, follow these steps:
-
Click the Embedded Table data block in the top panel to select it.
-
Press the ‘Change View’ button
 in the bottom panel and select ‘Edit’ .
 -
Right-click a table row you want to delete in the bottom panel, and choose ‘Remove Row’ from the context menu. This removes the row you clicked, and shifts subsequent rows upward in the table.
Convert a Data Block to an Embedded Table
Watch Video: Convert to Embedded Table
This video might show an earlier version of the feature or operation that differs in minor ways from the current version.
To convert a regular data block to an Embedded Table, right-click the title bar of the data block, and select ‘Convert to Embedded Table’. Note: You can also access menu options from the ‘More’ button ( ) in the mini-toolbar.
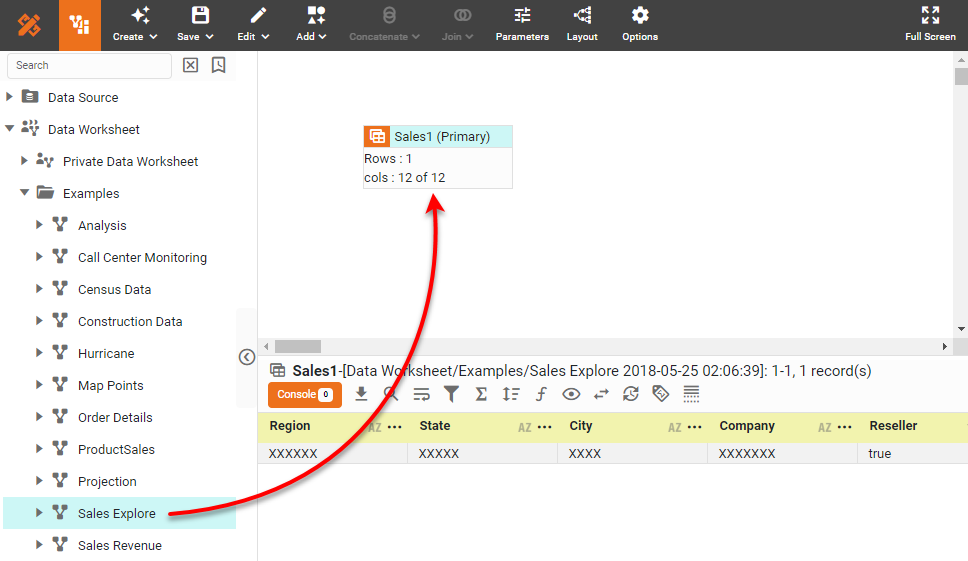
In the following example, the ‘Sales’ data block of the ‘Sales Explore’ Data Worksheet is converted to an editable Embedded Table.
| The 'Sales Explore' Data Worksheet can be found in . You may need to download the examples.zip file from GitHub into your environment. (This requires access to Enterprise Manager.) See Import and Export Assets for instructions on how to import. |
-
Create a new Data Worksheet. For information on how to create a new Data Worksheet, see Create a Data Worksheet.
-
From the left panel, drag the ‘Sales Explore’ Data Worksheet into the right panel. This creates the data block ‘Sales1’.
-
Press the ‘Change View’ button
in the bottom panel, and select ‘Live Data View’  .
.
-
Right-click the data block and select ‘Convert to Embedded Table’. Note: You can also access menu options from the ‘More’ button (
) in the mini-toolbar.A new data block is created with name ‘Query1’.
-
Select the ‘Query1’ data block. Press the ‘Change View’ button
in the bottom panel and select ‘Edit’ .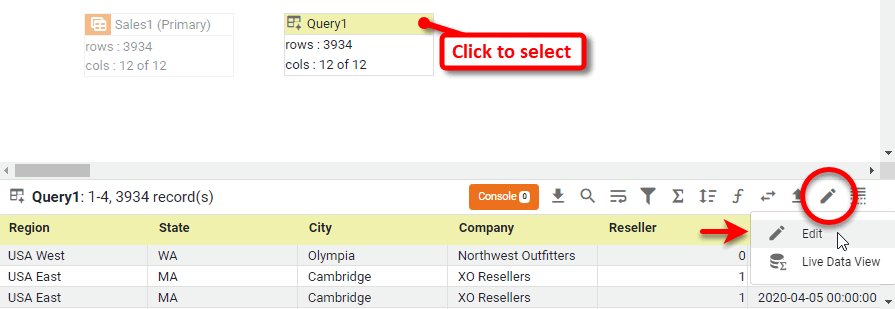
-
Click on any of the cells in the bottom panel. Notice that all of the cells are now editable.

Import Data into an Embedded Table
To upload a text or Excel data into a new Embedded Table, see Upload Data. To upload a text or Excel data into an existing Embedded Table, follow the steps below.
| Any existing data and column names in the Embedded Table will be overwritten by the imported data. |
-
Select an existing Embedded Table.
-
In the bottom panel, Press the ‘Import Data File’ button
 .
.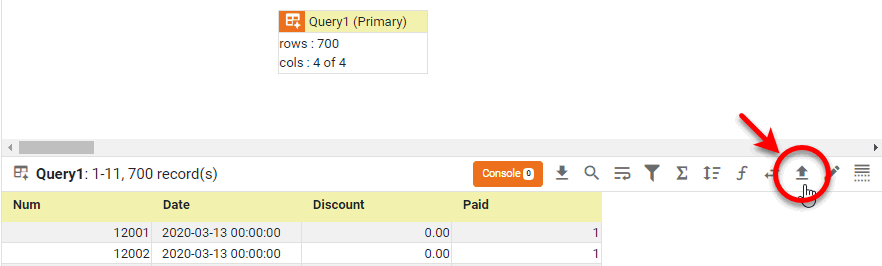
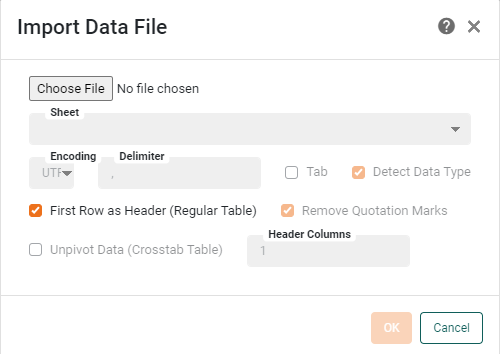
This opens the ‘Import Data File’ dialog box.
-
Press ‘Choose File’, and choose the desired text file. (By default, only files with the extension
.csvare shown. To view all file types, enter*.*in the ‘File Name’ field, and press Enter.) -
From the ‘Encoding’ menu, select the encoding of the text file.
-
In the ‘Delimiter’ field, enter the character that is used in the text file to separate entries. The default delimiter character is a comma. For tab-delimited files, select the ‘Tab’ option.
-
Adjust any of the following optional settings to modify the way the file data is interpreted:
-
Select ‘First Row as Header (Regular Table)’ to use the entries in the first row of the text file as the column header text. Otherwise, default column names are used (“col0,” “col1,” etc.).
-
Optional: Select ‘Unpivot Data (Crosstab Table)’ if the data in the file is in crosstab table form, and you wish to convert the crosstab table into a regular table within the Data Worksheet. This option will convert the column header row into a “dimension” column and convert the crosstab cells into a “measure” column. If the crosstab table in the file contains multiple levels of row headers, enter the number of levels in the ‘Header Columns’ field.
You can only unpivot a crosstab that has a single level of column headers. -
Optional: Select ‘Remove Quotation Marks’ to strip quotation marks out of the text file upon import.
-
Press OK. The delimited text is imported into the existing Embedded Table, replacing any previous data.
-
Press the ‘Save’ button
in the toolbar to save the Data Worksheet with the embedded data.
-
Modify Embedded Data from a Dashboard
A user can modify the values in an Embedded Table (or the value of a Variable) in the Data Worksheet by using a Dashboard Form component or Dashboard Embedded Table (a Table with the ‘Embedded Table’ option enabled).
Update from Dashboard Form Component
Watch Video: Update Embedded Data from Dashboard
This video might show an earlier version of the feature or operation that differs in minor ways from the current version.
To configure a Dashboard Form component to control a Data Worksheet Embedded Table (or Variable), follow these steps:
-
Open the Dashboard for editing. (See Edit a Dashboard.)
-
Right-click on the Form control in the Dashboard, and select ‘Properties’.
-
Select the Data tab in the ‘Properties’ panel.
-
Open the ‘Target’ menu:
-
To access an Embedded Table, expand the ‘Table’ node, and select the desired Embedded Table data block of the Data Worksheet.
Multiple controls can be linked to the same Embedded Table. -
To access a Variable, expand the ‘Variable’ node, and select the desired Variable asset in the Data Worksheet. Skip to the final step below.
-
-
For an Embedded Table, press the ‘Choose Cell’ button
next to the ‘Target’ field. This displays a representation of the Embedded Table.
-
In the displayed Embedded Table, click to select the table cell into which form values should be passed. This automatically populates the ‘Column’ and ‘Row’ menus with the corresponding cell indices. Alternatively, specify the target cell directly from the provided menus:
-
From the ‘Column’ menu, select the appropriate field of the Embedded Table data block.
-
From the ‘Row’ menu, select the row of the table to which the form element should provide data.
The ‘Row’ menu displays the format “row: row value.” For example, “1:25” indicates that form values are passed to the second row of the Embedded Table, which currently contains the value “25.”
-
-
Optional: If you want the modified data to persist across sessions, enable the ‘Write Back to Storage’ option. This will save the modified data together with the Data Worksheet.
-
Press OK to exit the ‘Properties’ panel.
The control is now linked to the Data Worksheet’s Embedded Table or Variable, and changes you make using the control will alter the values in the specified Embedded Table cells or Variable. To set the options displayed by the Form control, see Radio Button/Check Box/Combo Box Properties in Dashboard Reference.
Update from Dashboard Embedded Table
To configure a Dashboard Table to control of a Data Worksheet Embedded Table (or Variable), follow these steps:
-
Open the Dashboard for editing. (See Edit a Dashboard.)
-
Create a Table based on a Data Worksheet Embedded Table. (To do this, assign fields from an Embedded Table in the Data Worksheet to a Dashboard Table component.)
-
Right-click on the Table in the Dashboard, and select ‘Properties’.
-
Select the Advanced tab in the ‘Properties’ panel. Select the ‘Enable Table Editing’ option.
-
Press OK to close the panel.